Gravity Forms UTM Tracking Integration
Set up Gravity Forms with HandL UTM Grabber to capture UTM parameters, GCLID, FBCLID, referrer, and landing page data in hidden fields for lead attribution.
- Gravity Forms One Click Integration (Recommended)
- Gravity Forms to Zapier SIMPLE UTM Tracking Integration Video Tutorial
- Gravity Forms to Zapier UTM Tracking Integration Video Tutorial
- Gravity Forms UTM Tracking Integration
- Gravity Form to Facebook Conversion API (FB CAPI) - v3.1 - HandL UTM Grabber Guide
Gravity Forms One Click Integration (Recommended)
Use One Click Integrations to add every HandL hidden tracking field to your Gravity Forms forms automatically. The full guide is below.
UTM attribution overview
This guide explains One Click Integrations with HandL UTM Grabber. It helps you capture UTM source, medium, campaign, term, content, click IDs, referrer, and landing page data and keep the marketing context needed for accurate reporting across forms, bookings, signups, and sales.
1. Open the Integrations tab
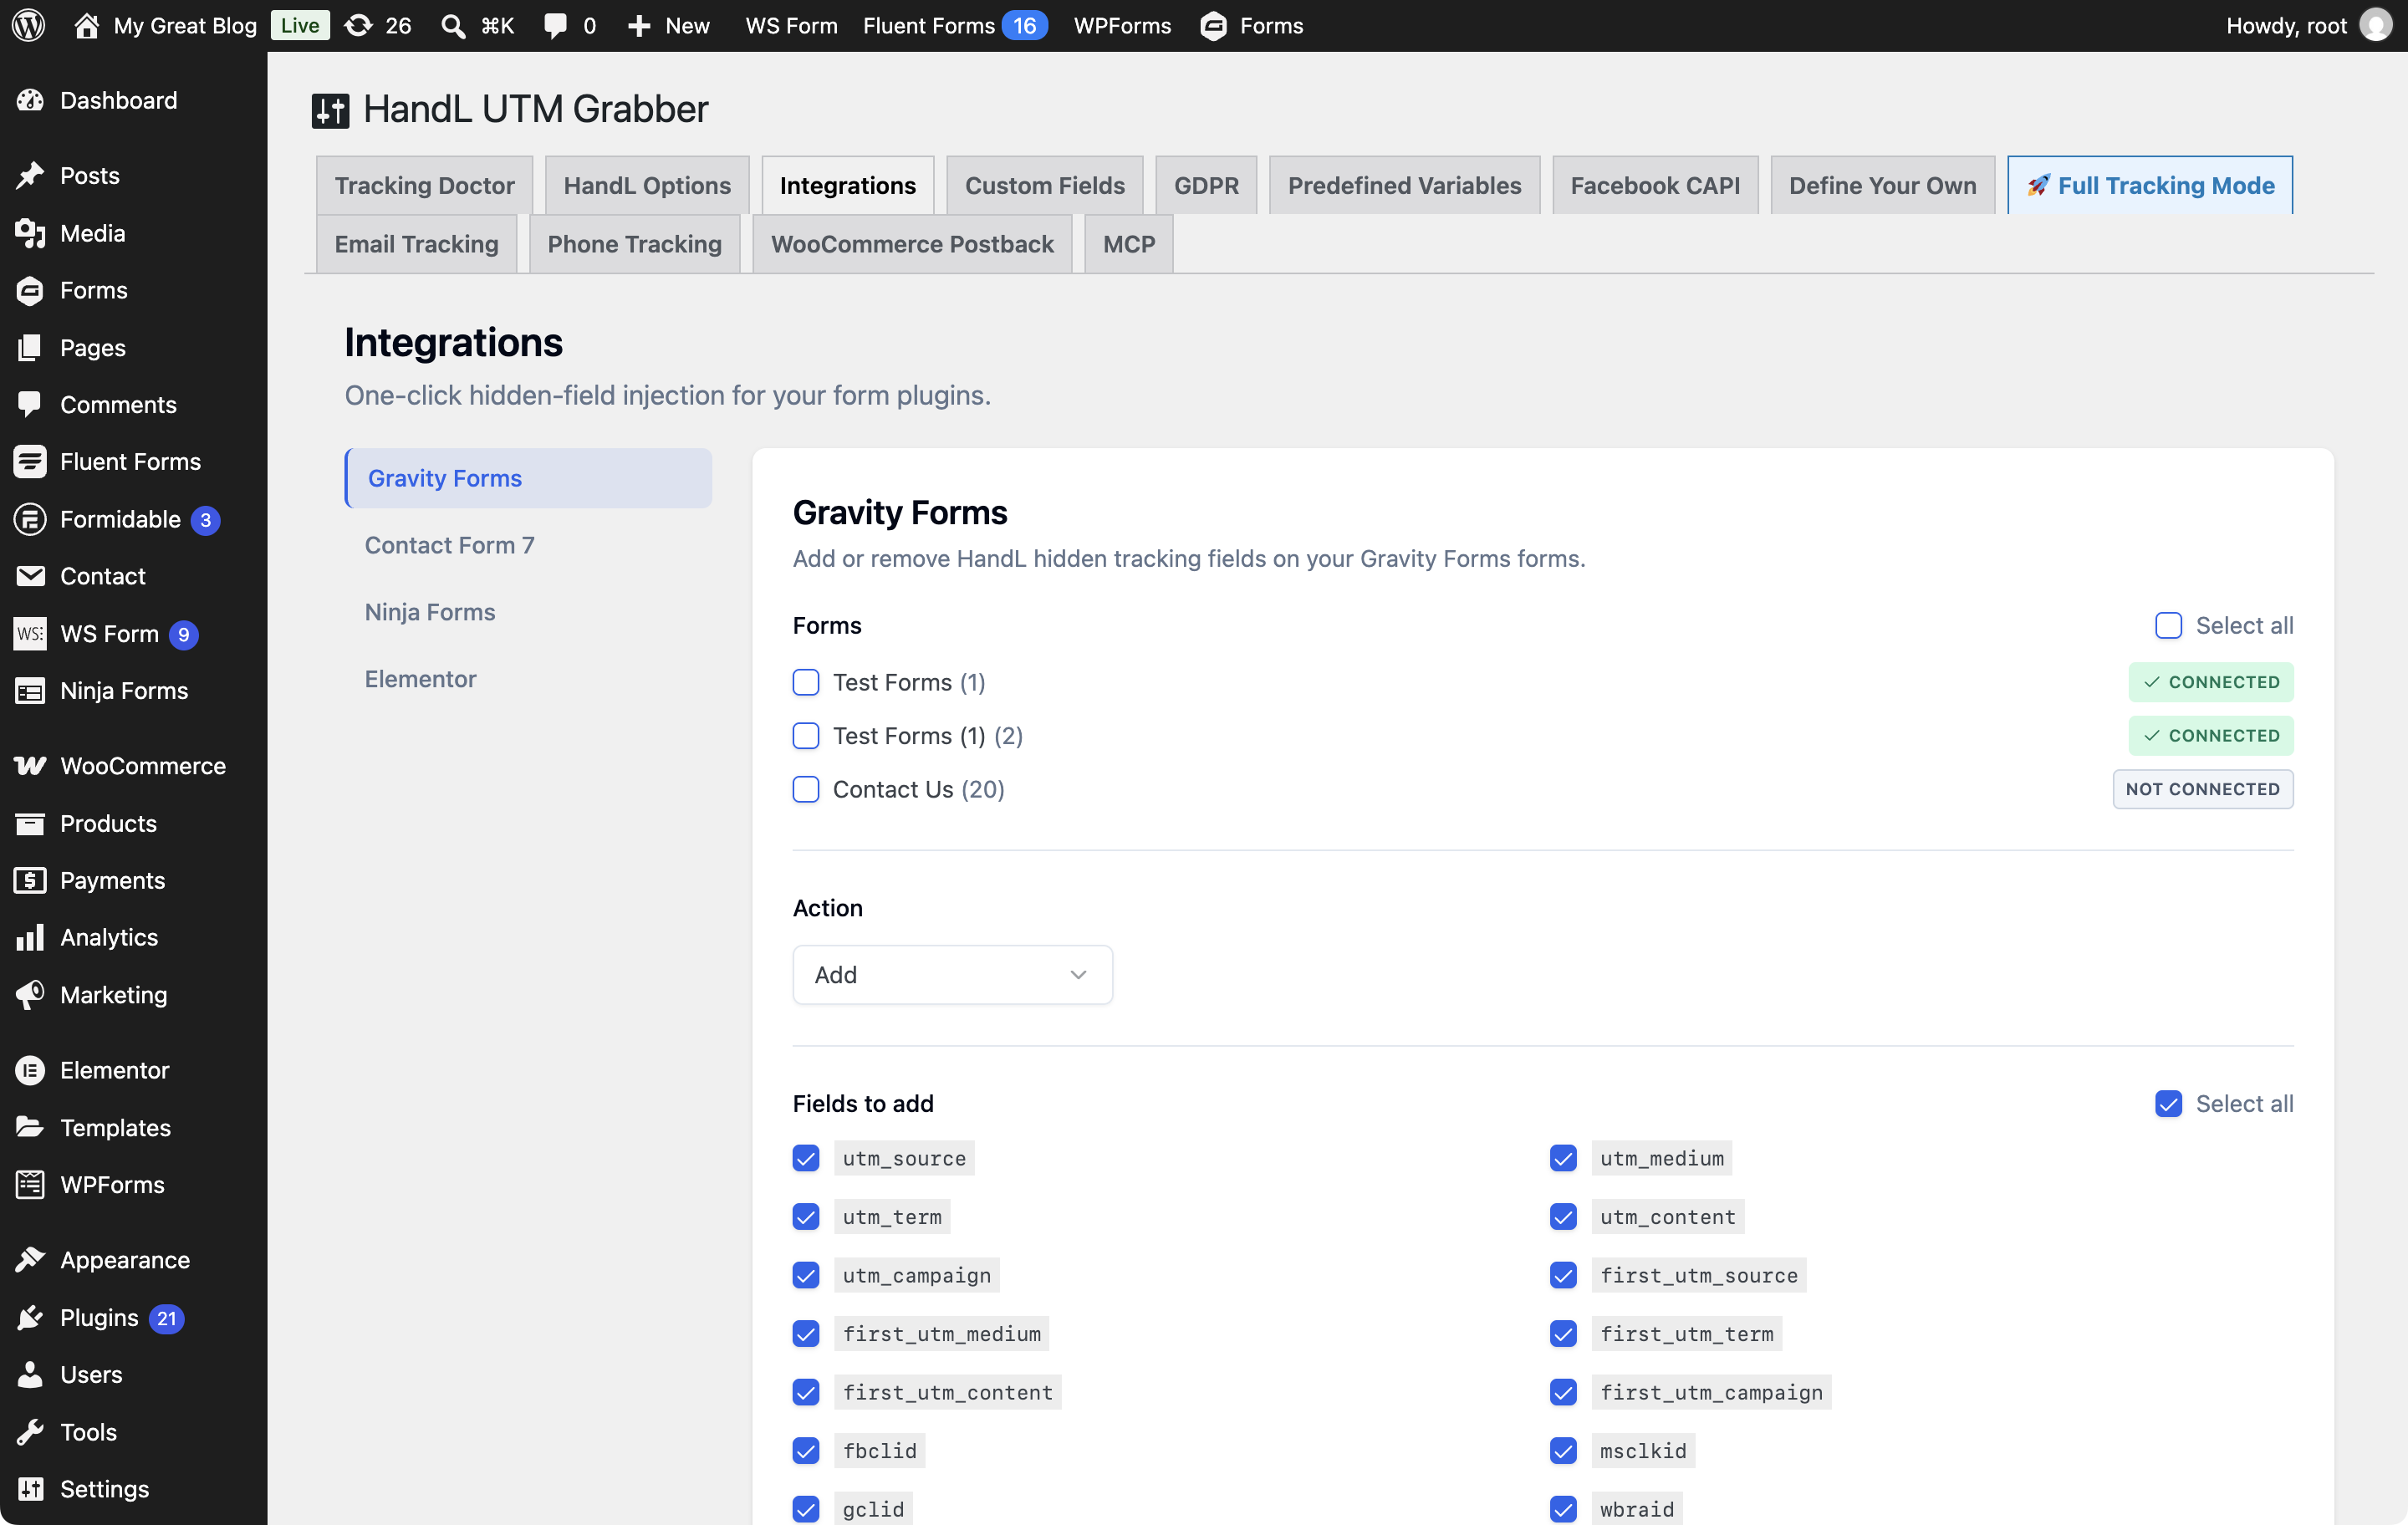
Use One Click Integrations with Gravity Forms, Contact Form 7, Ninja Forms, or Elementor. Other form plugins use the manual hidden field method in Native WP Shortcodes.
2. Find your form plugin
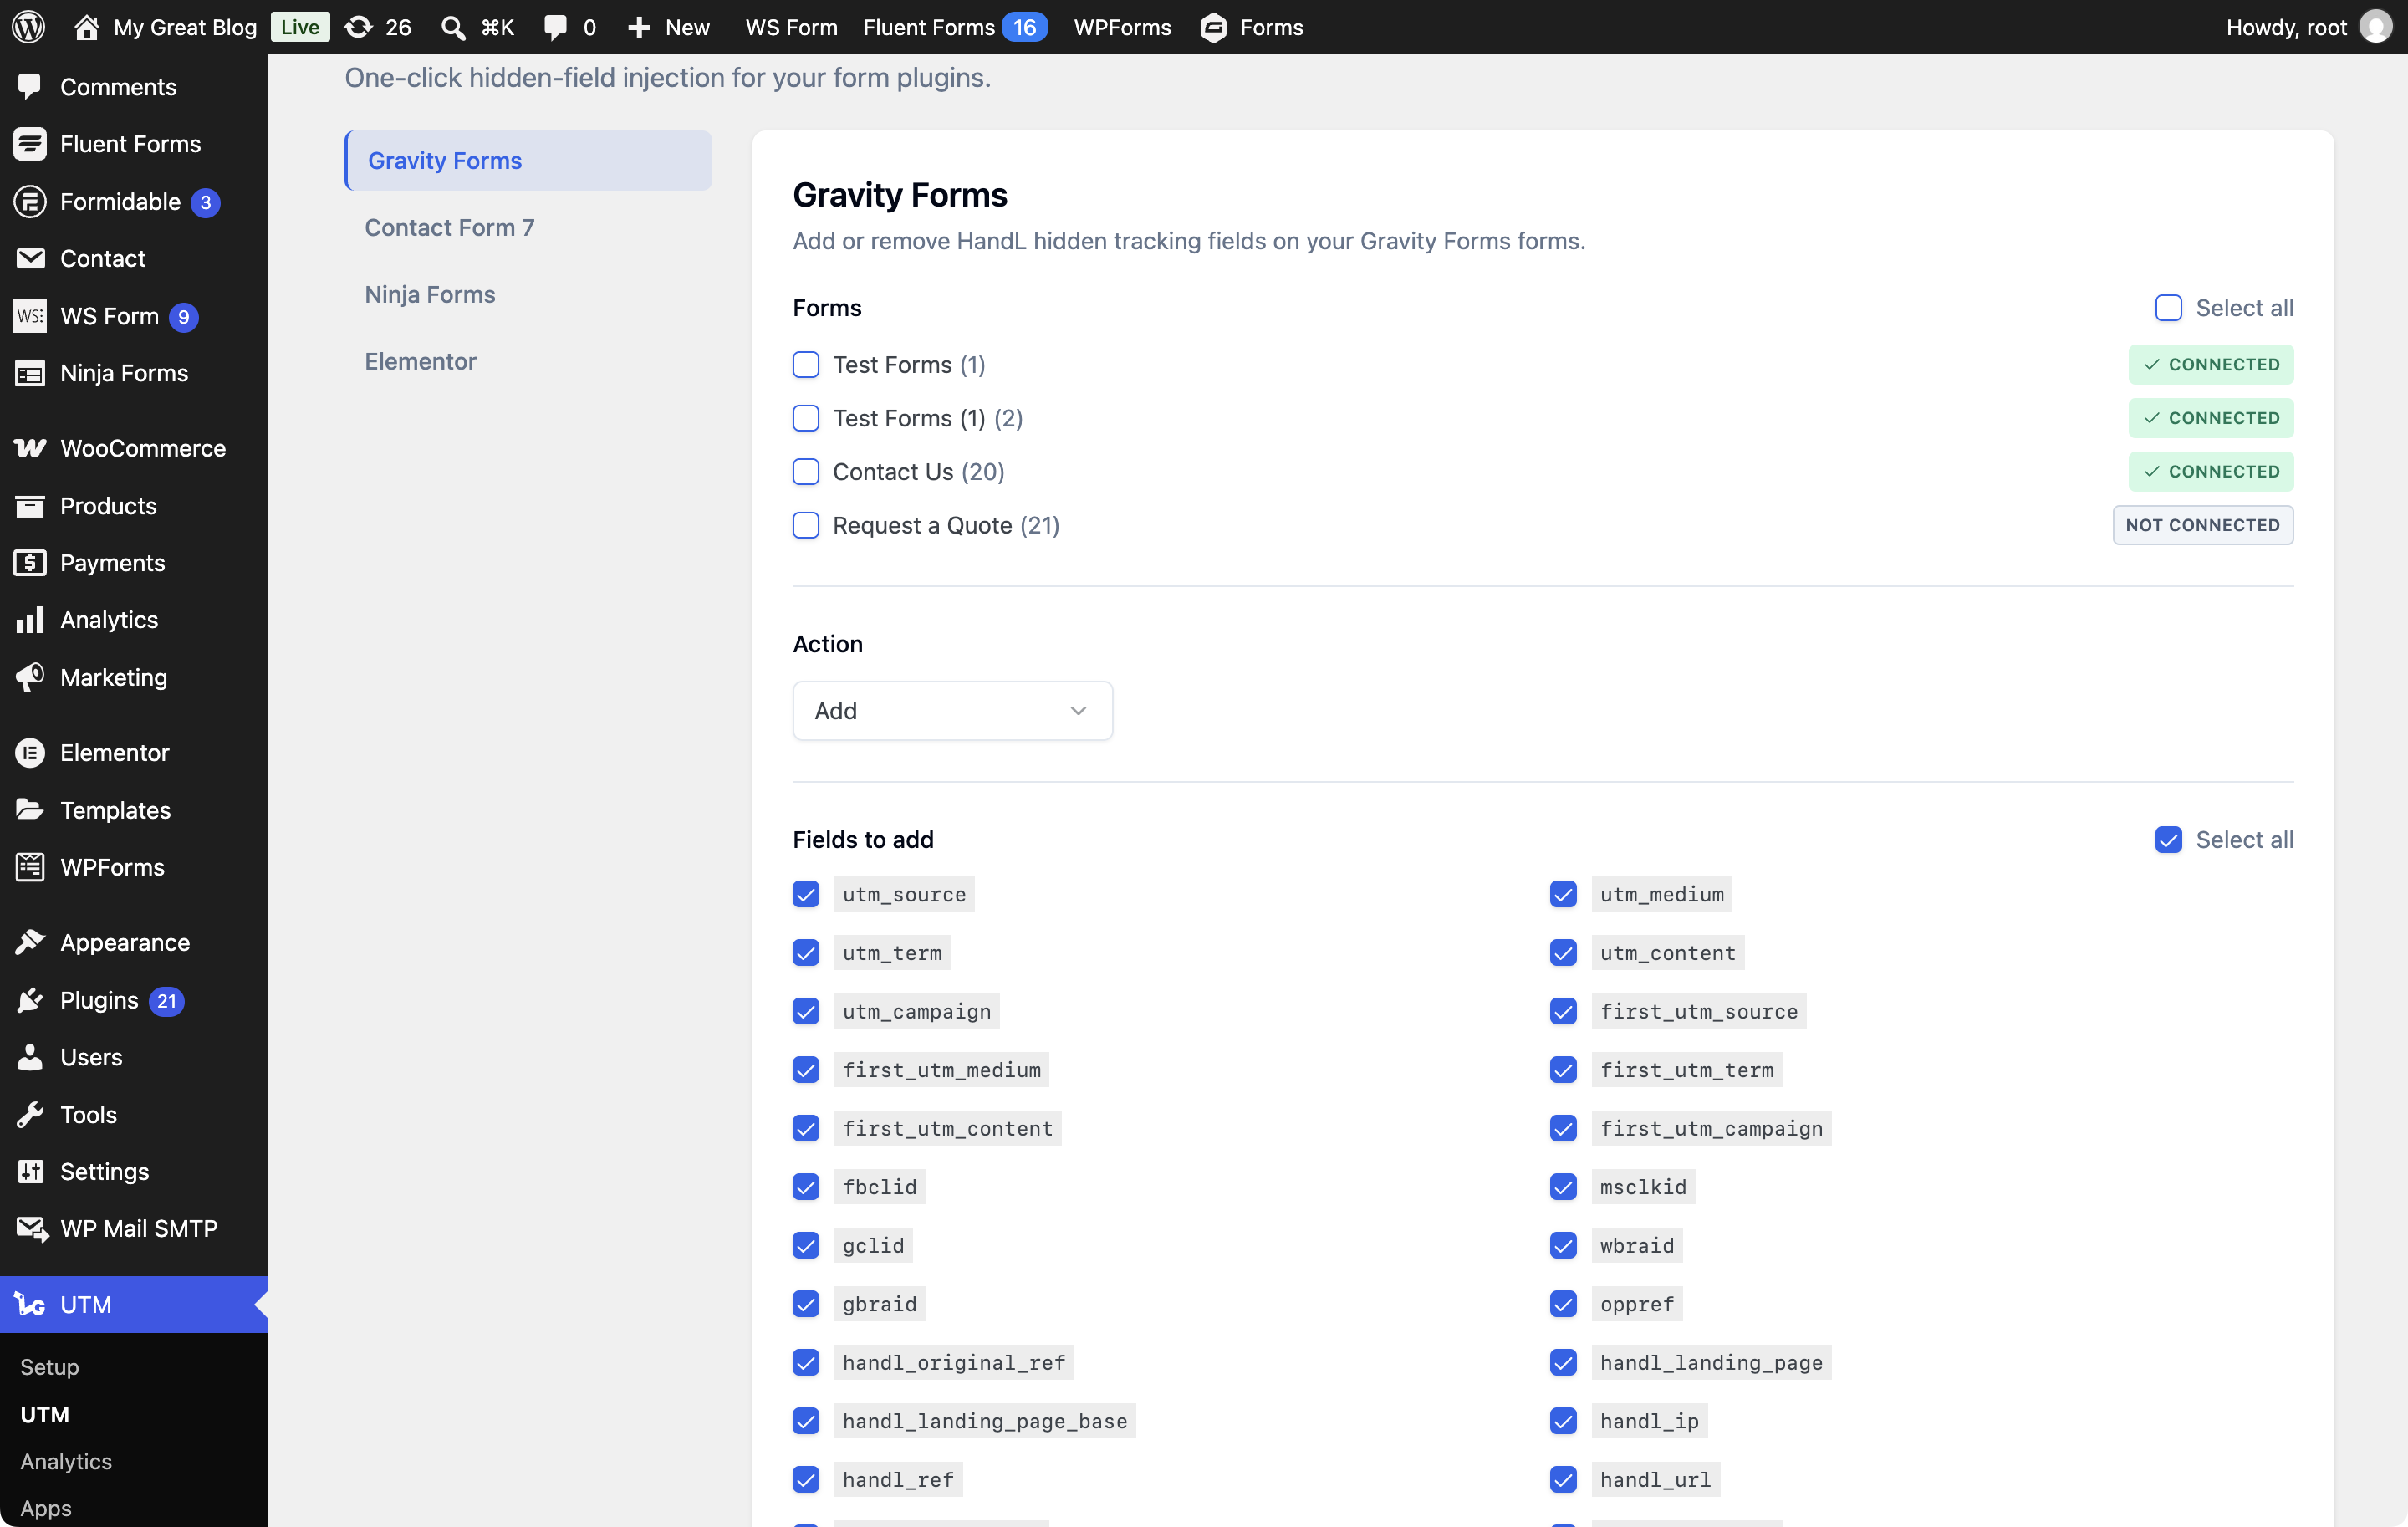
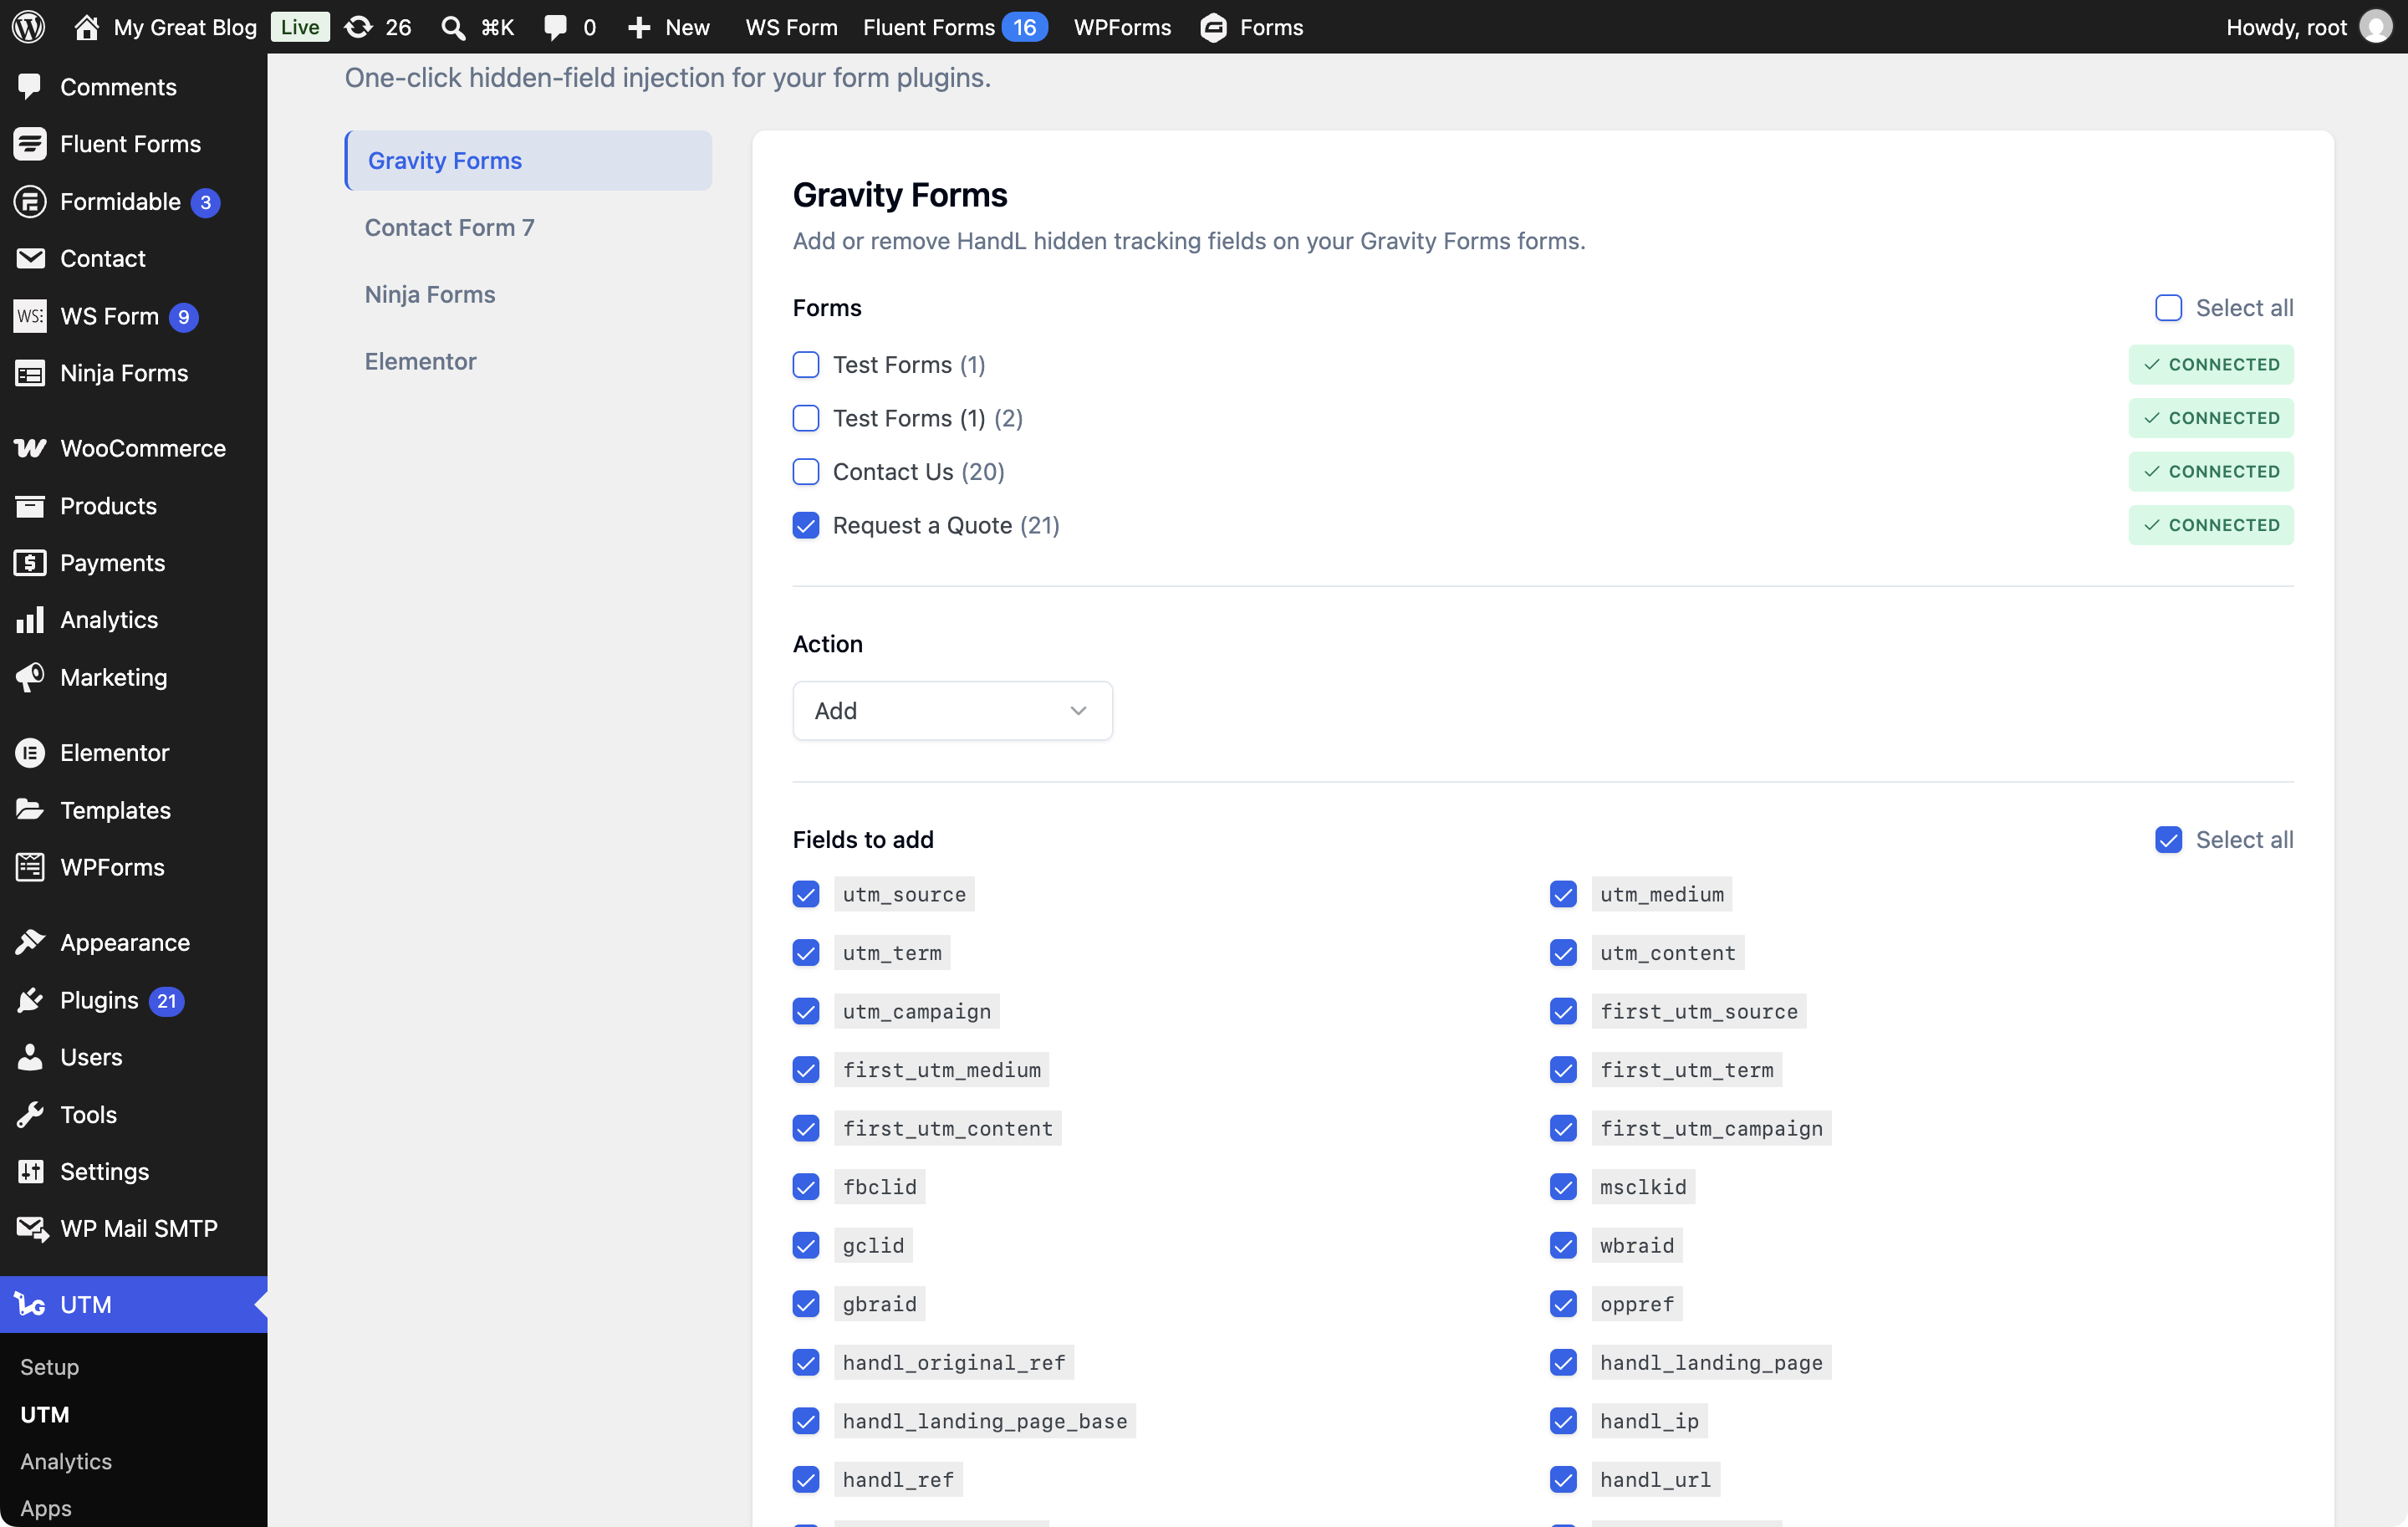
Open a plugin panel to see its forms. Each form shows Connected, Not connected, or N new field(s) available.
3. Select your forms
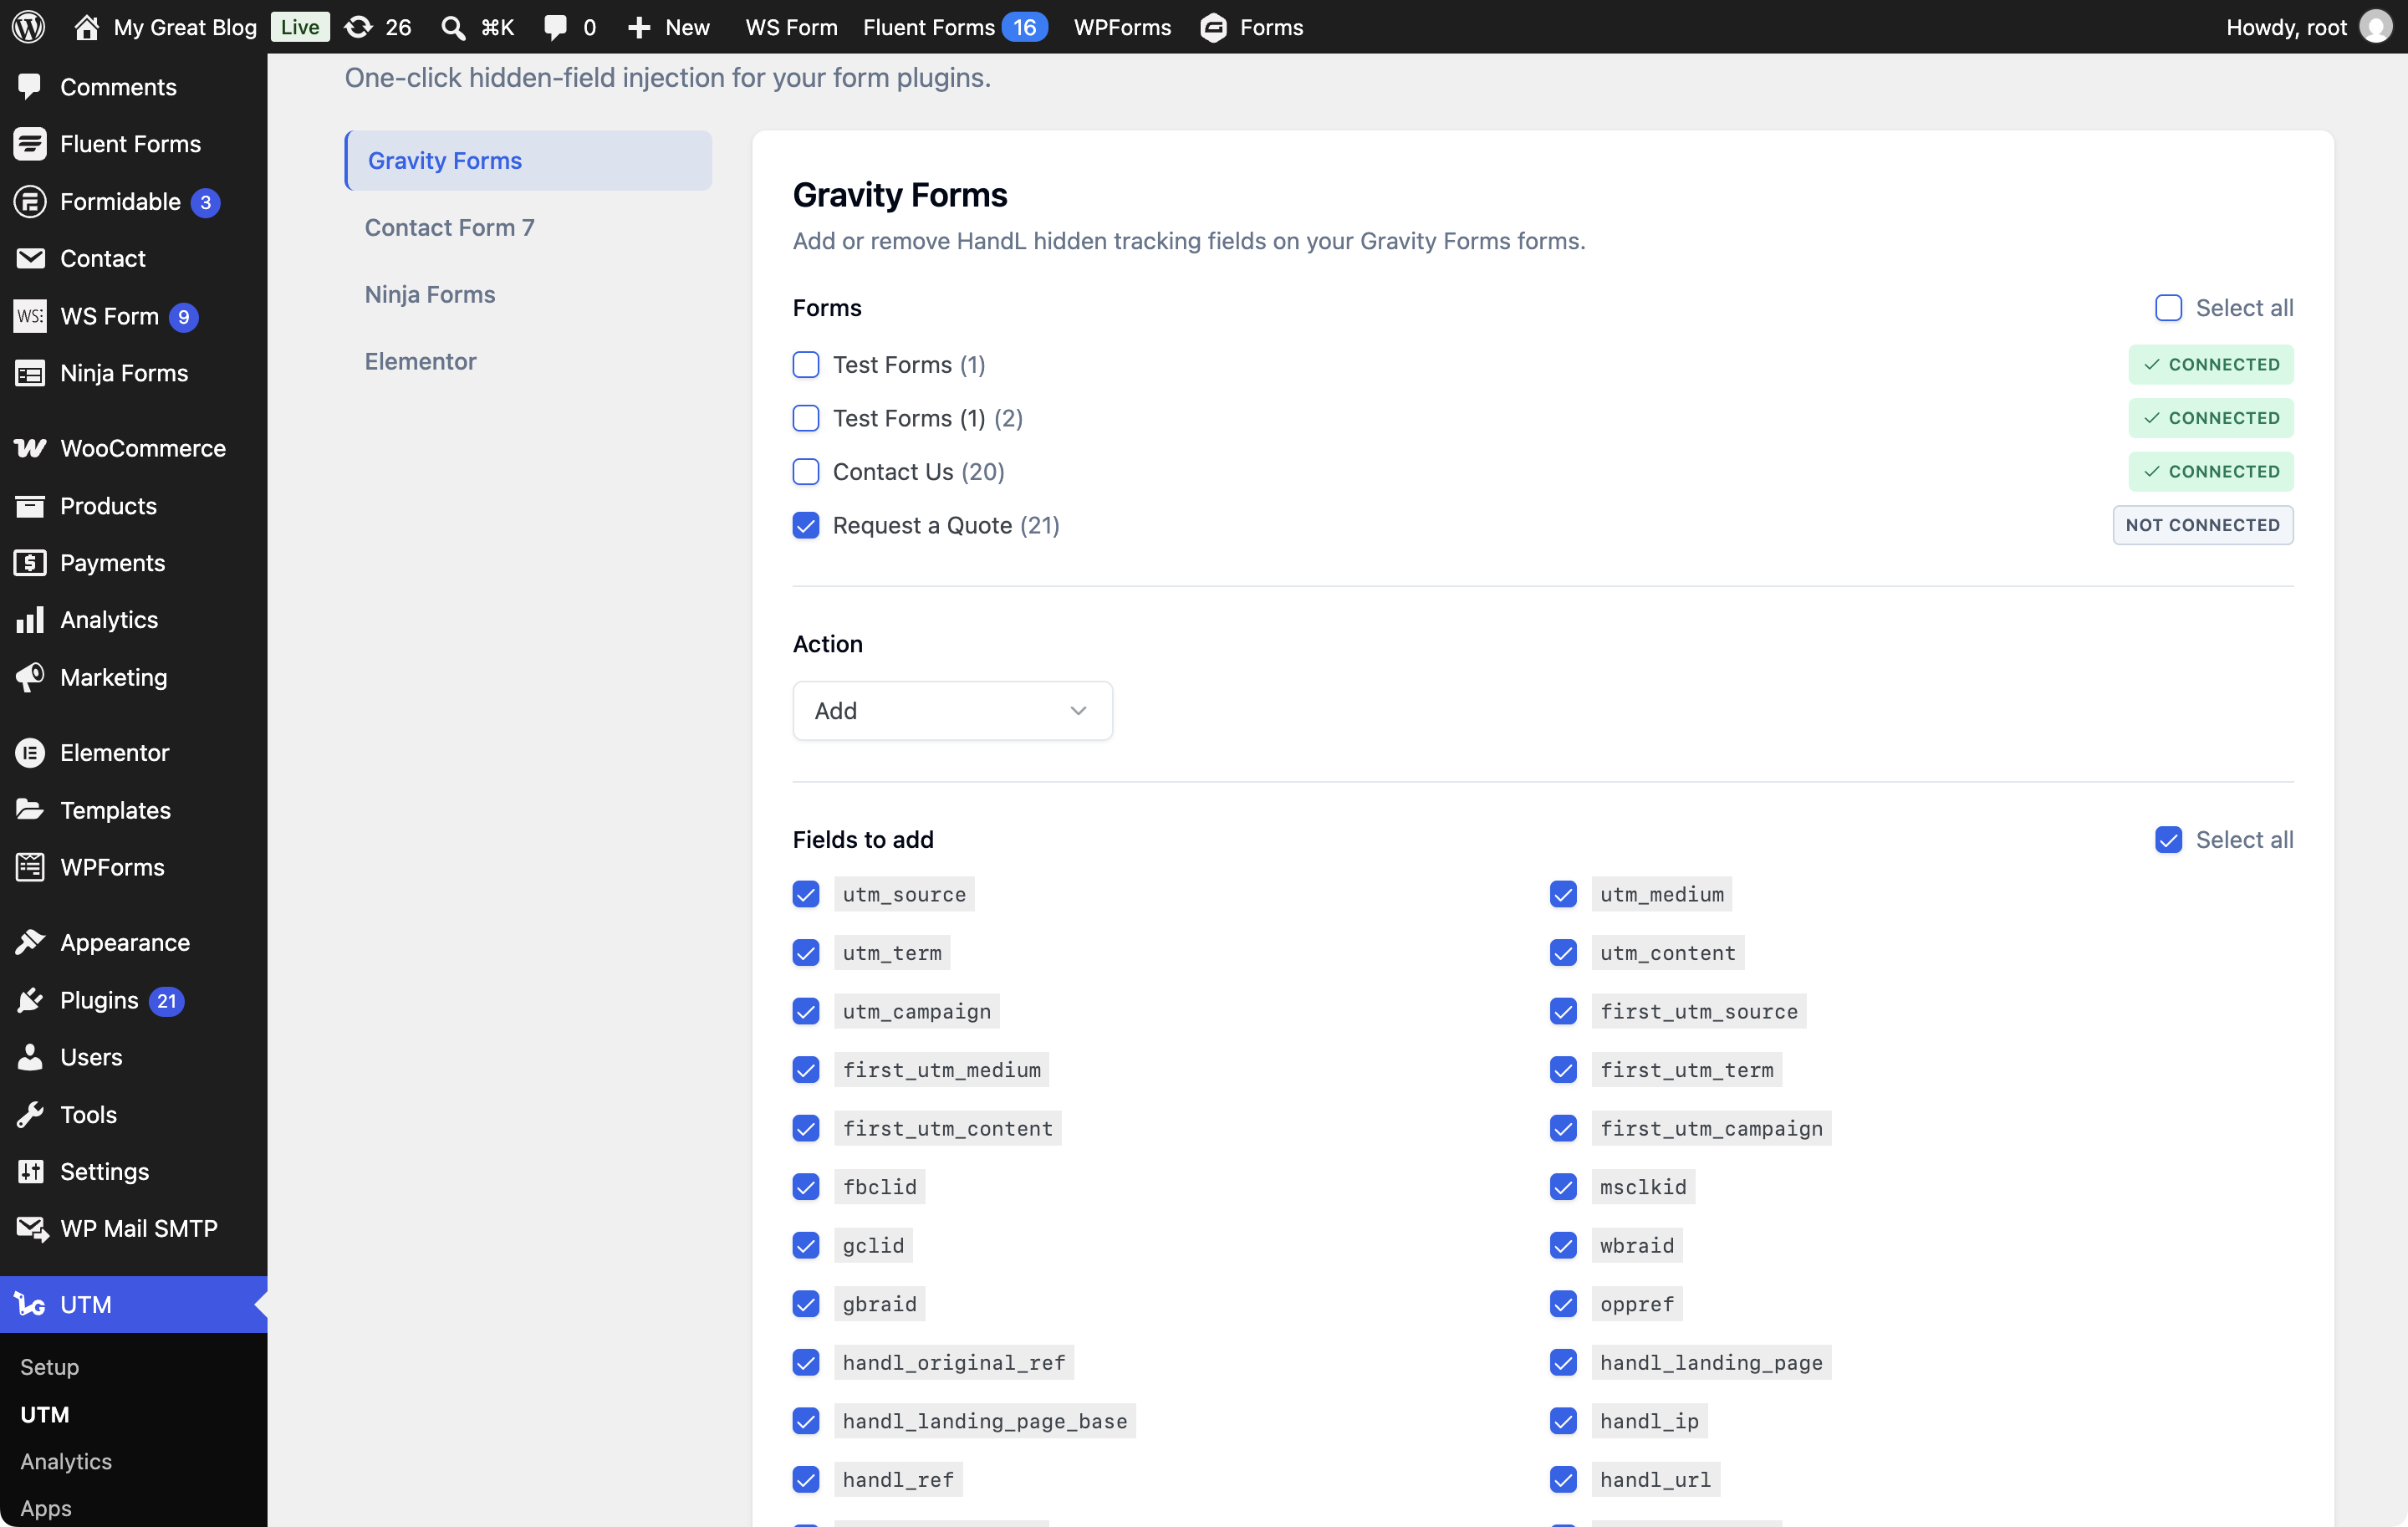
4. Click Save Changes
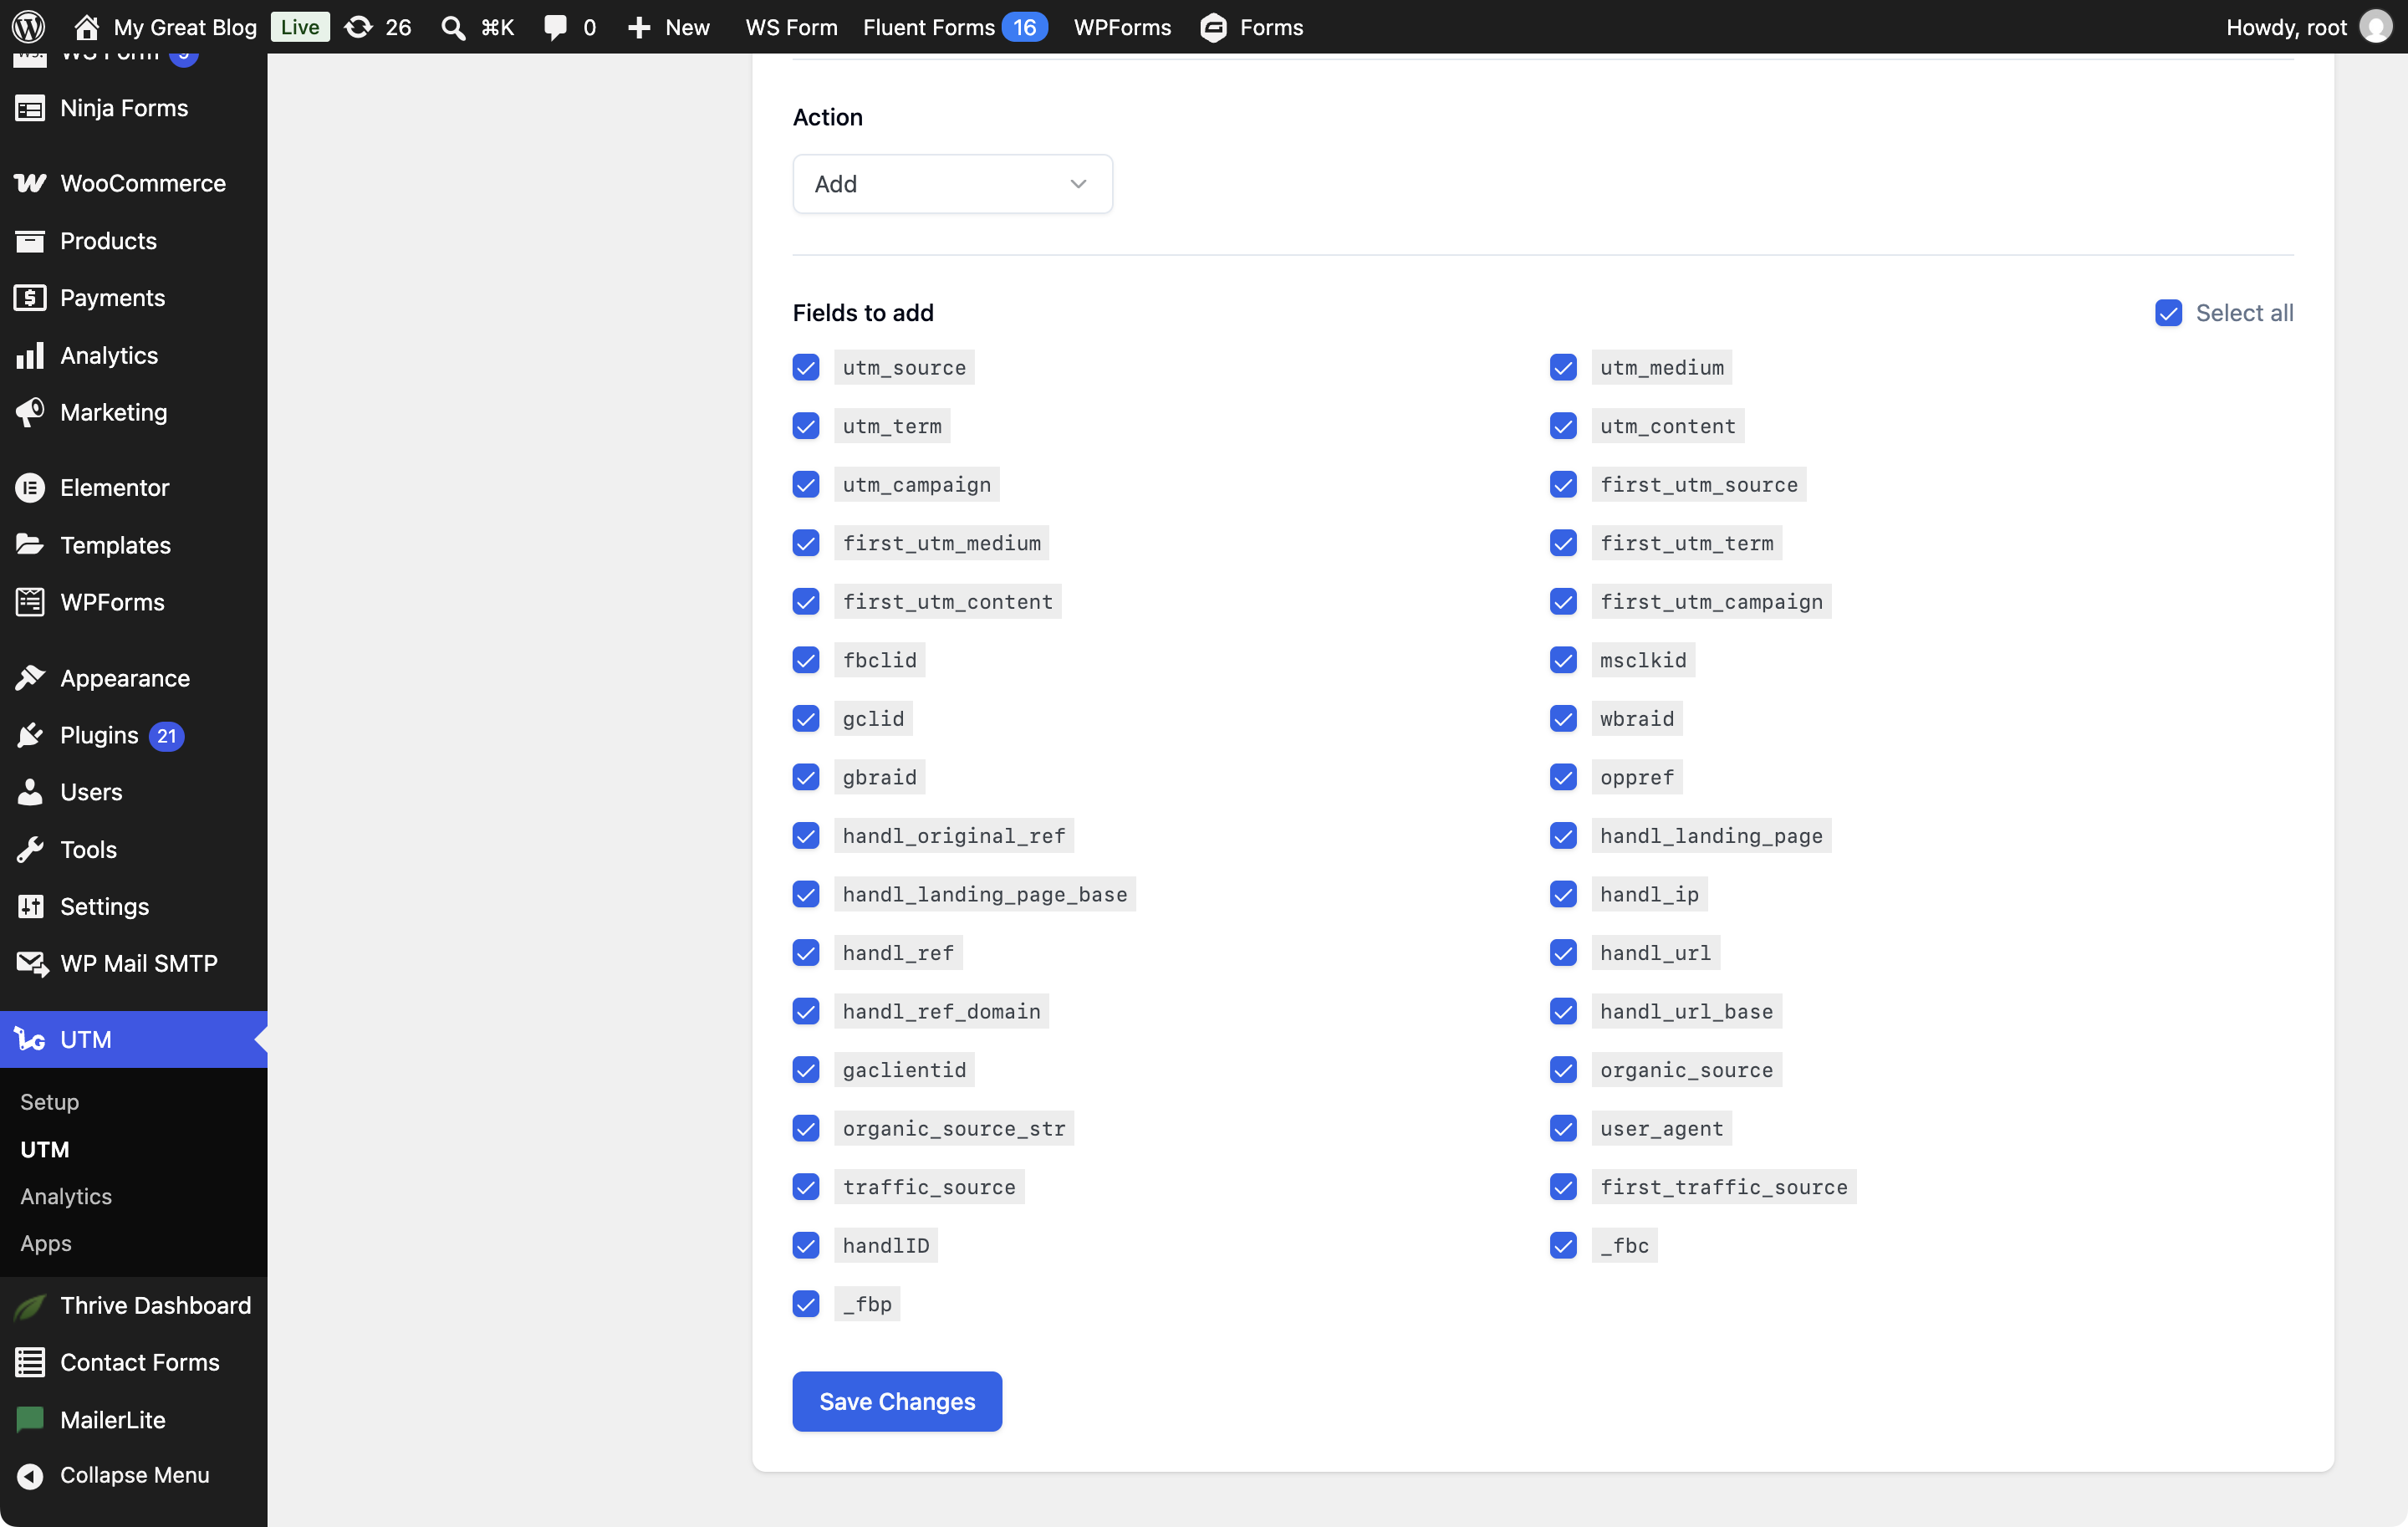
Keep Add selected, choose the tracking fields you need, and click Save Changes. The field list includes HandL tracking parameters and any fields from the Custom Fields tab. If your license is inactive, Save Changes is disabled and an alert asks you to activate it.
Choose Remove only when you intend to remove every HandL field from the selected forms, including fields you added manually. Remove hides the field list before you save.
5. Check the confirmation message
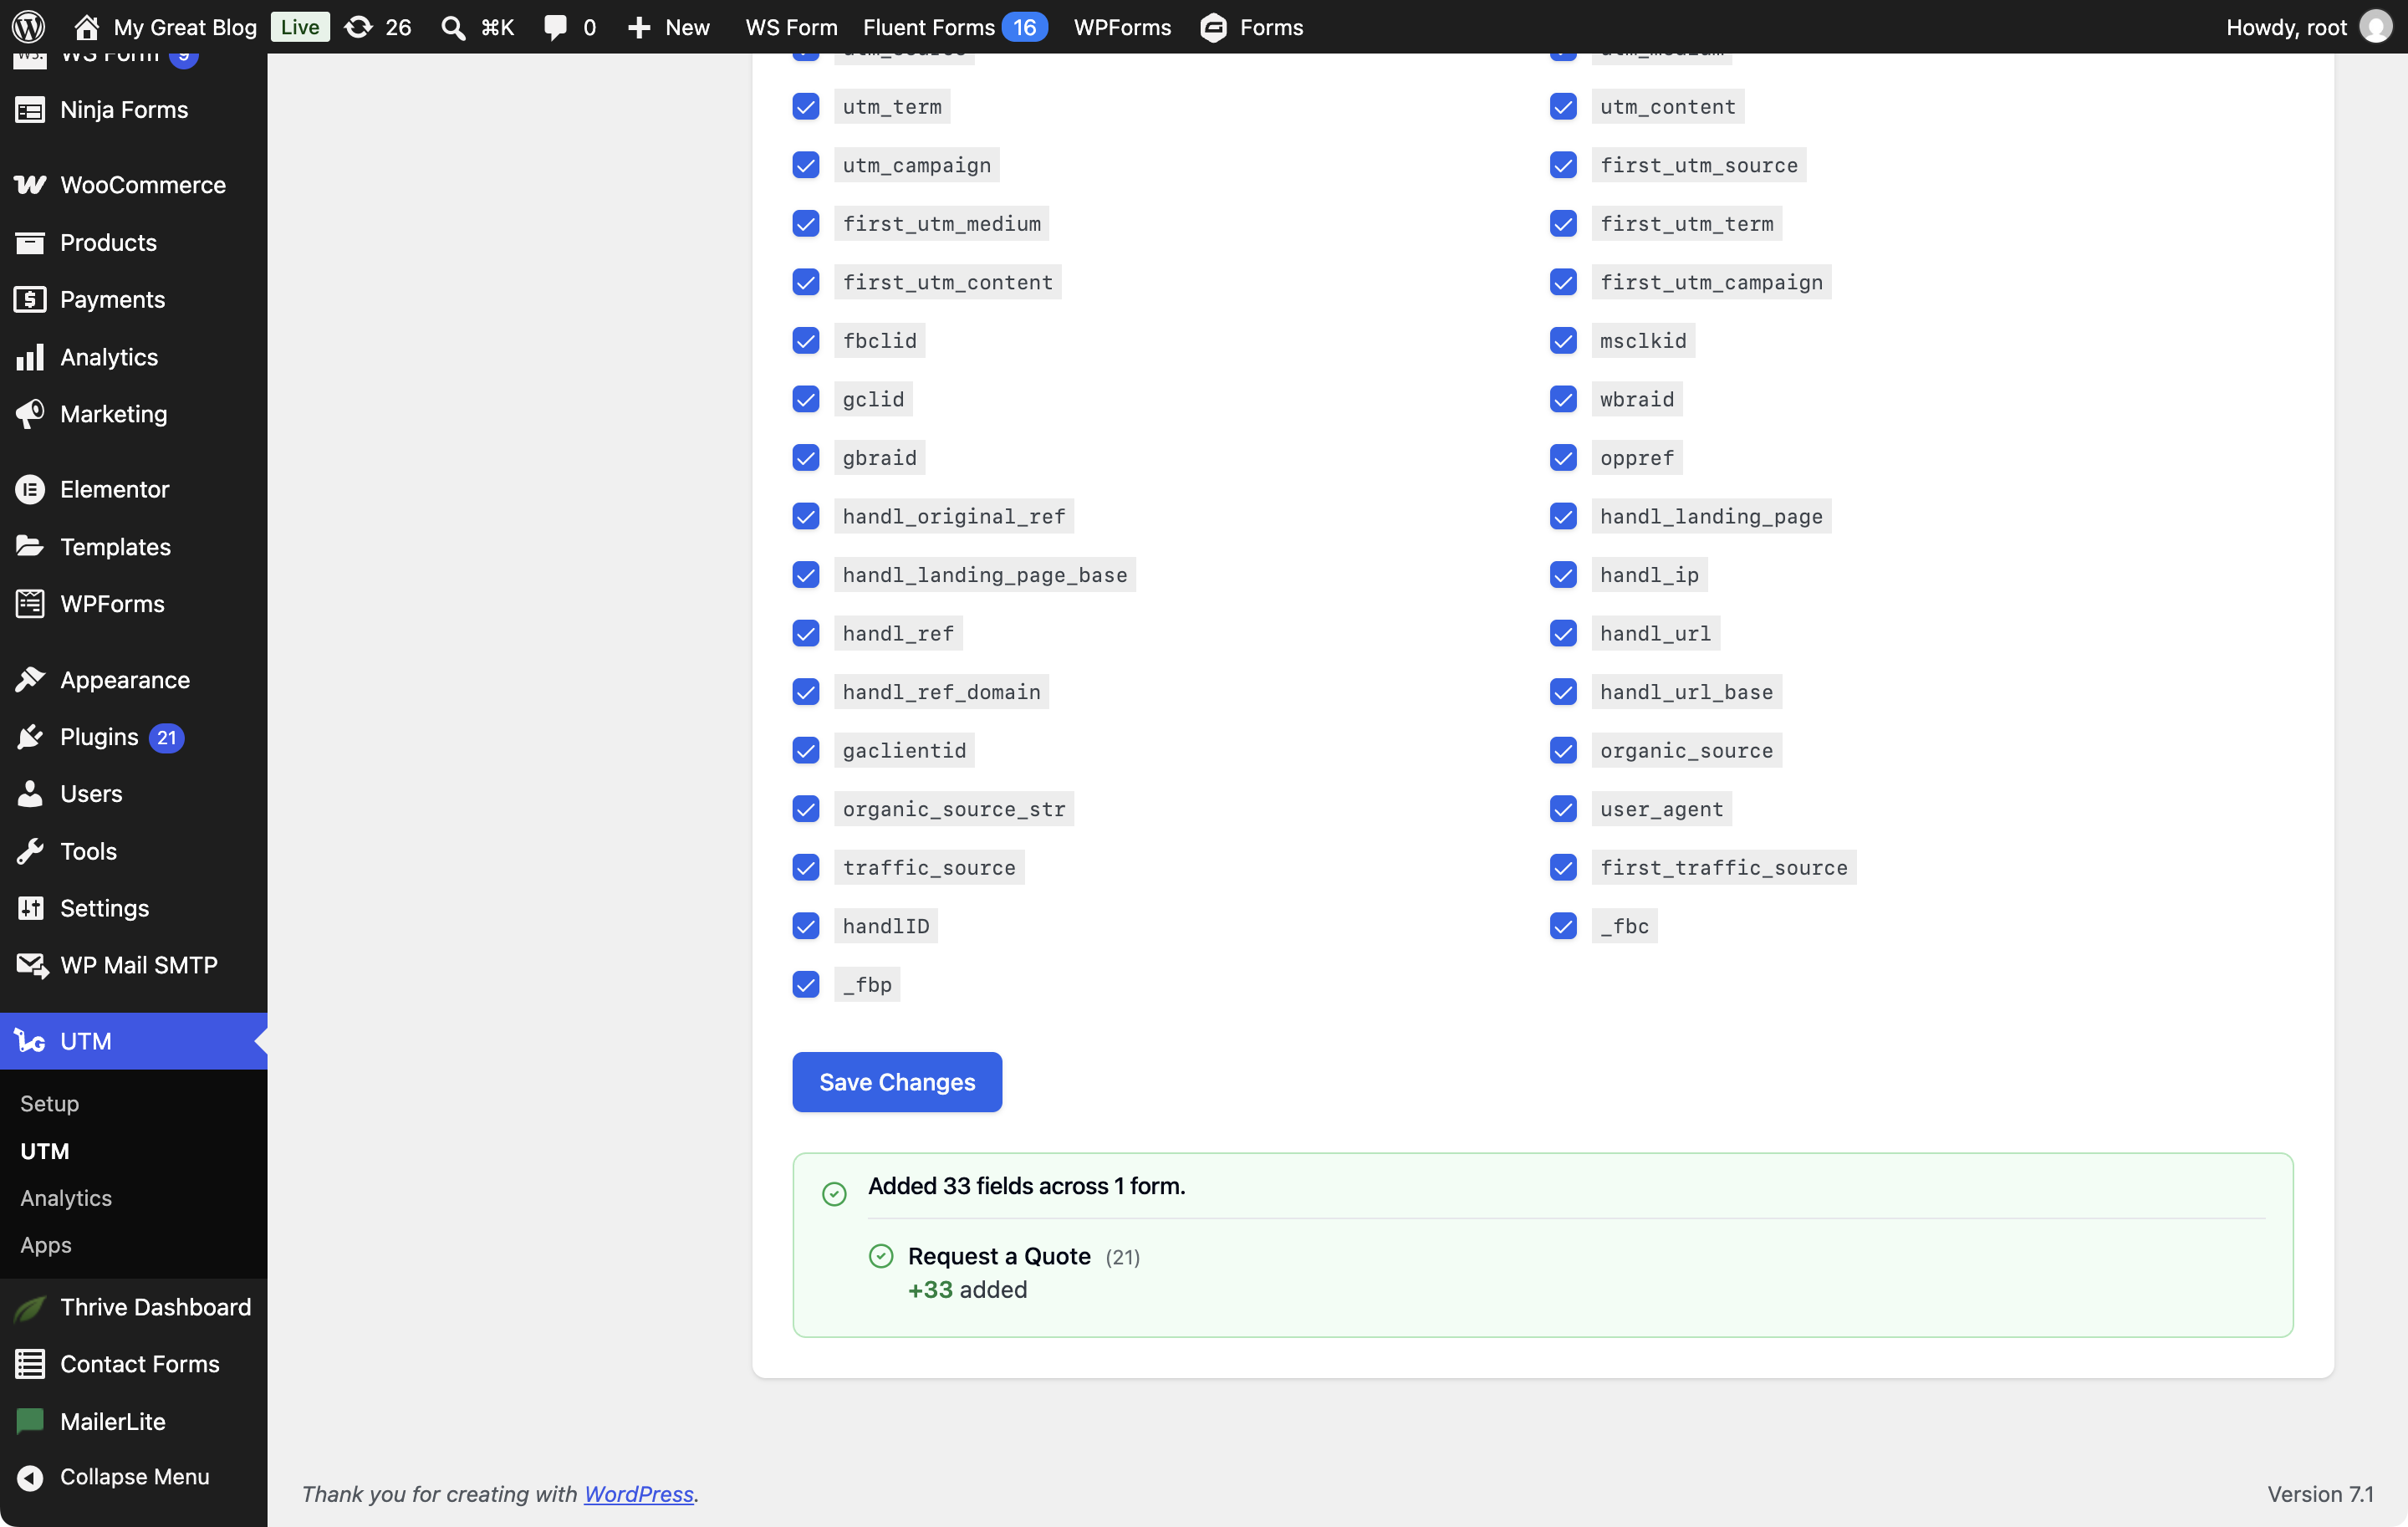
Review the green confirmation message. It summarizes added, existing, removed, unchanged, or failed fields for each form. The status badges refresh without a page reload.
6. Your forms are now connected
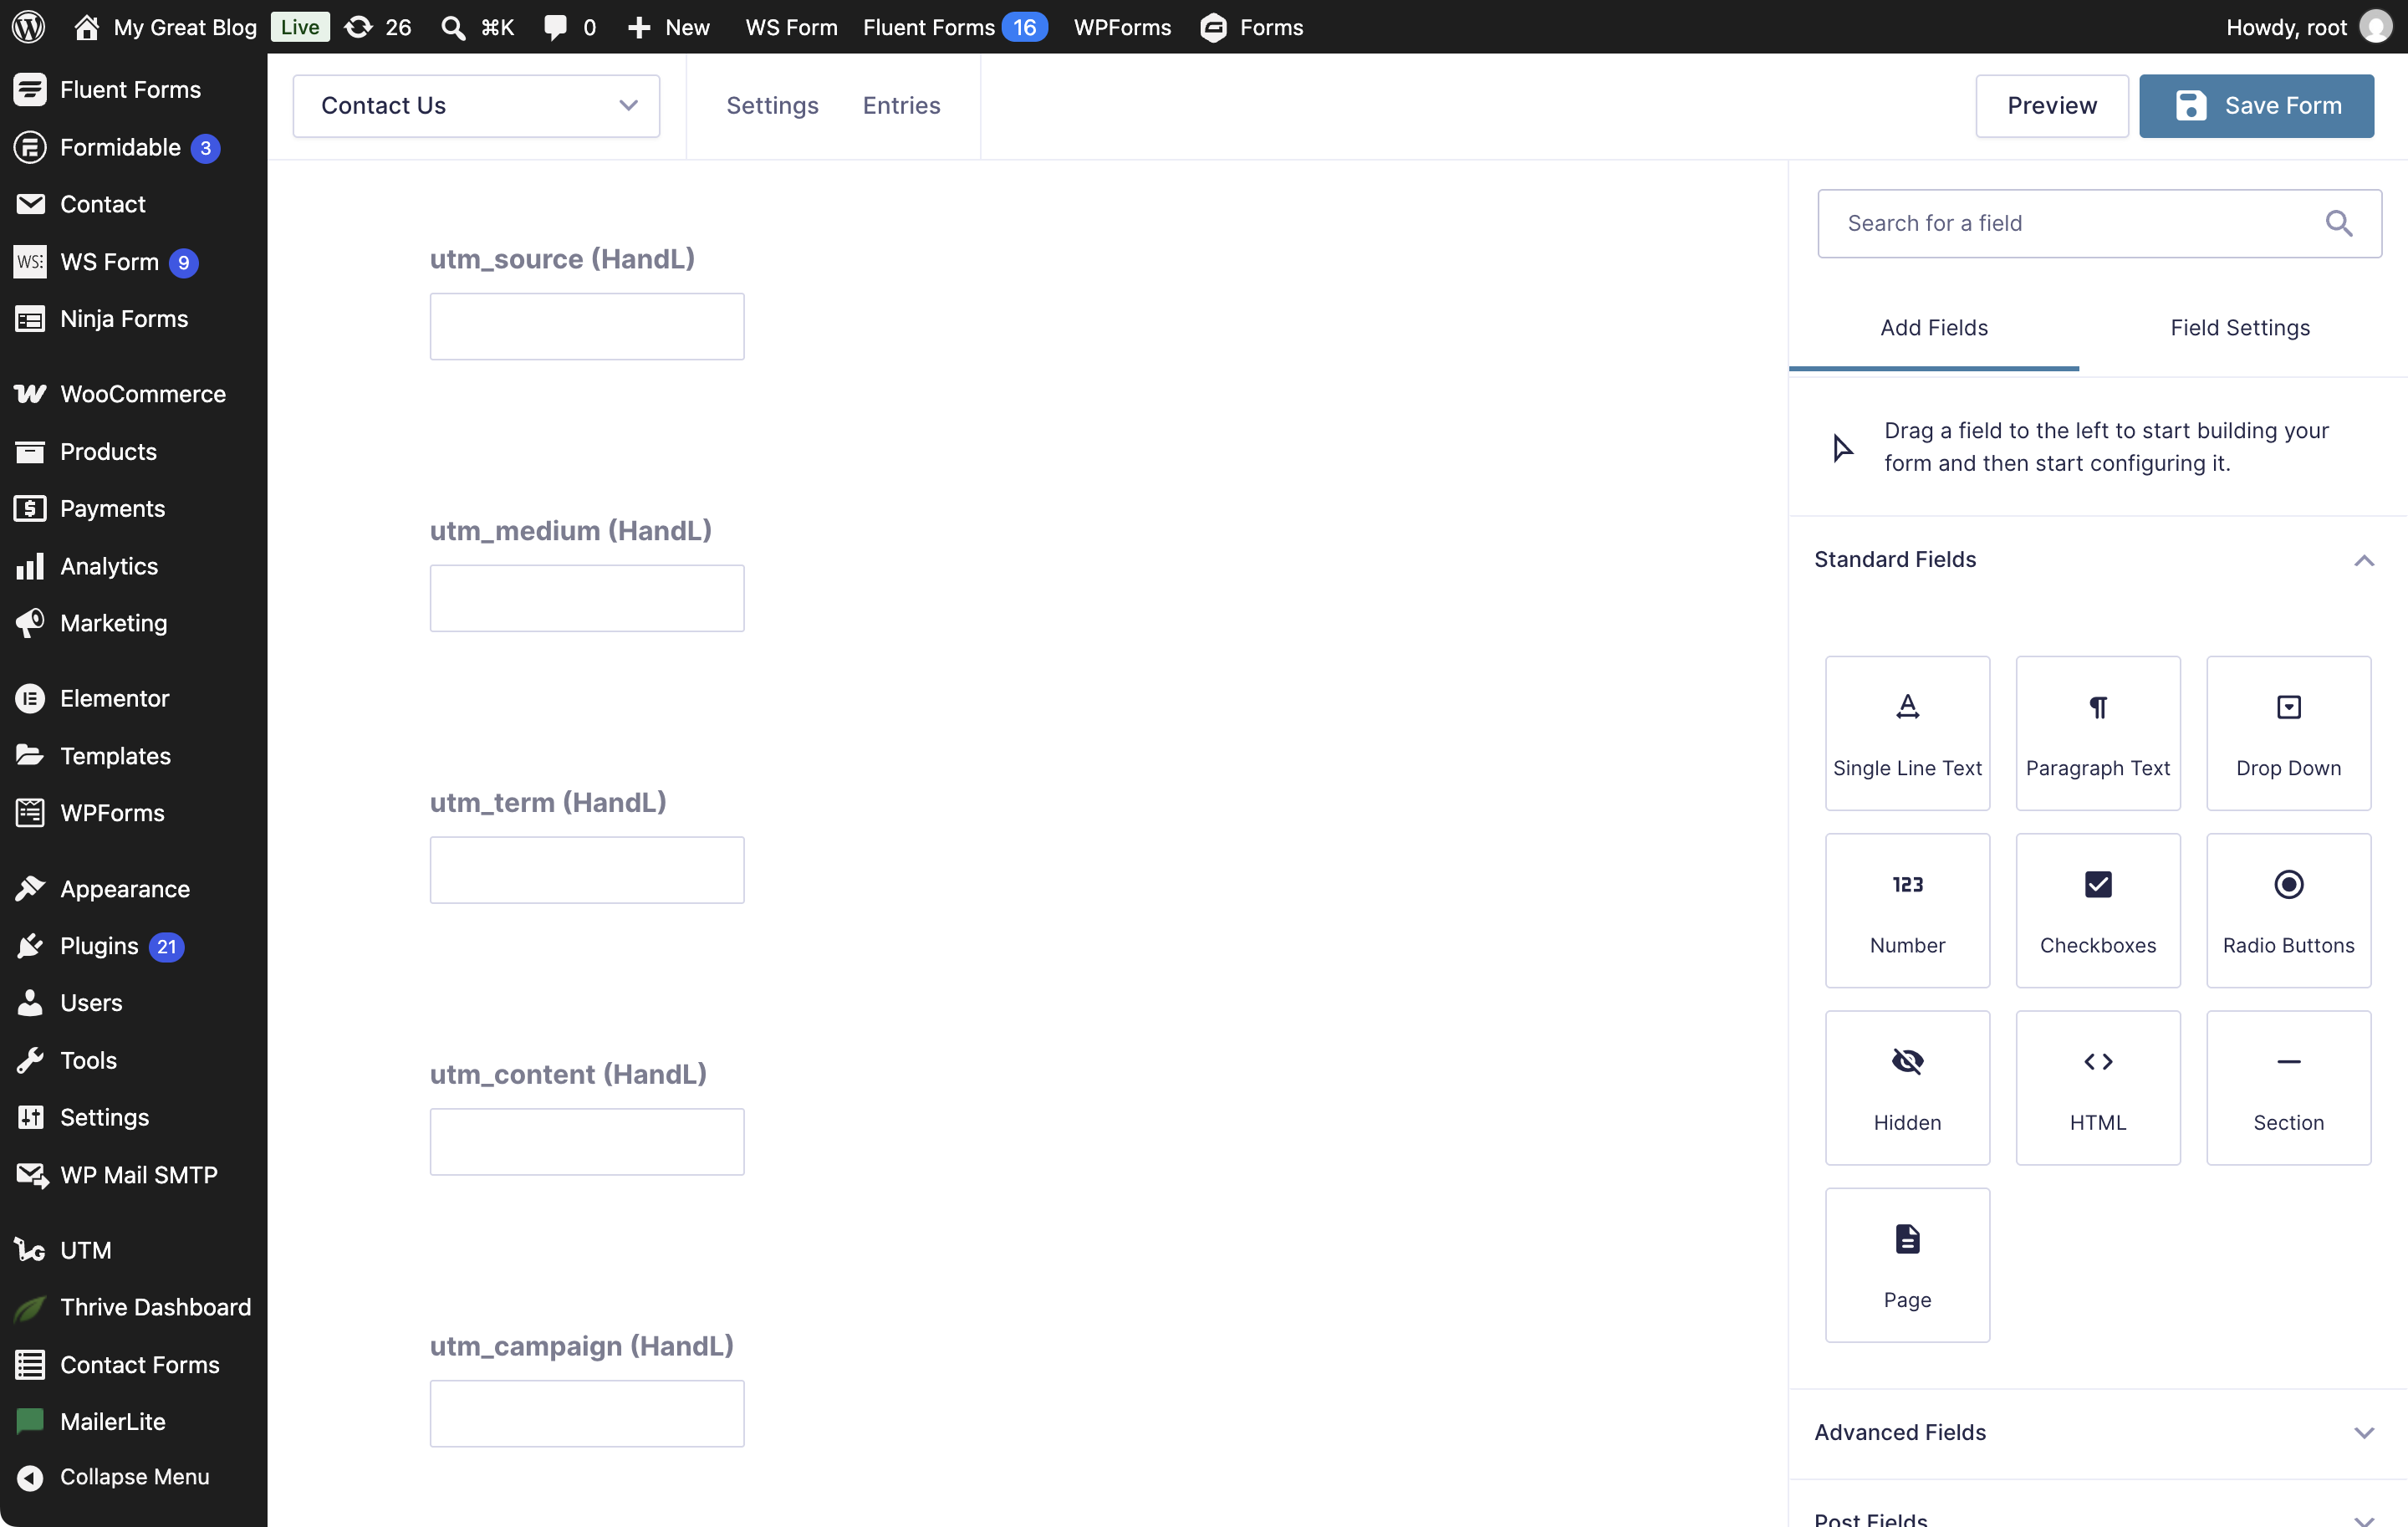
7. Tracking fields added to your form
8. Connect from the Setup wizard
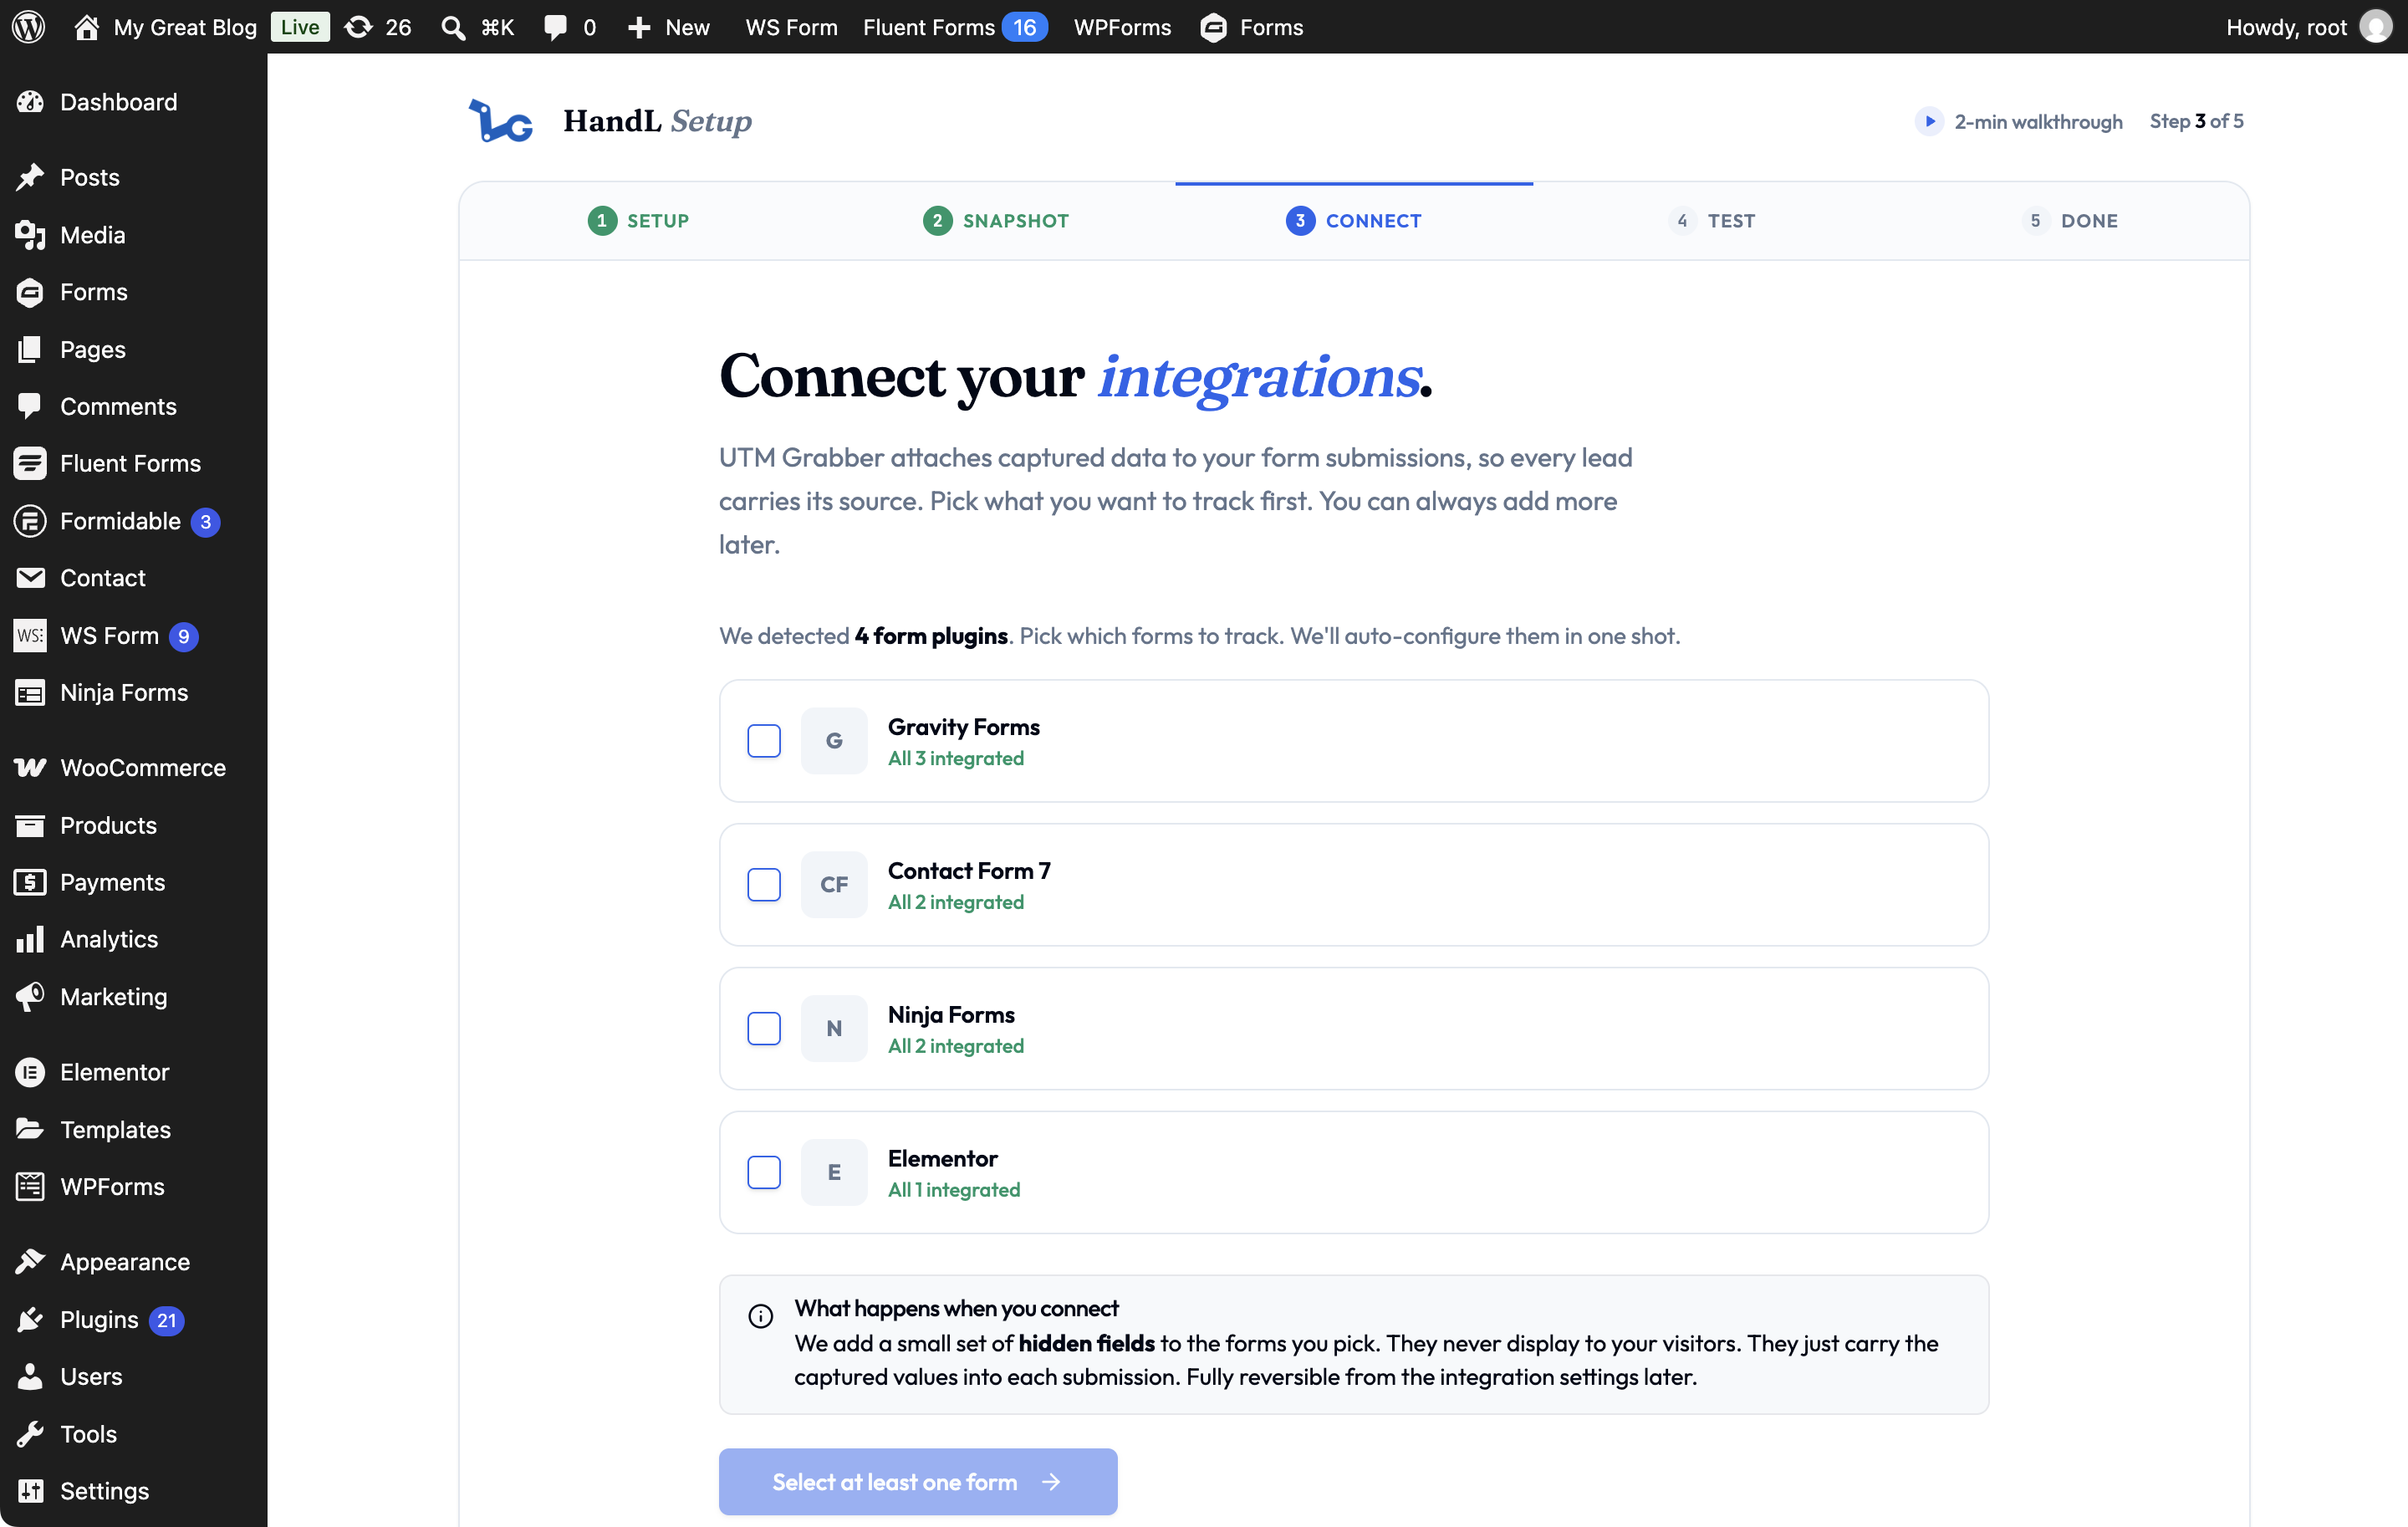
You can also select forms in the Connect your integrations step of the Setup wizard. Select at least one form to enable the next step.
Use this process for any supported form plugin shown in the Integrations tab. For other form plugins or manual setup, see Native WP Shortcodes.
Gravity Forms to Zapier SIMPLE UTM Tracking Integration Video Tutorial
UTM attribution overview
This guide explains Gravity Forms to Zapier SIMPLE UTM Tracking Integration Video Tutorial with HandL UTM Grabber. It helps you send UTM and click ID data into automations, webhooks, reports, and connected tools and keep the marketing context needed for accurate reporting across forms, bookings, signups, and sales.
Please watch the related Video Tutorial below
and click right to the video and open link in new tab
Gravity Forms to Zapier UTM Tracking Integration Video Tutorial
UTM attribution overview
This guide explains Gravity Forms to Zapier UTM Tracking Integration Video Tutorial with HandL UTM Grabber. It helps you send UTM and click ID data into automations, webhooks, reports, and connected tools and keep the marketing context needed for accurate reporting across forms, bookings, signups, and sales.
Please watch the related Video Tutorial below
and click right to the video and open link in new tab
Gravity Forms UTM Tracking Integration
UTM attribution overview
This guide explains Gravity Forms UTM Tracking Integration with HandL UTM Grabber. It helps you capture UTM source, medium, campaign, term, content, click IDs, referrer, and landing page data and keep the marketing context needed for accurate reporting across forms, bookings, signups, and sales.
1. Click Forms and 'Add New' Button
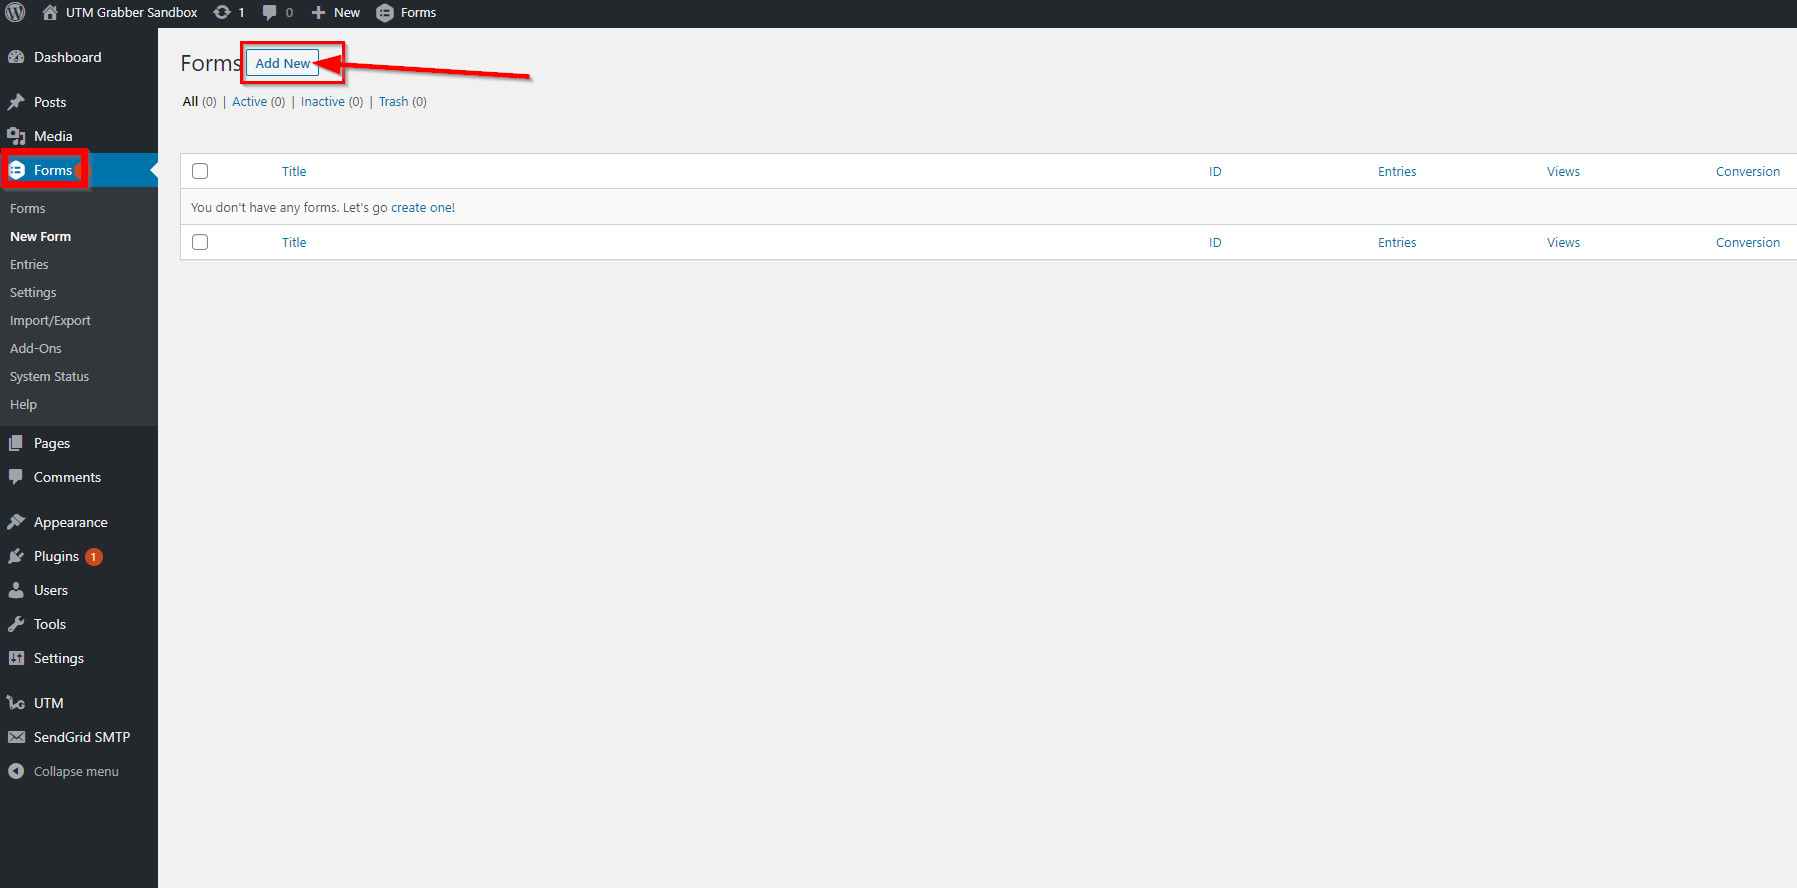
2. Write Your Form Title and Description as you wish
Then Click 'Create Form' Button
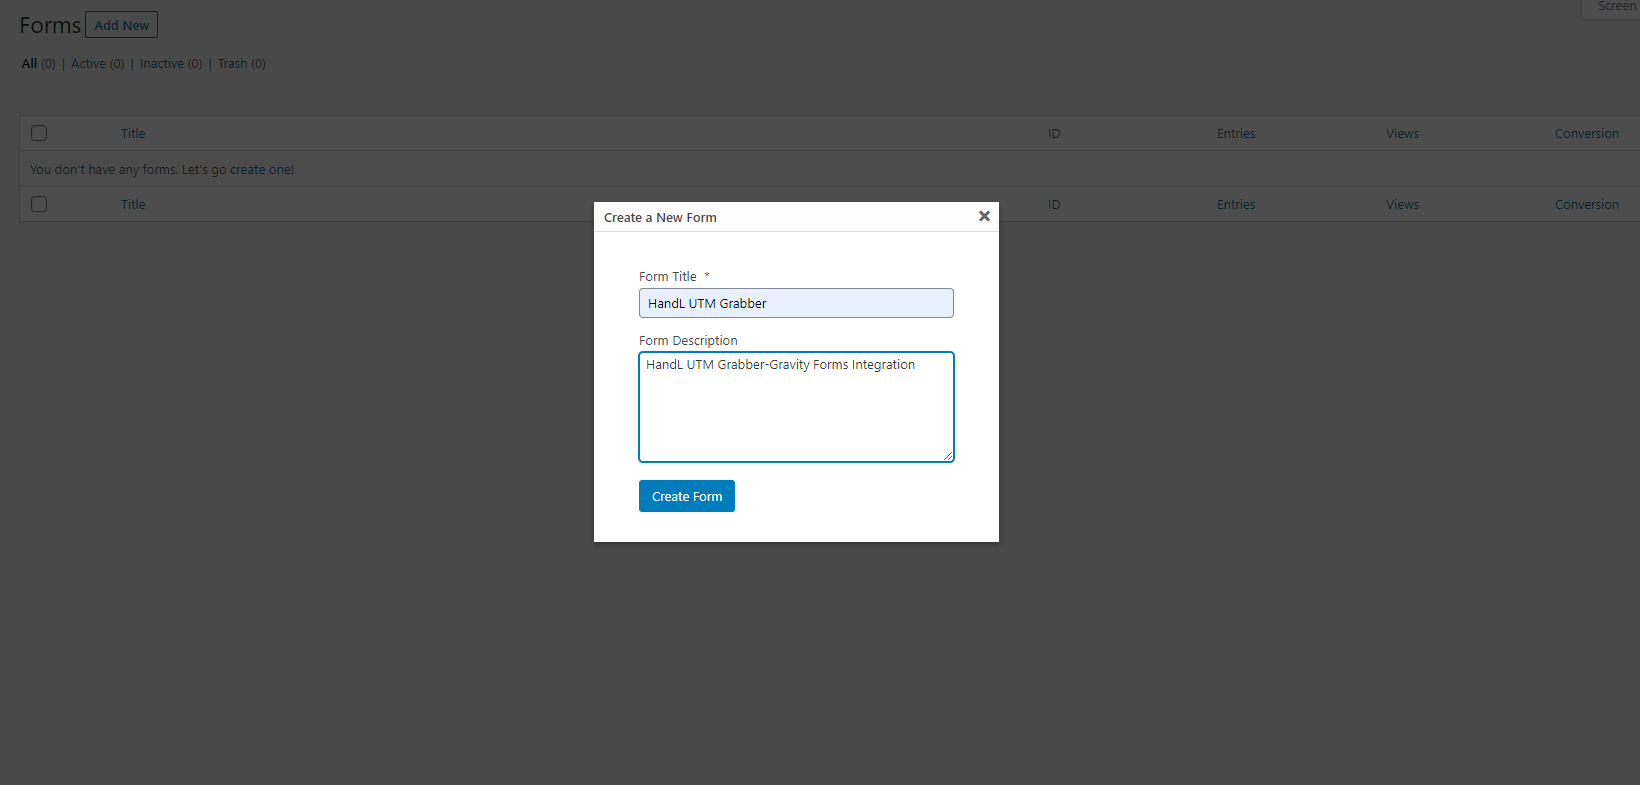
3. First Add your'Hidden' Element on your form
Click the 'Hidden' Button on the menu right
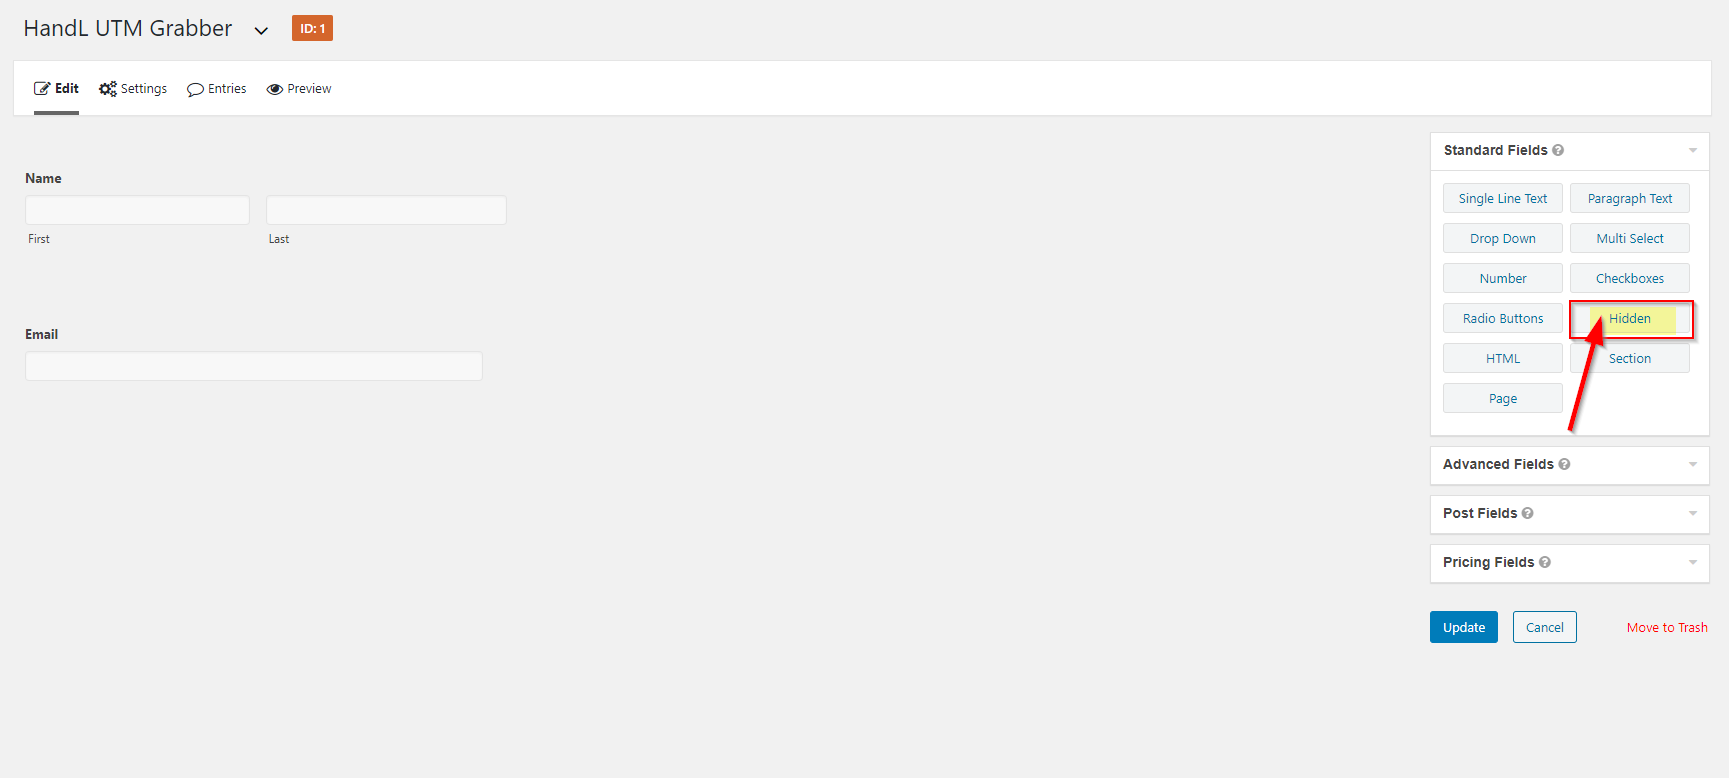
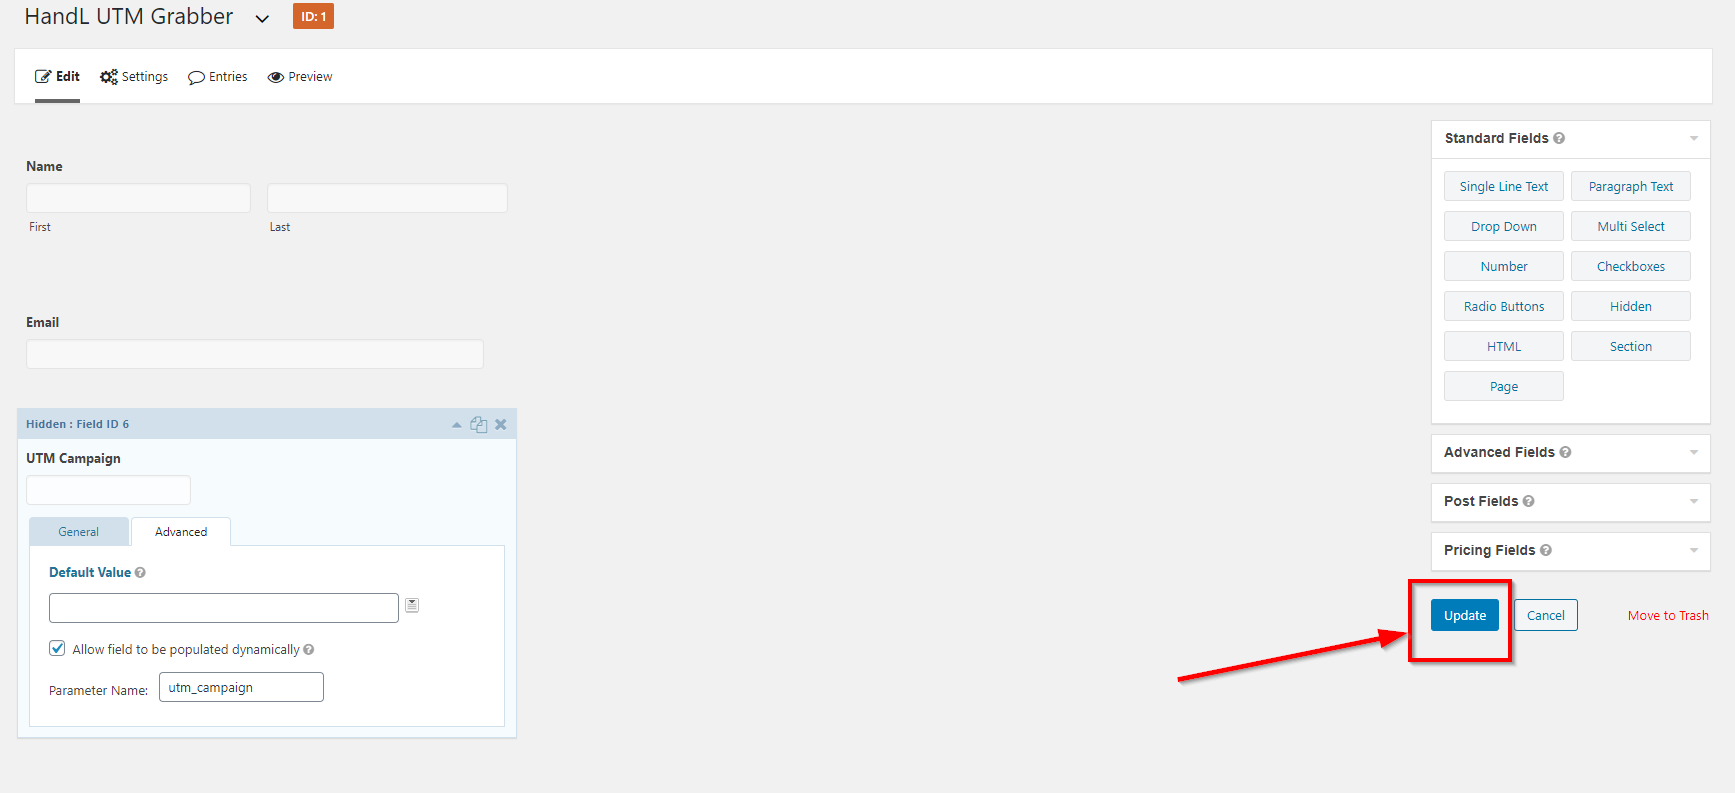
4. Click Hidden Field
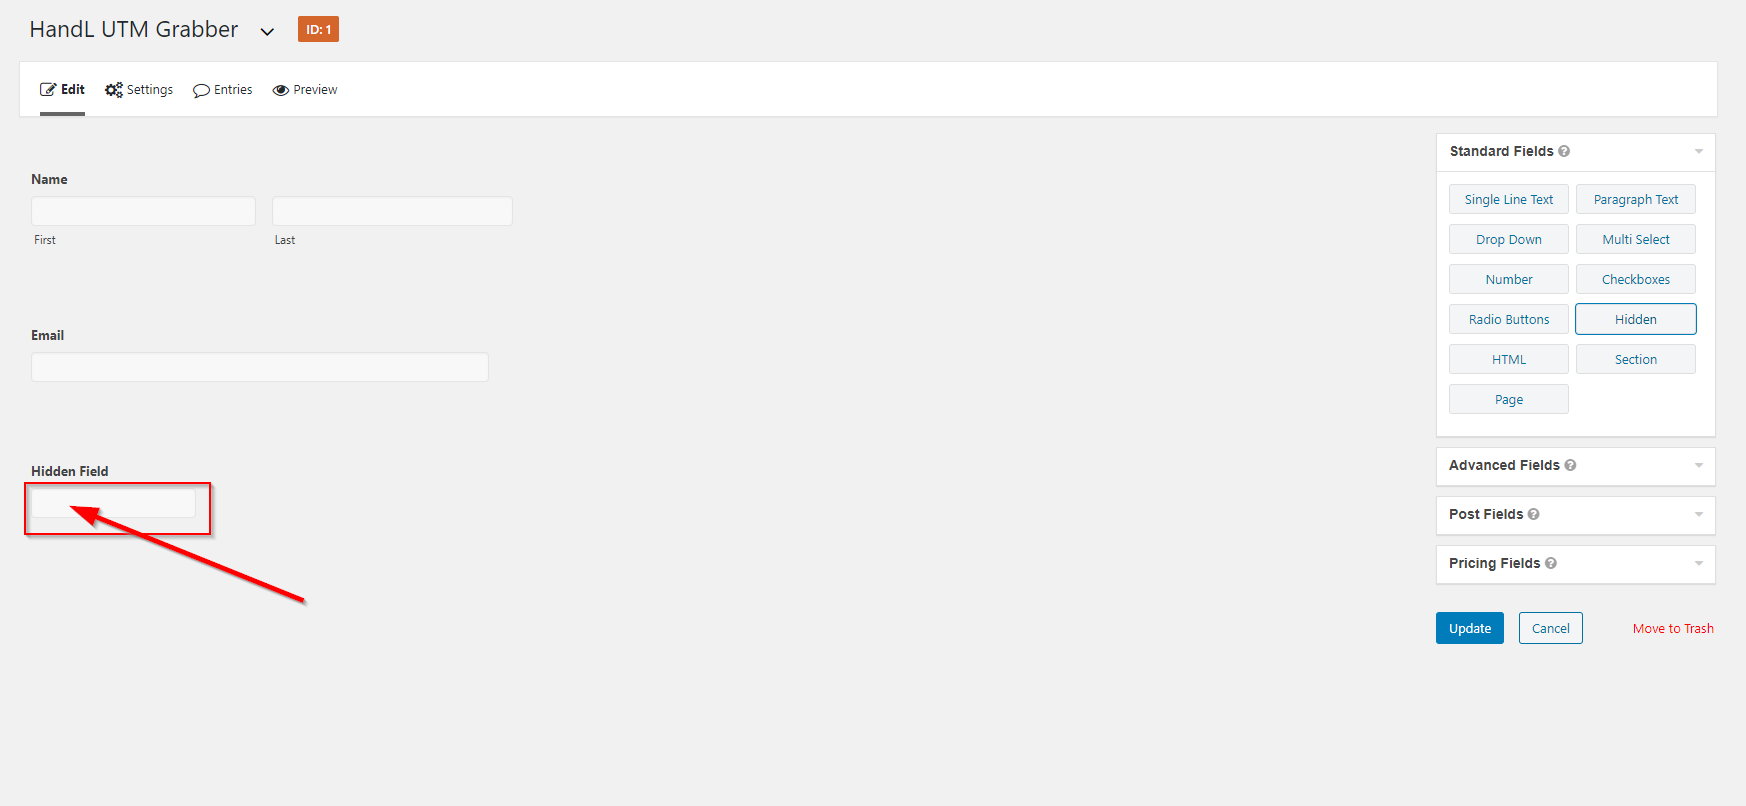
5. Give any name for your label
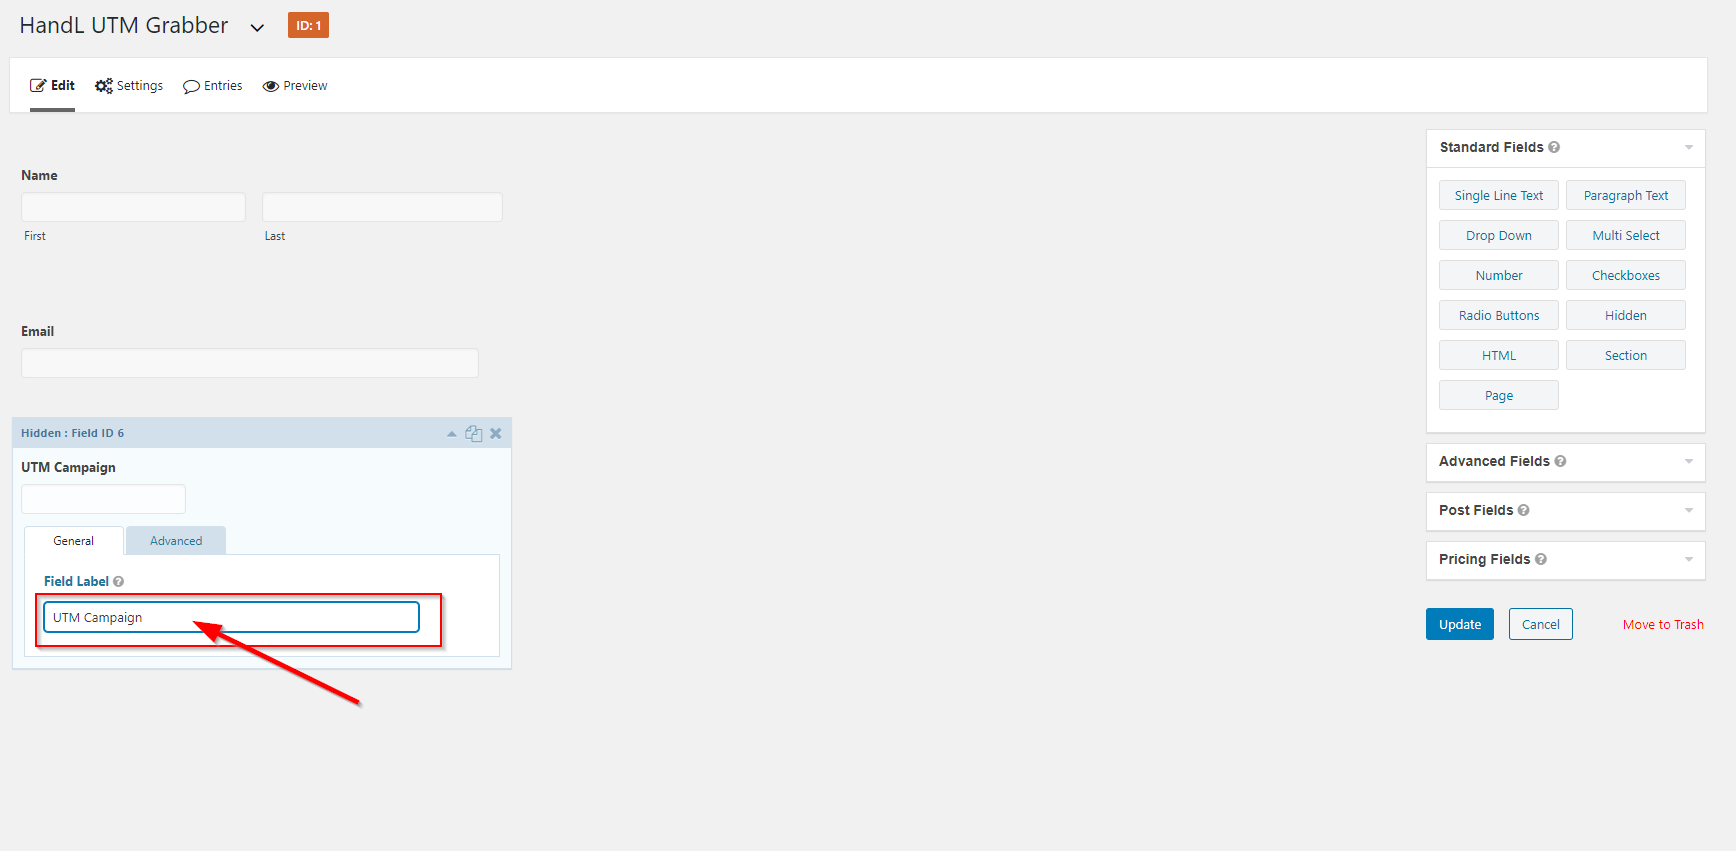
6. Click “Advanced” tab and check “Allow field to be populated dynamically” and use the shortcode in “Parameter Name”

7. Click Update Button
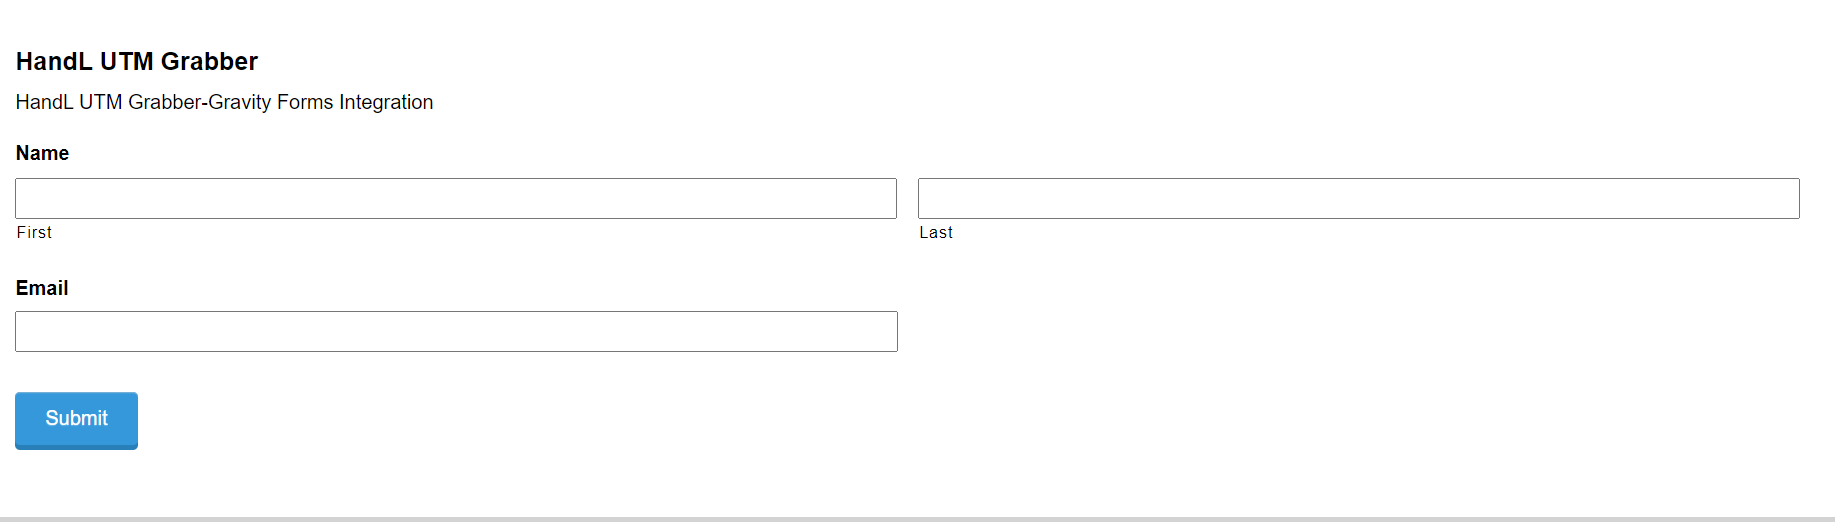
8. Preview of Your Form
Here we only illustrated utm_campaign. However you can use all the other parameters very similar way. See the list of all the parameters available here Native WP Shortcodes
Gravity Form to Facebook Conversion API (FB CAPI) - v3.1 - HandL UTM Grabber Guide
UTM attribution overview
This guide explains Gravity Form to Facebook Conversion API (FB CAPI) - v3.1 - HandL UTM Grabber Guide. It helps you send UTM and click ID data into automations, webhooks, reports, and connected tools and keep the marketing context needed for accurate reporting across forms, bookings, signups, and sales.
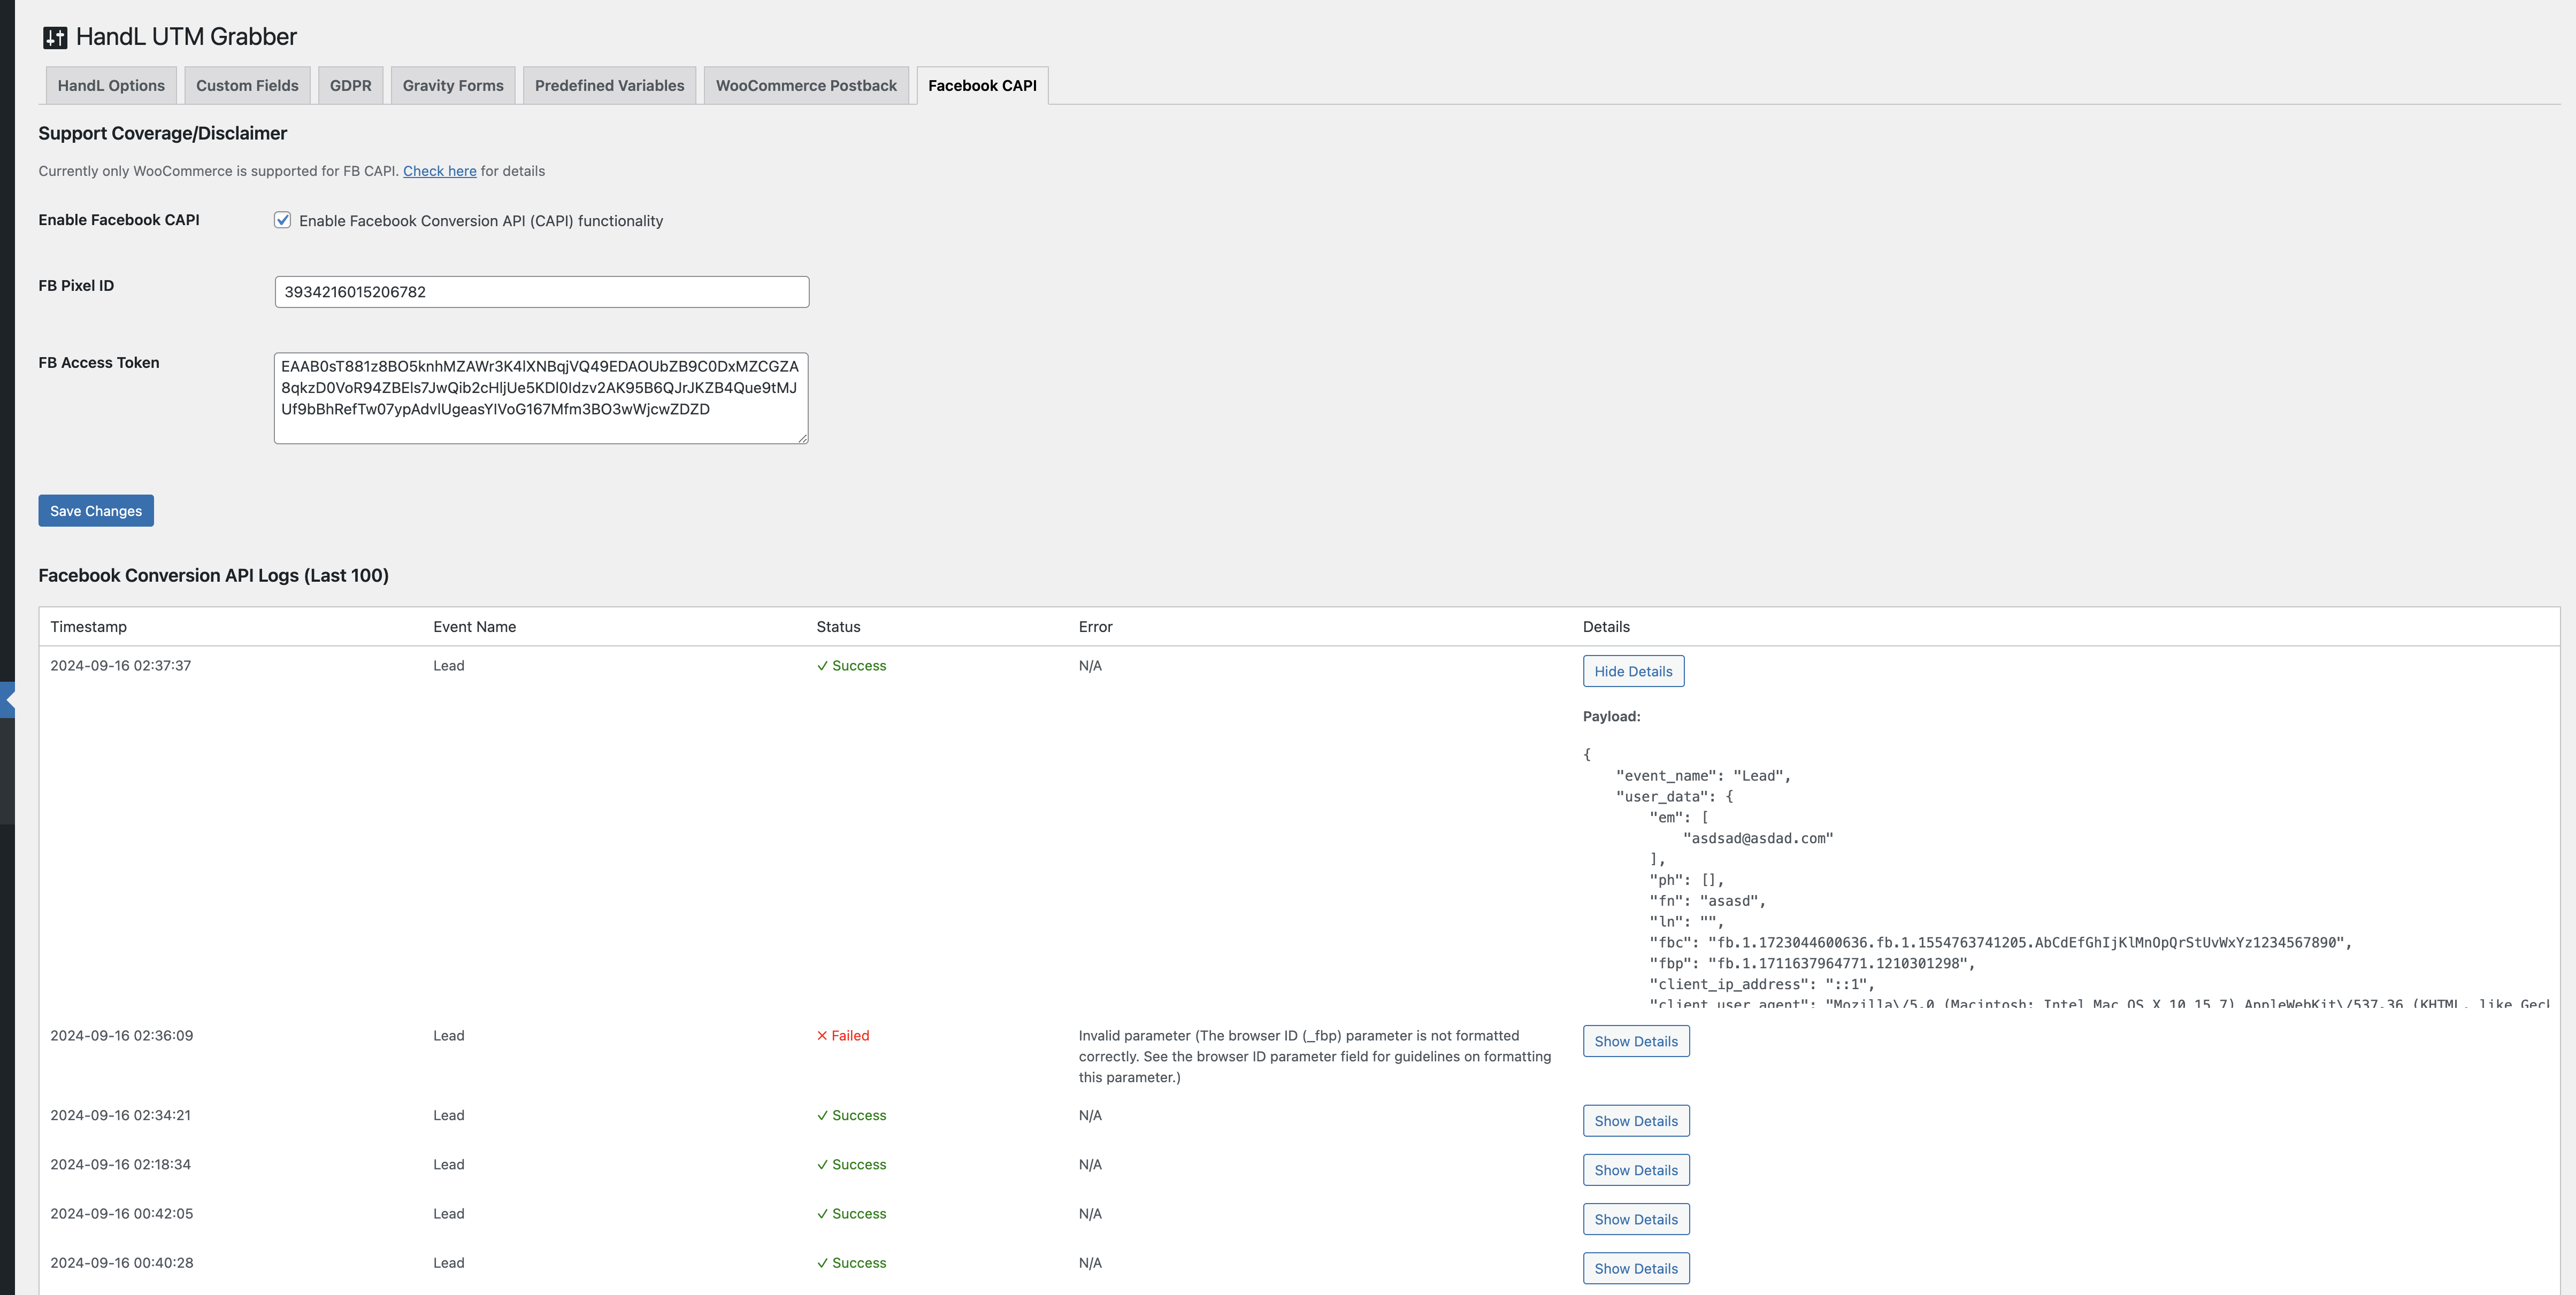
Click the Facebook CAPI menu in UTM and enter the Facebook pixel ID and access token

How to generate an Access Token: Go to your pixel, click "Settings," scroll down to the Conversion API section, and click "Generate Access Token."

Once you have set everything up, keep monitoring your events and watch your event match increases to the high 8-9s.

When you are ready, enable the feature by checking the "Enable Facebook Conversion API (CAPI)" functionality.

After that, as soon as one of your forms is submitted, the Lead event will be sent to Facebook as well.
You can check the events in the Facebook Conversion API Logs after they are sent. If there is any failure, it will be reported there, detailing what went wrong.