Make Integromat UTM Tracking Integration
Connect HandL UTM Grabber to Make Integromat so WordPress leads can pass UTM source, medium, campaign, click IDs, and referrer data into automated workflows.
- Contact Forms 7 to Integromat - HandL UTM Grabber Guide
- Contact Form 7 to Integromat -Video Tutorial - HandL UTM Grabber Guide
- Gravity Forms To Integromat - HandL UTM Grabber Guide
- Ninja Forms To Integromat - HandL UTM Grabber Guide
Contact Forms 7 to Integromat - HandL UTM Grabber Guide
UTM attribution overview
This guide explains Contact Forms 7 to Integromat - HandL UTM Grabber Guide. It helps you send UTM and click ID data into automations, webhooks, reports, and connected tools and keep the marketing context needed for accurate reporting across forms, bookings, signups, and sales.
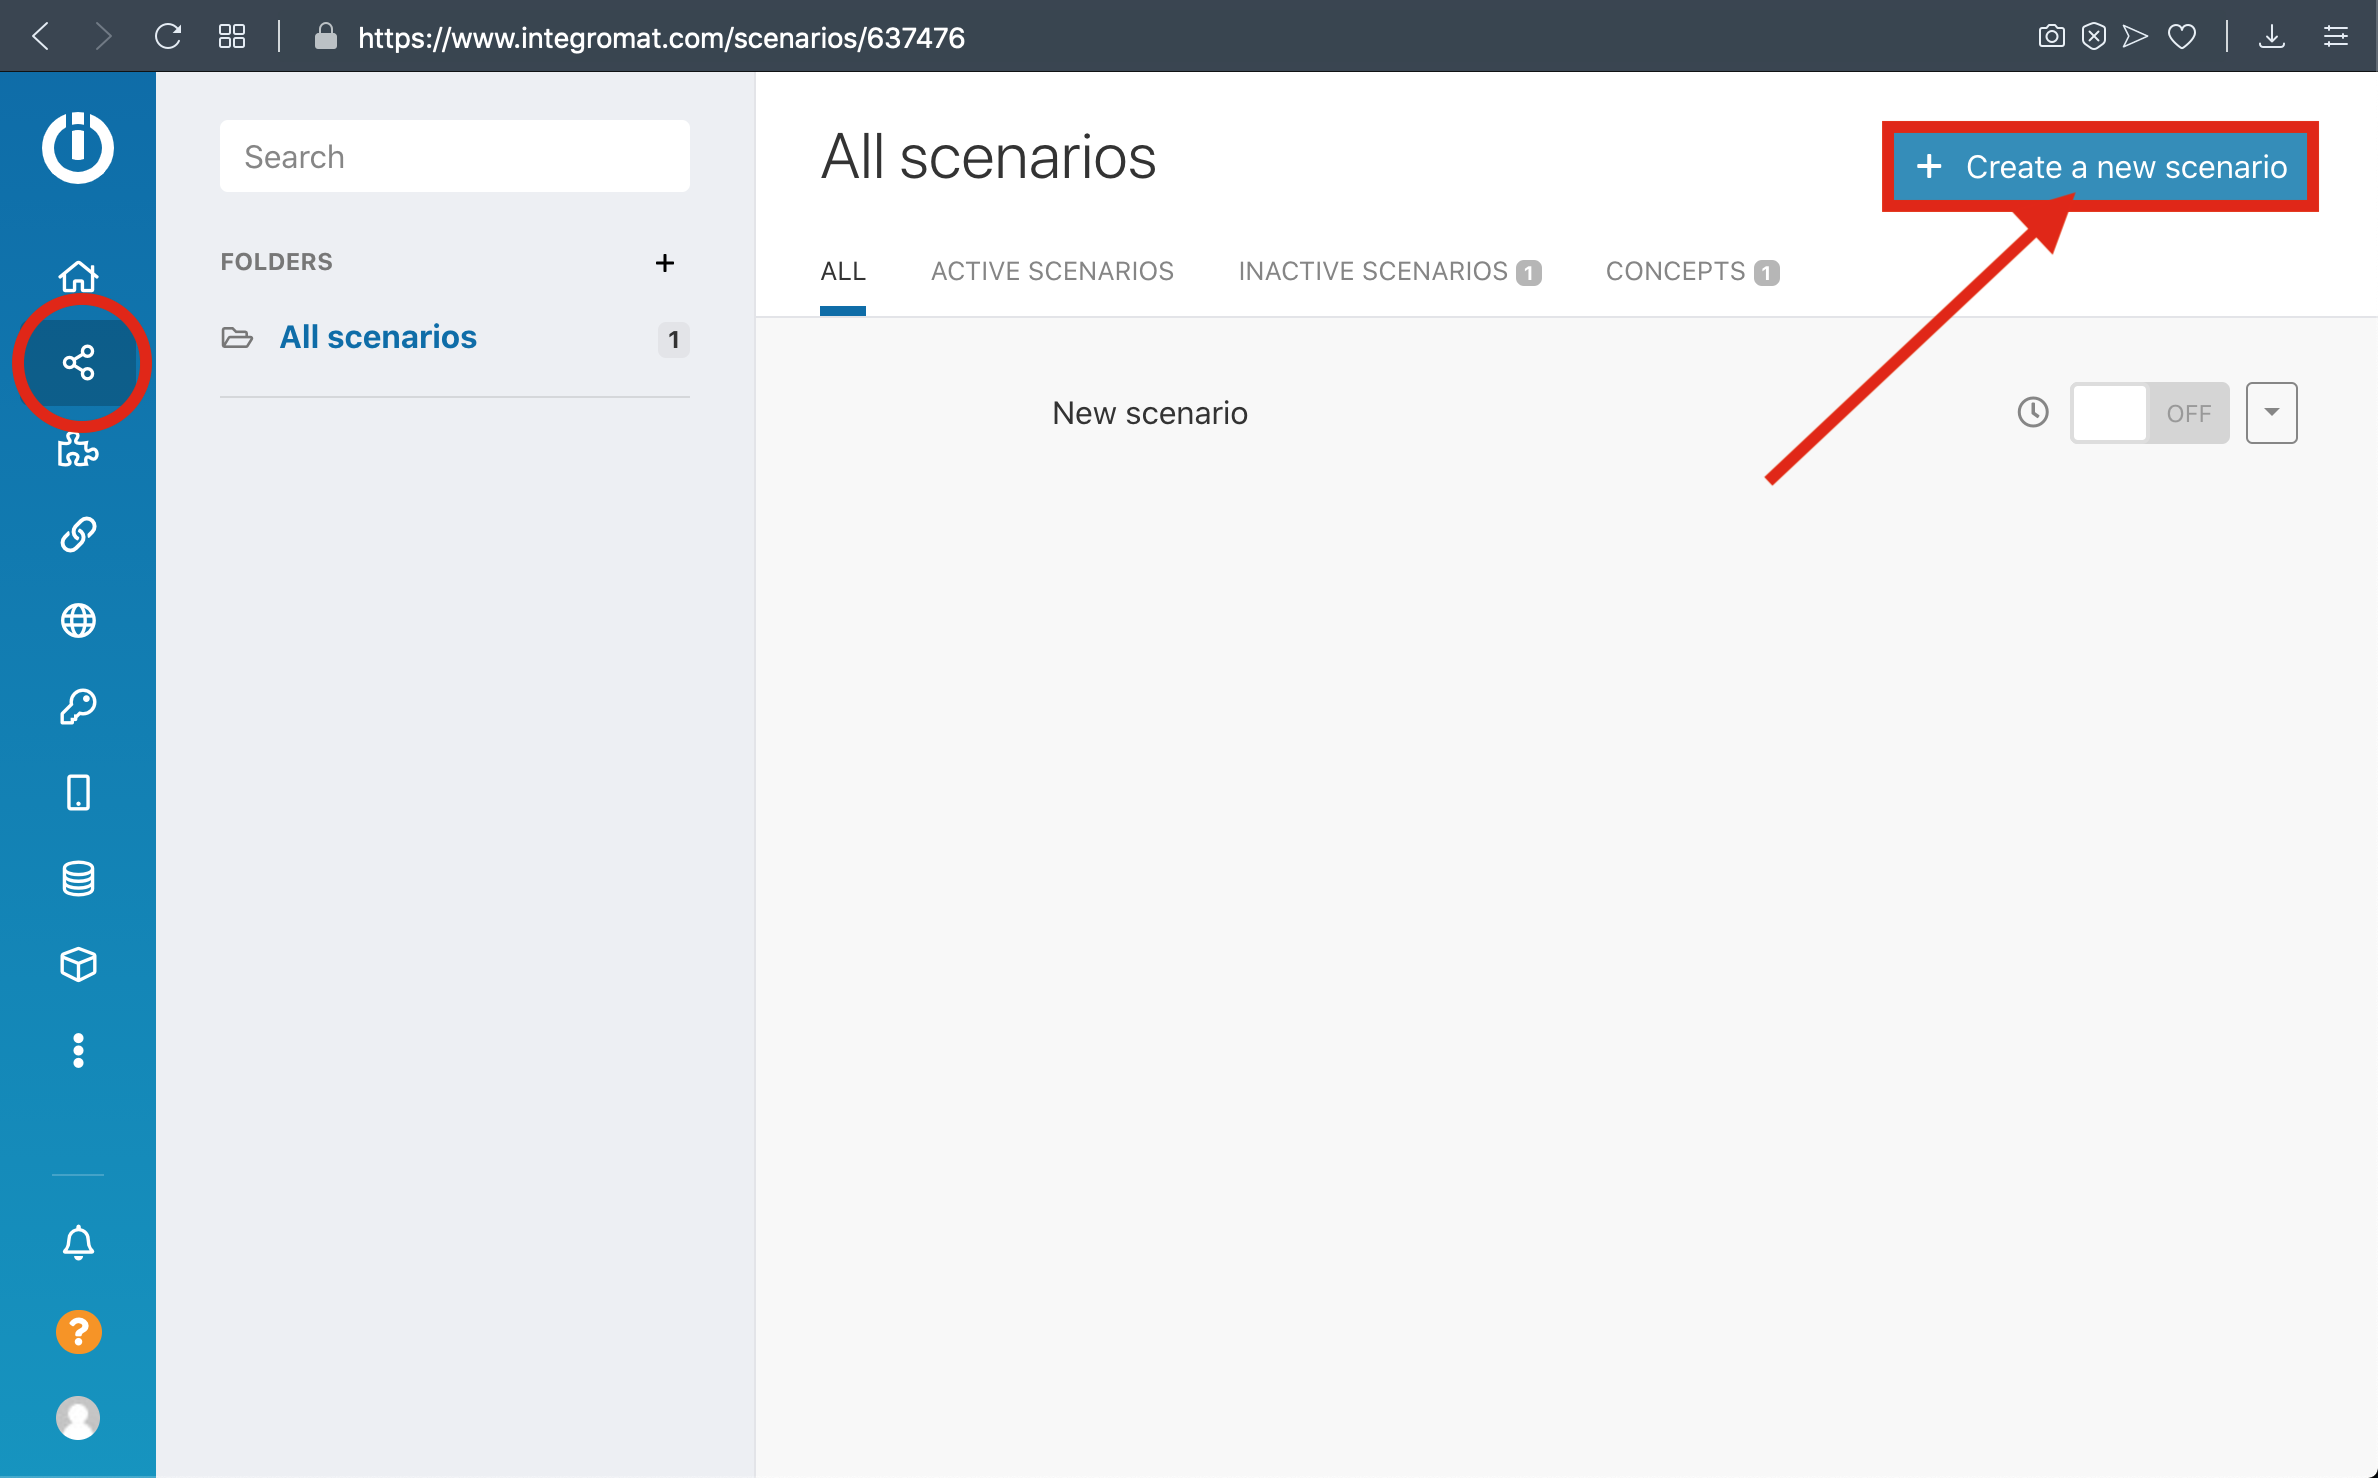
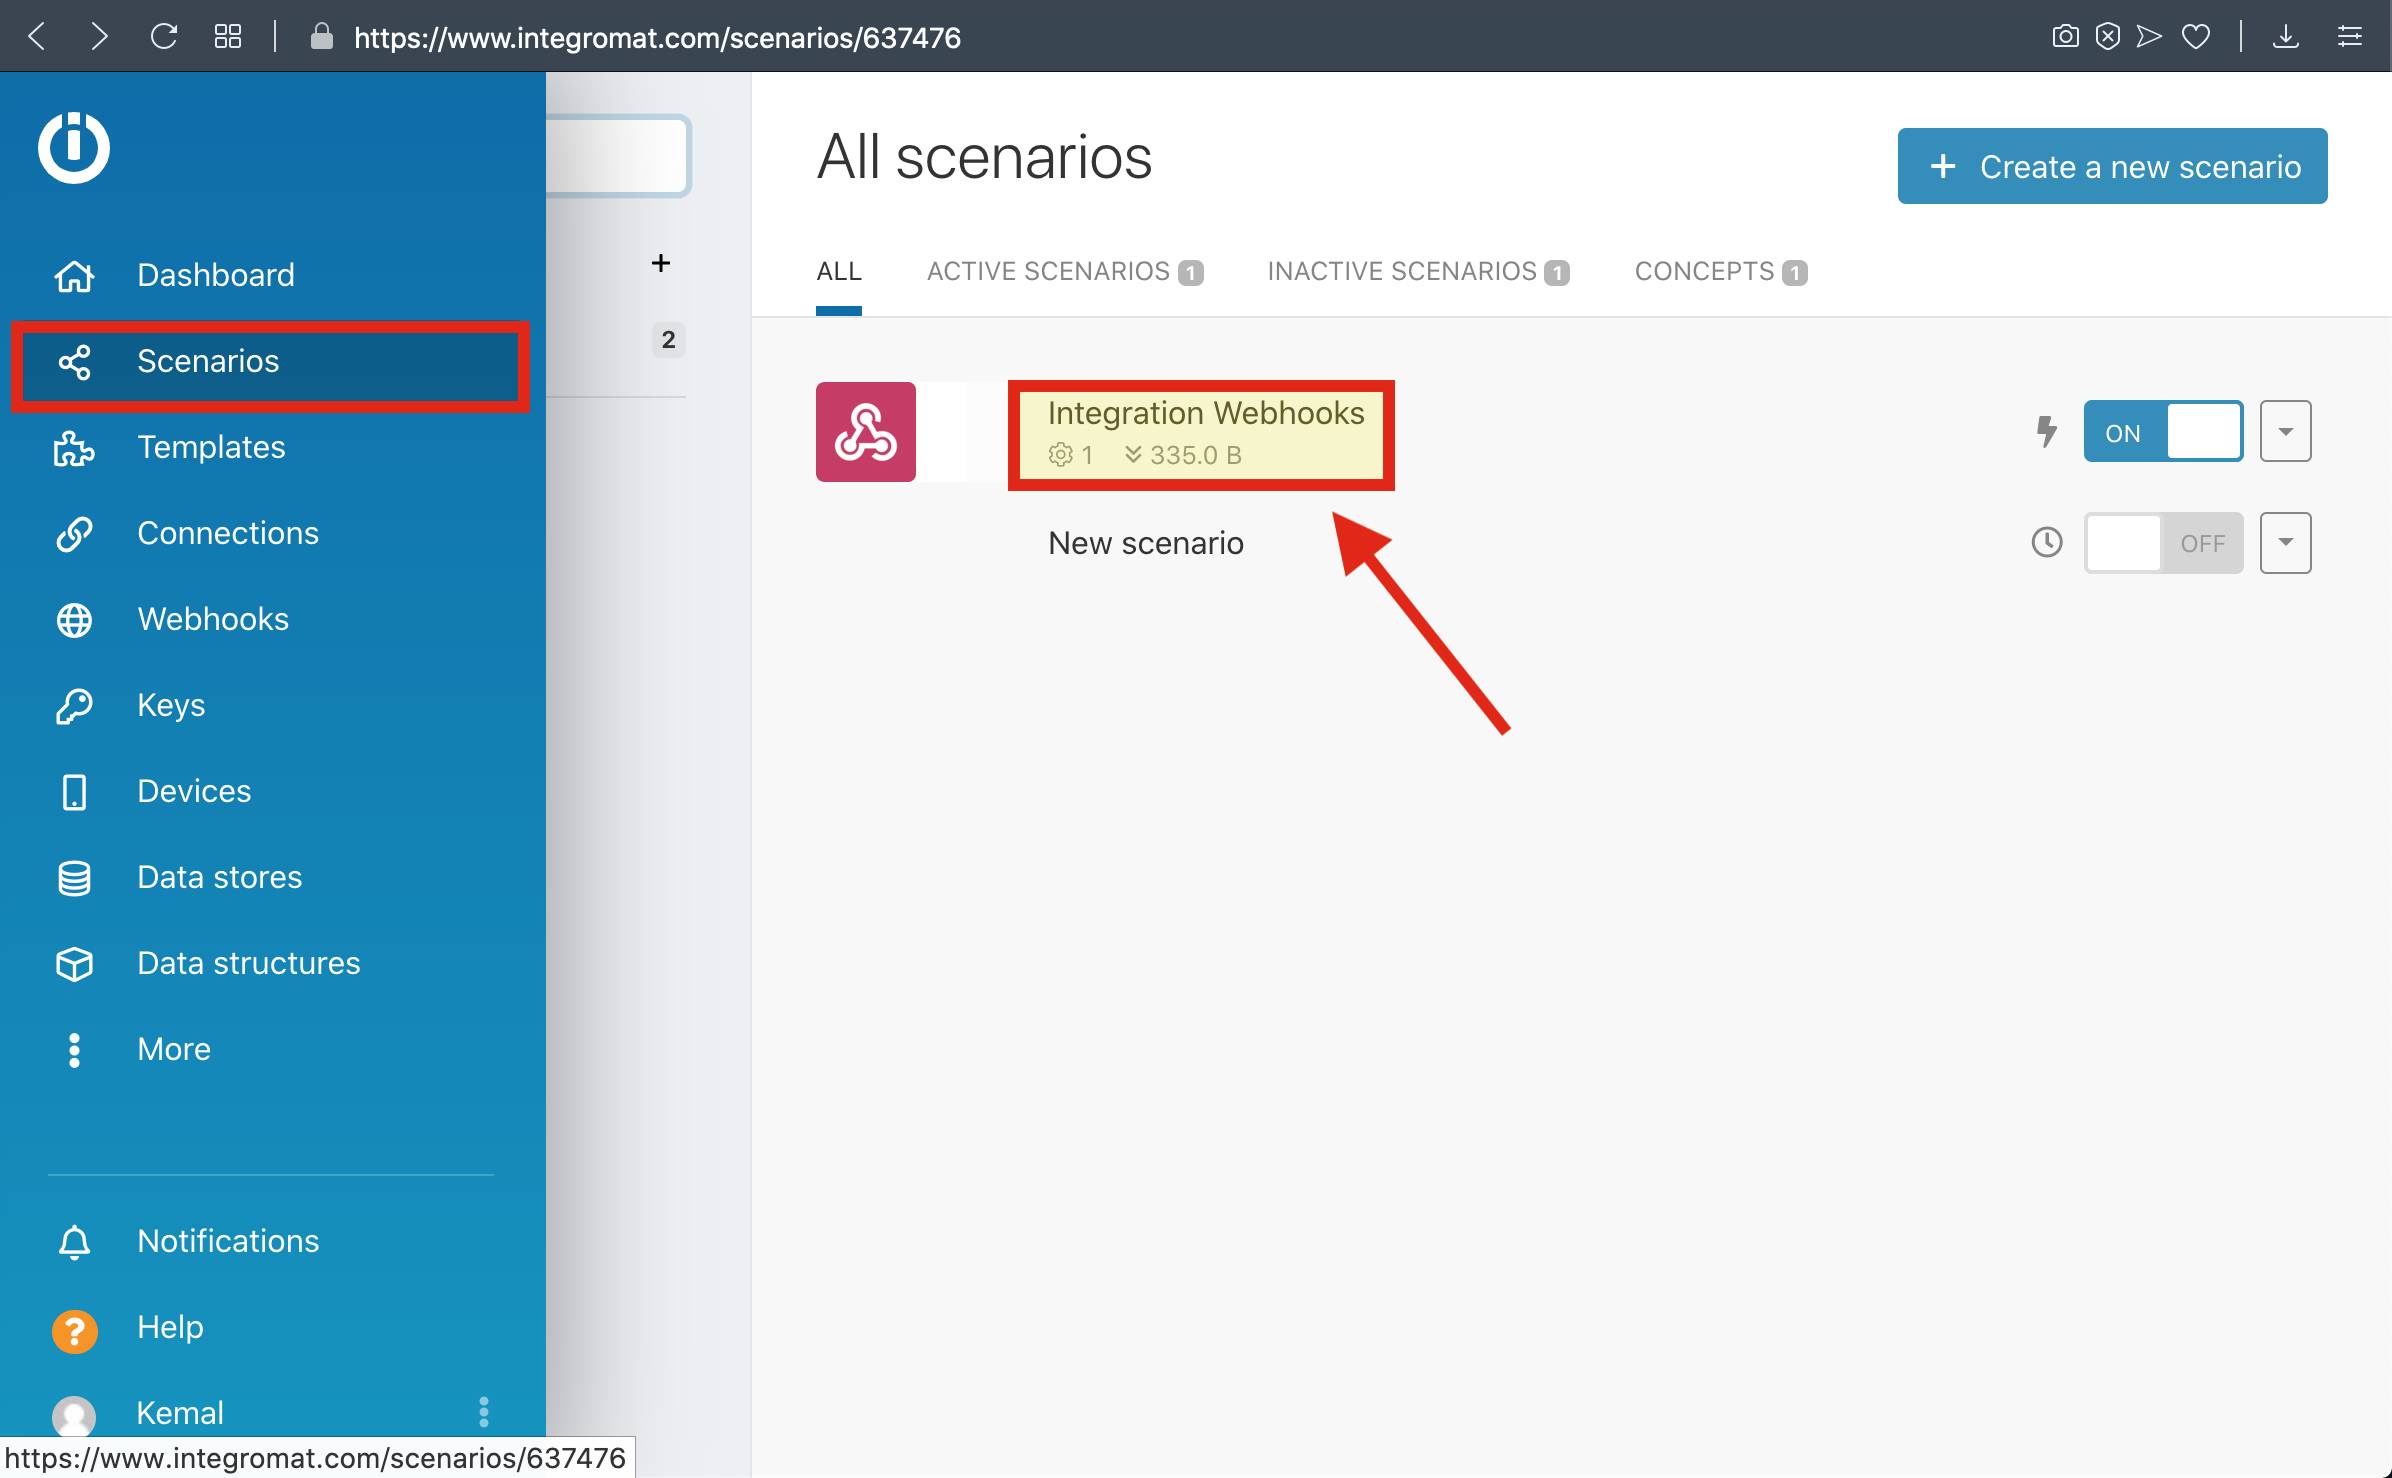
1-) Create a new Scenario
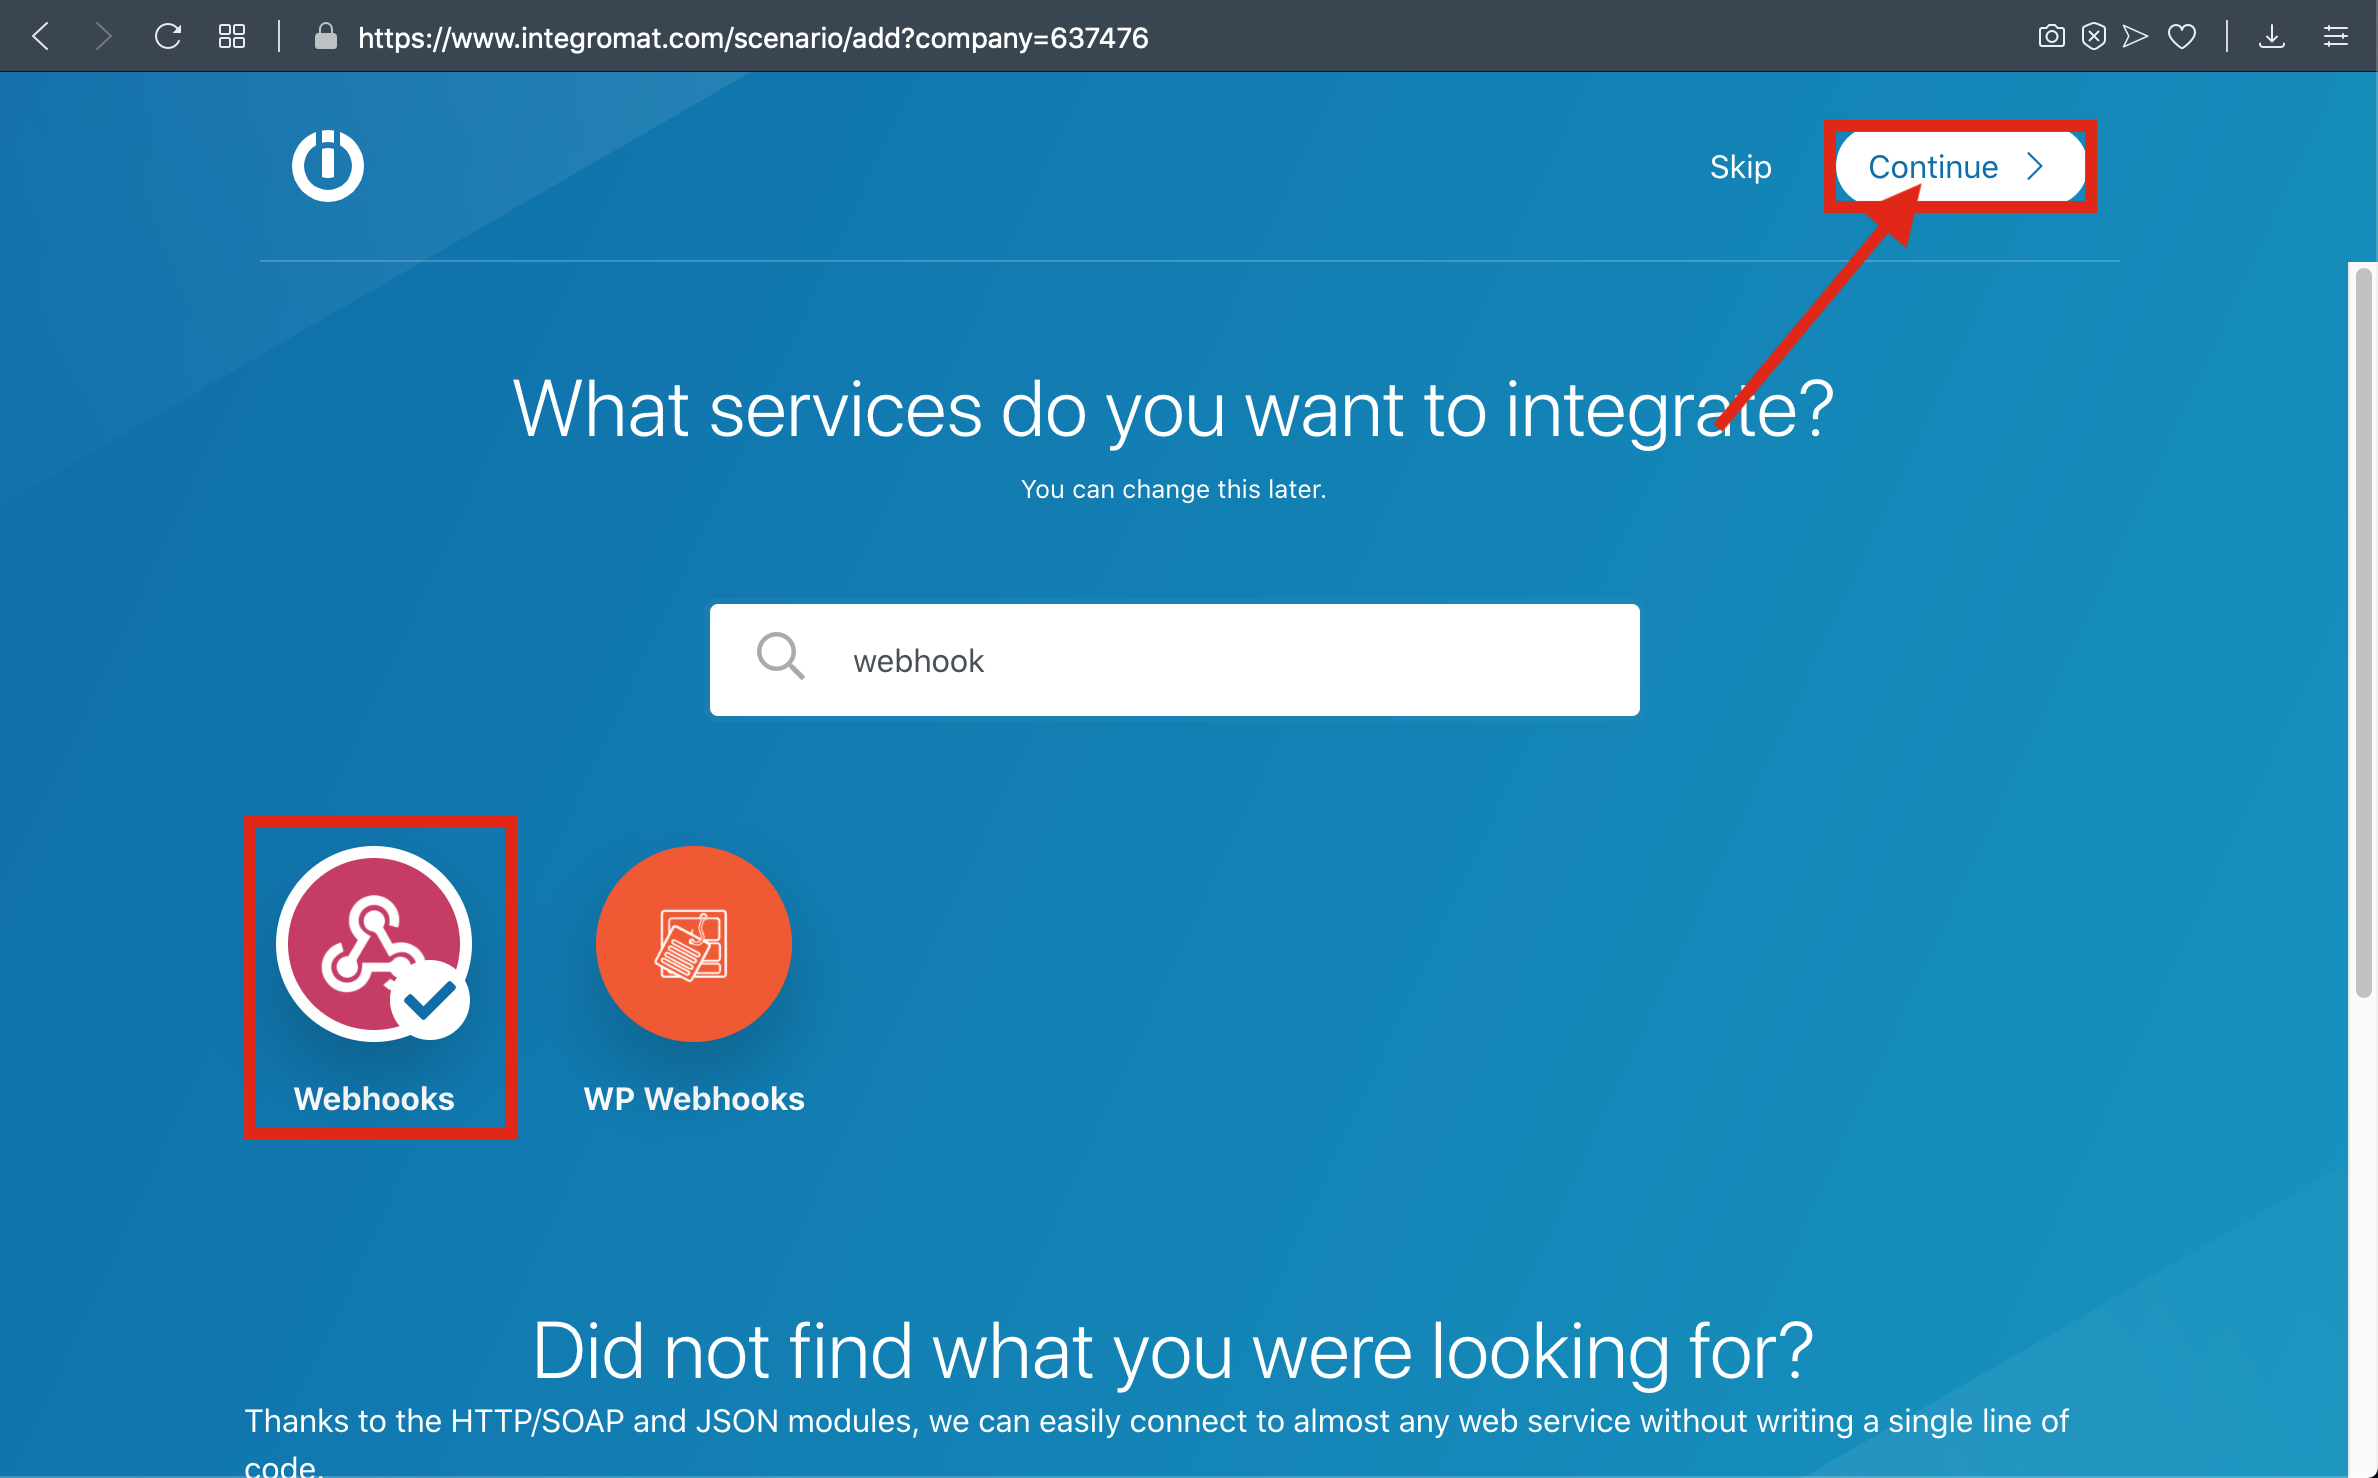
2-) Select Webhook and Click Continue

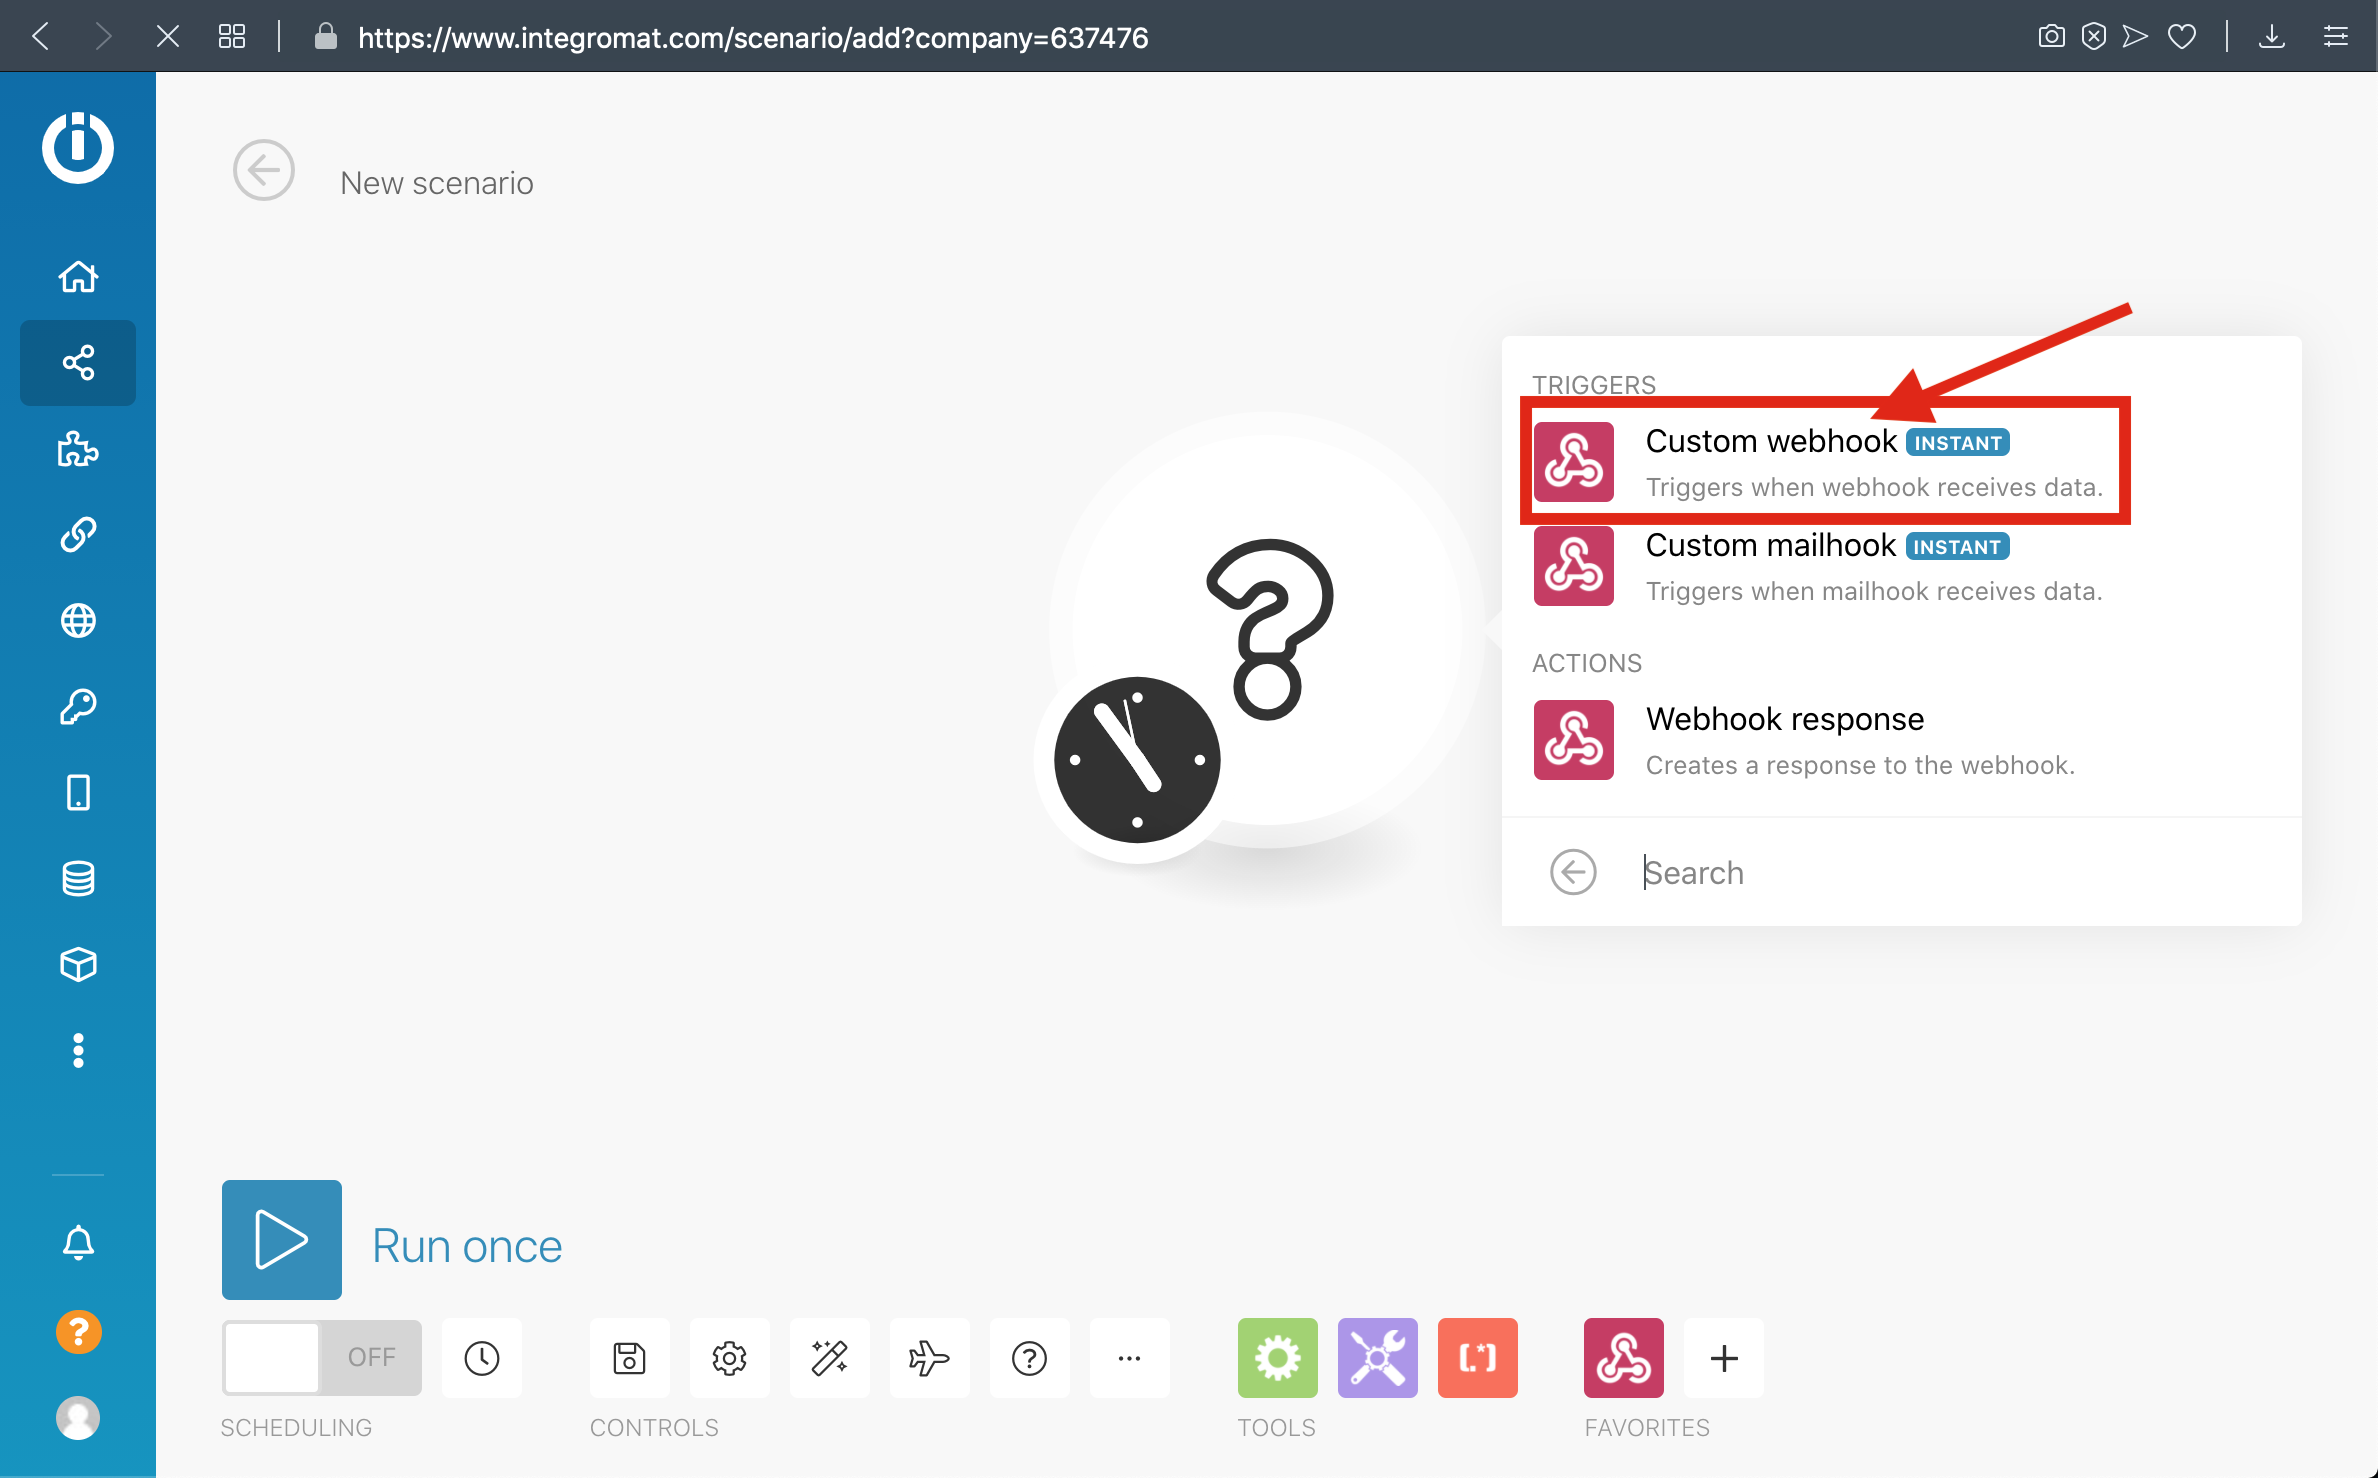
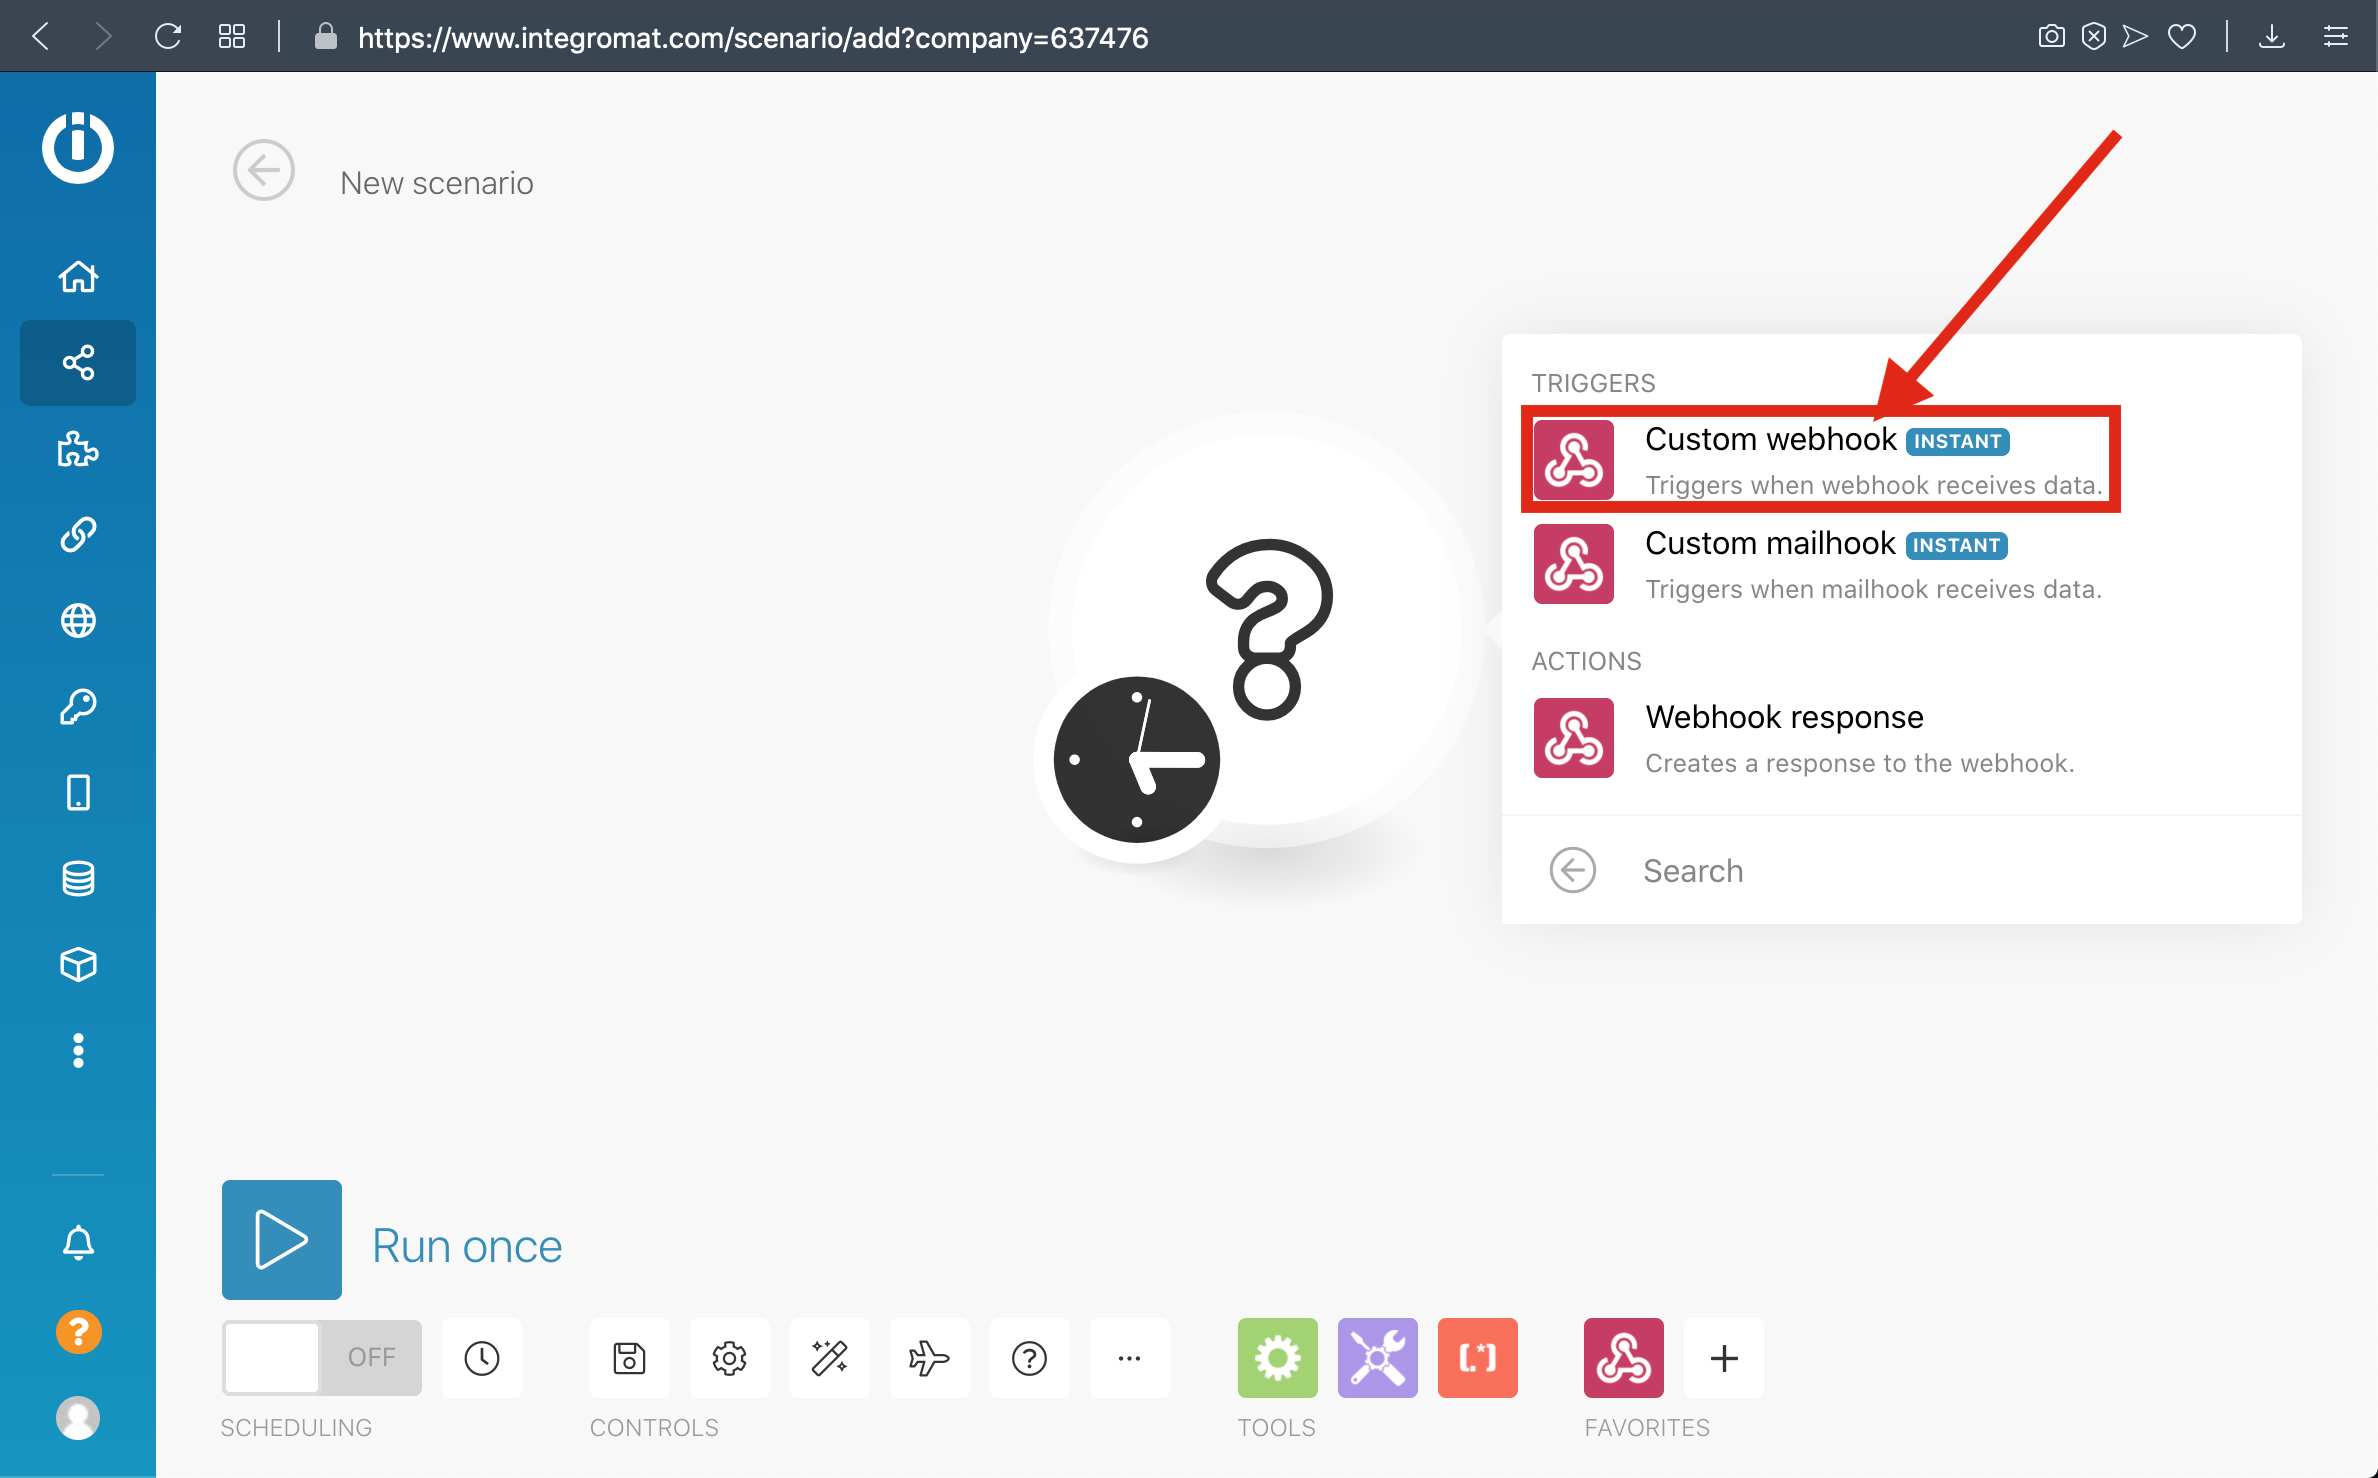
3-) Select Custom Webhook
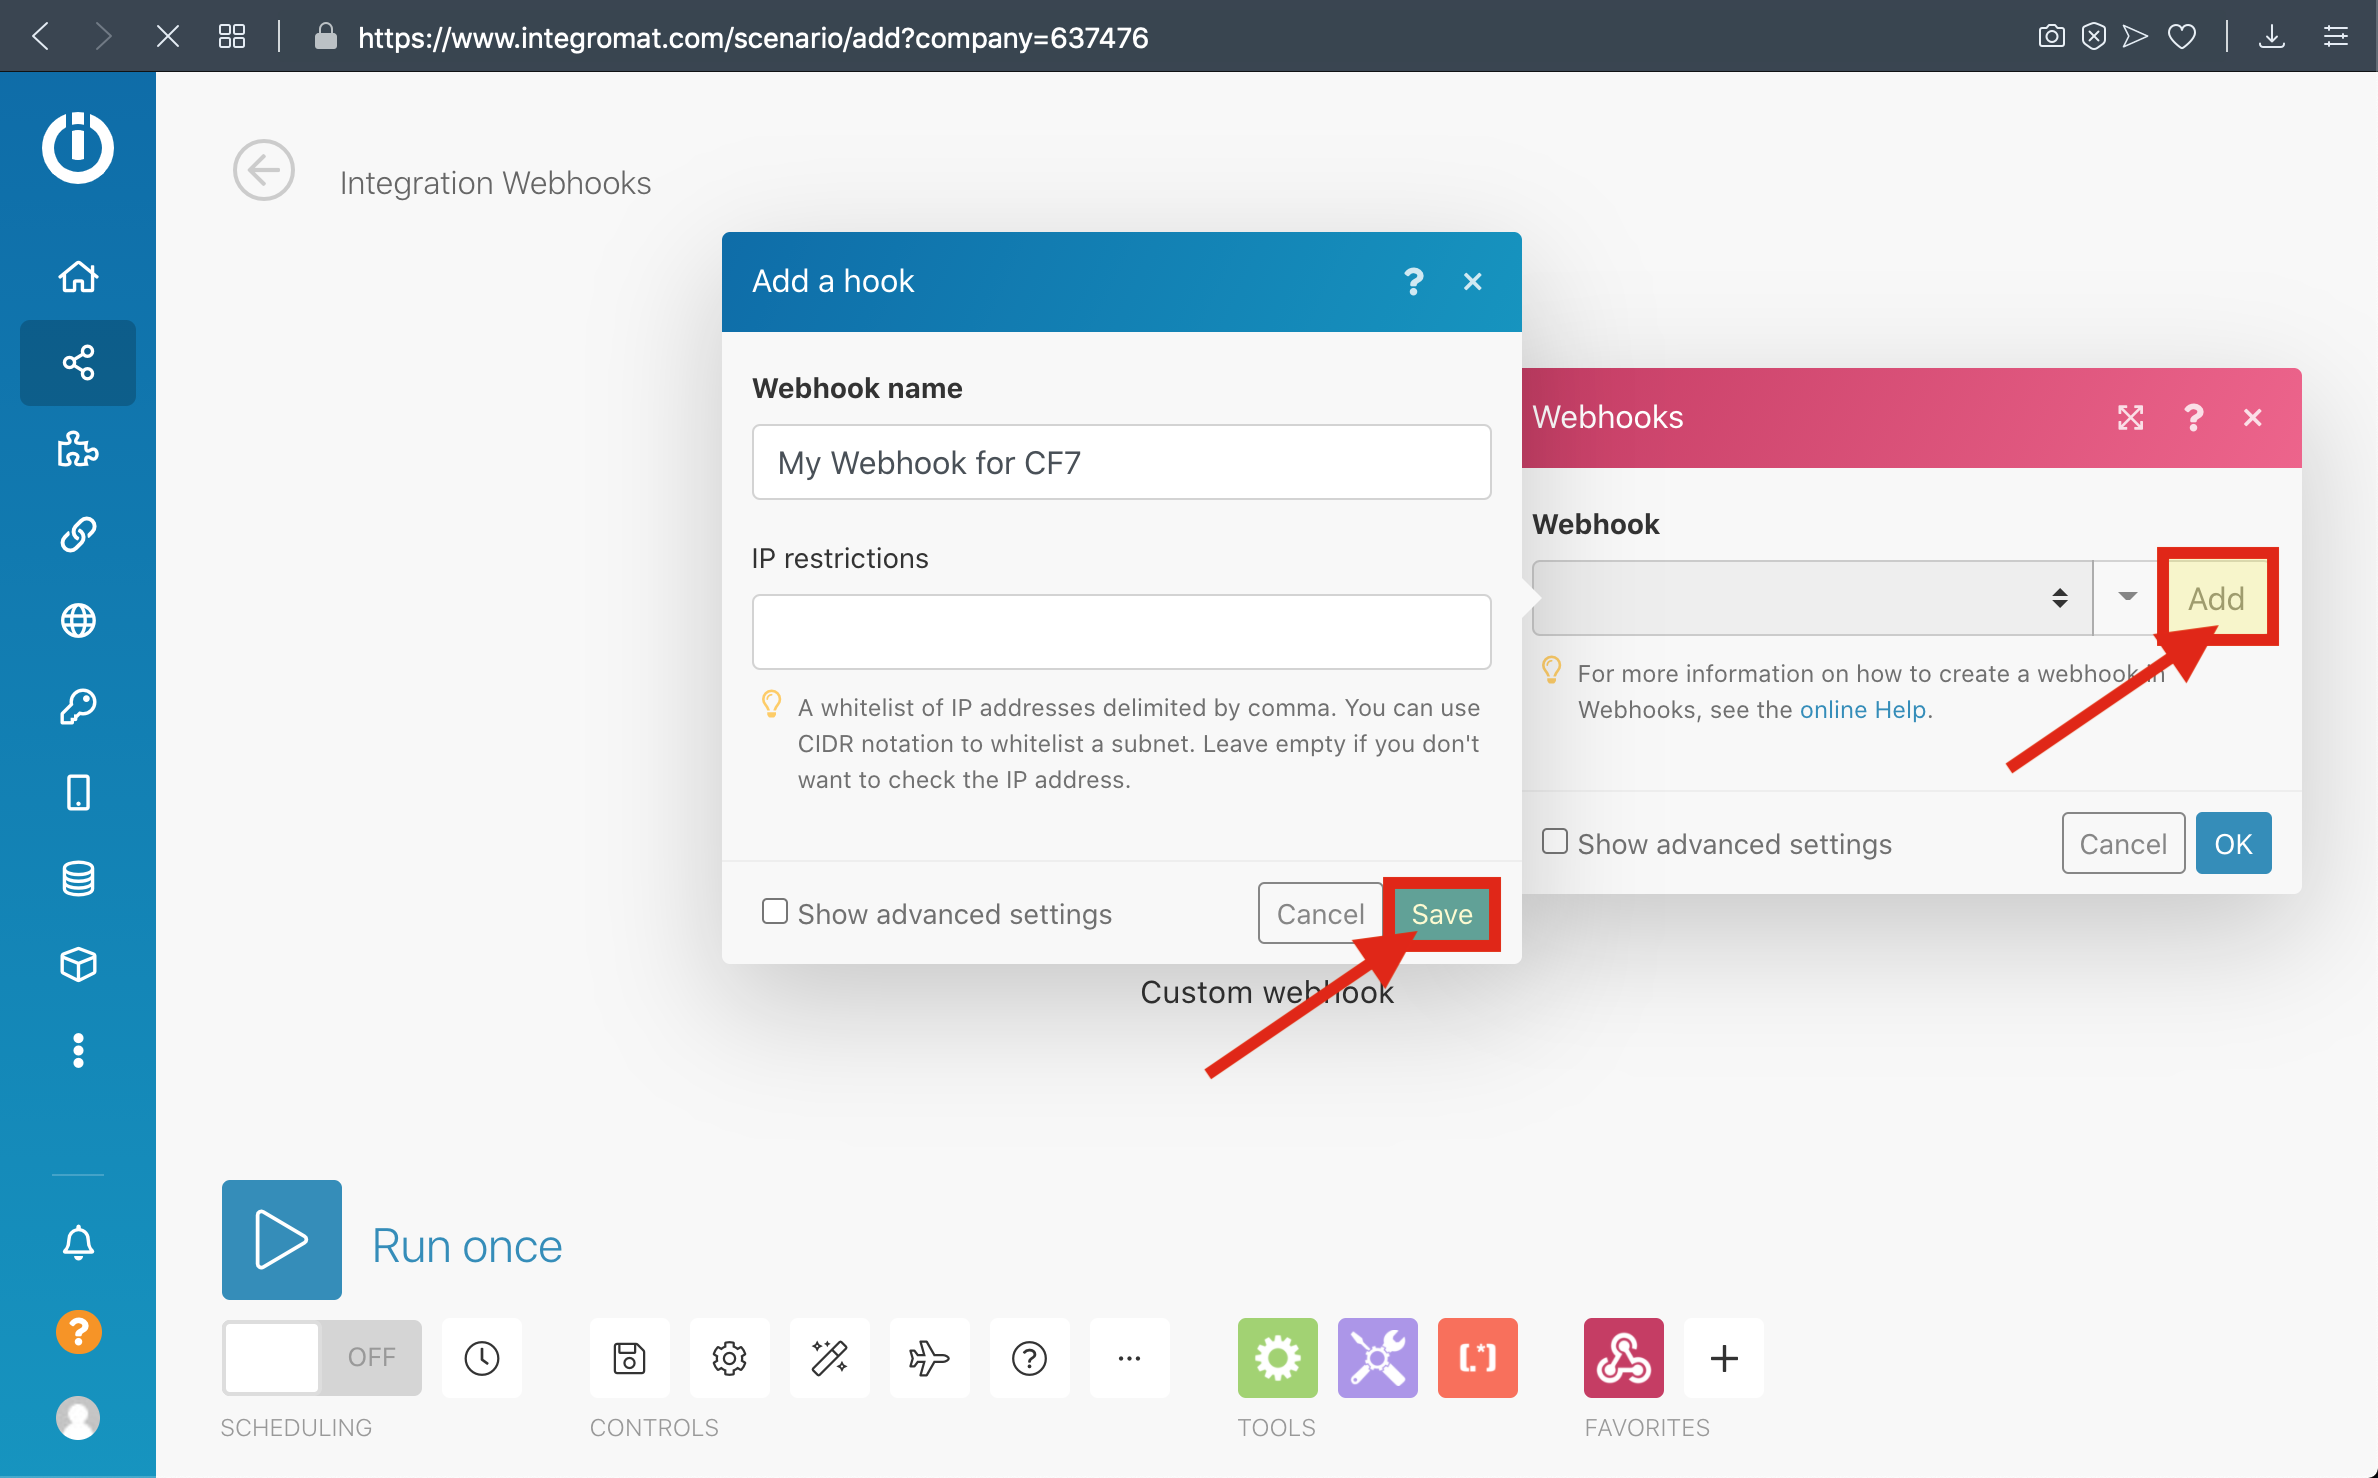
4-) Click Add and Enter your Webhook Name then save it
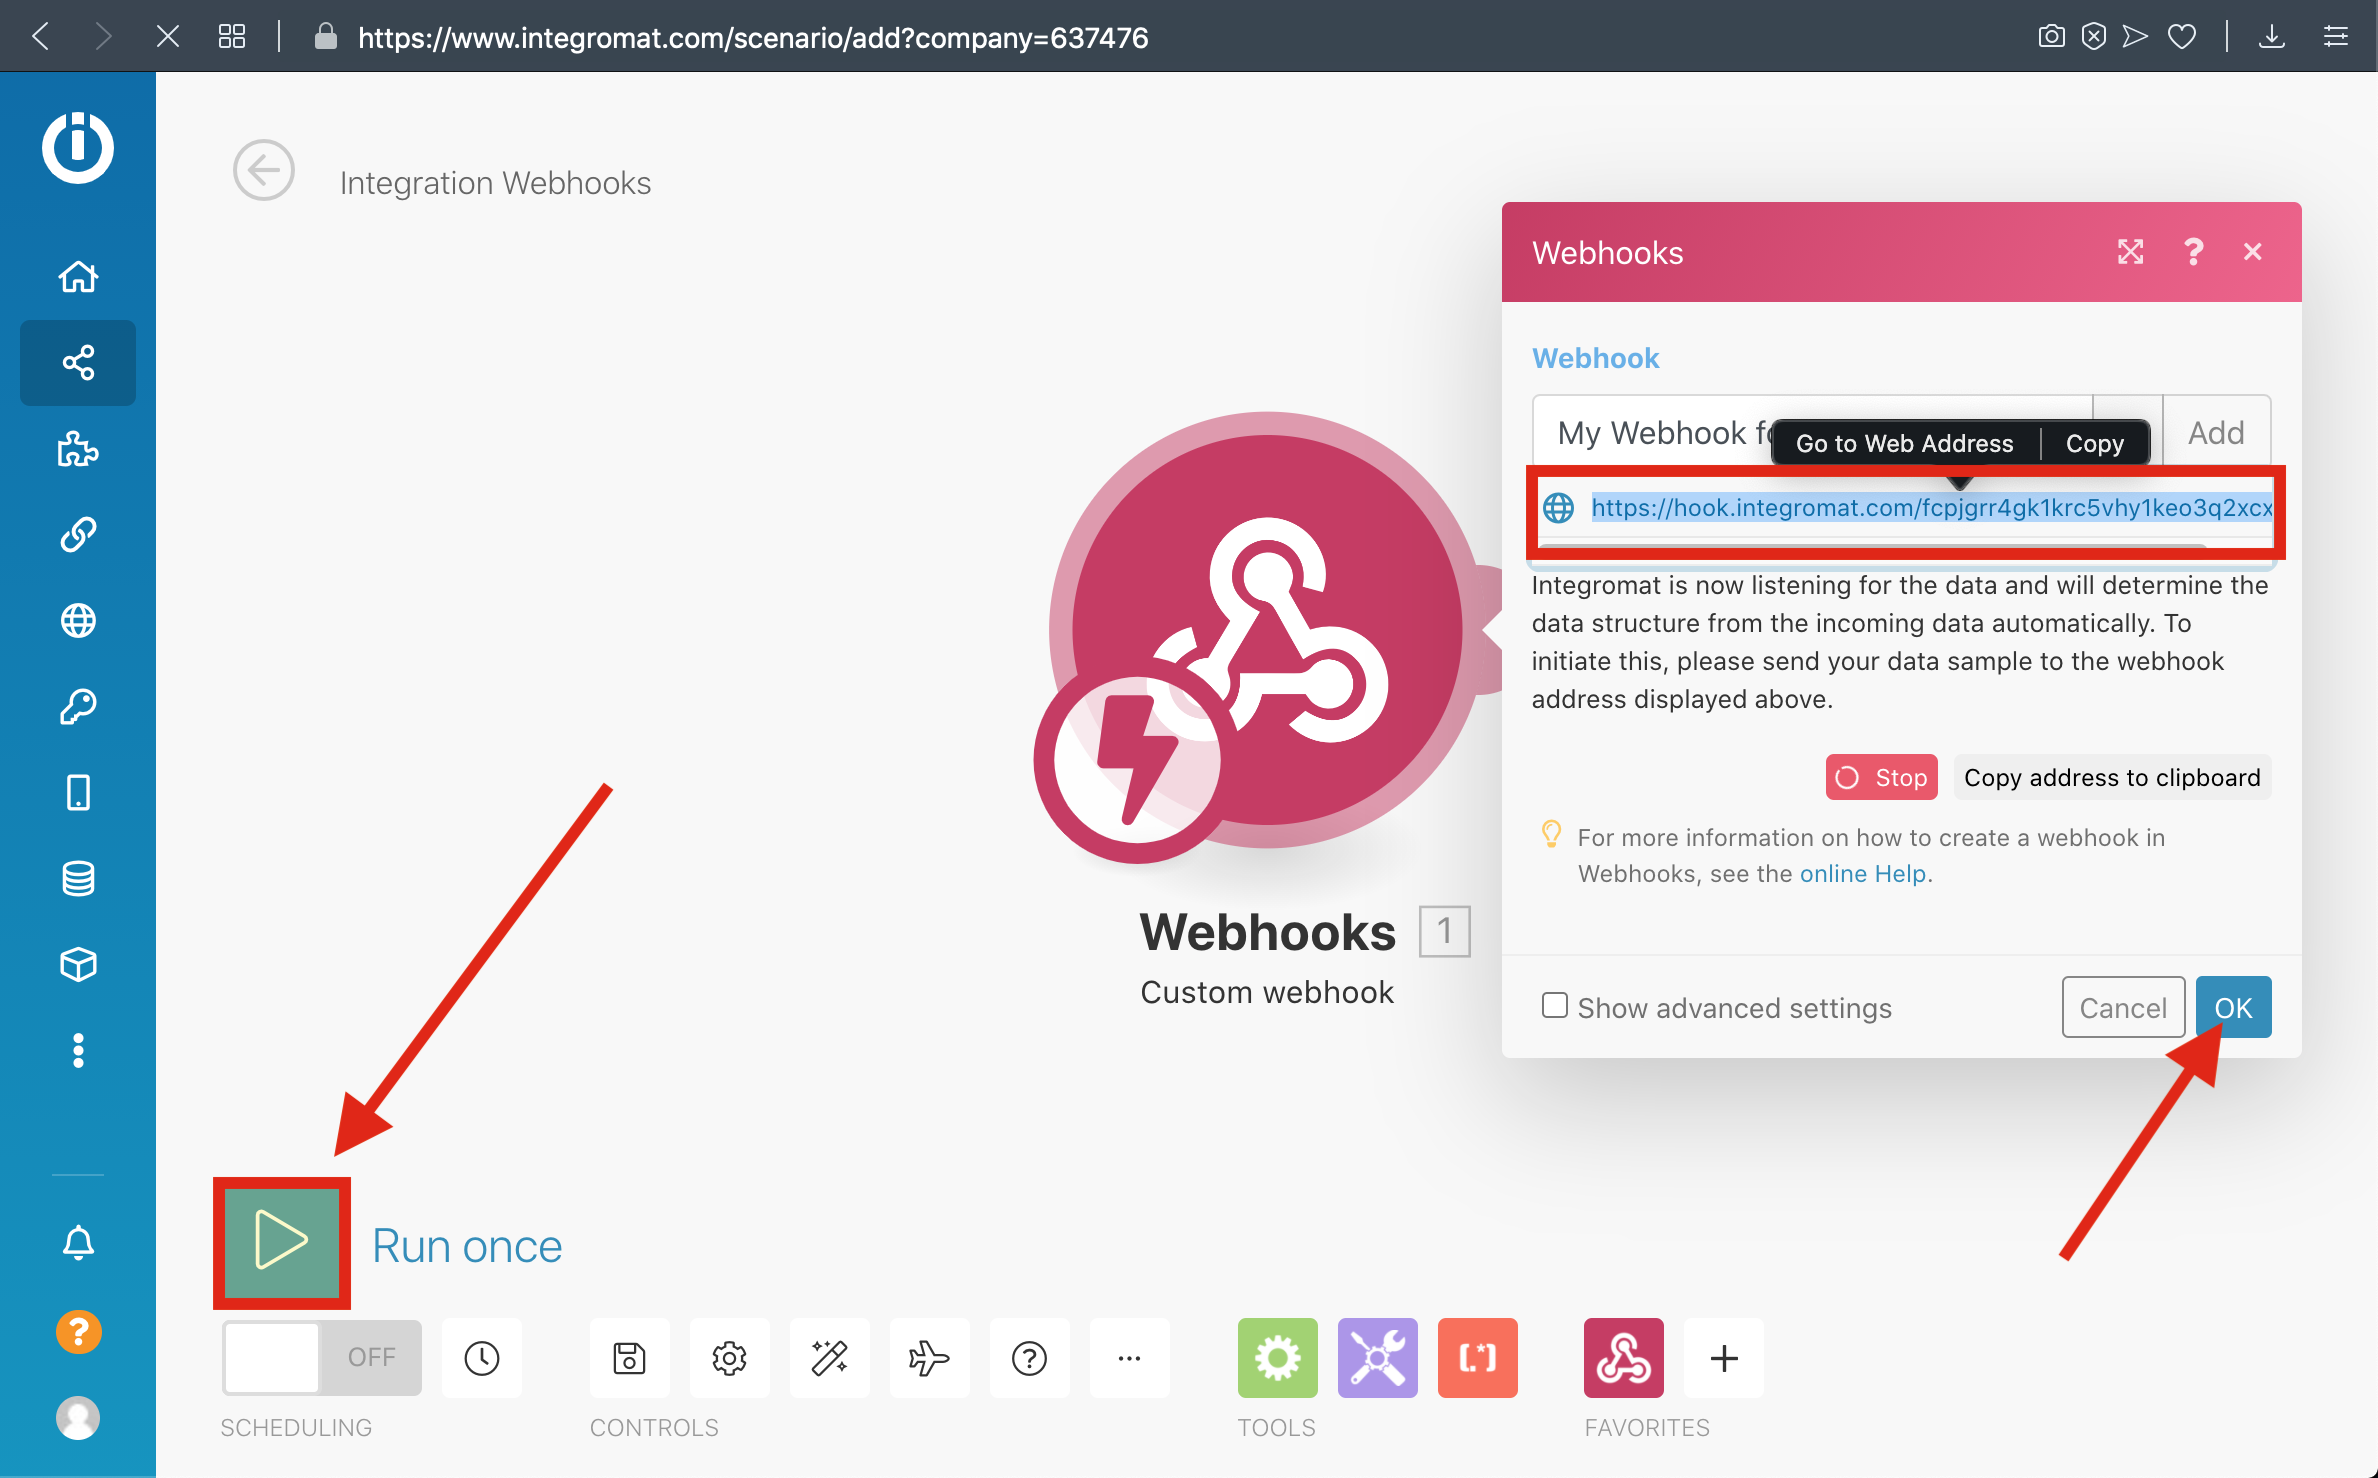
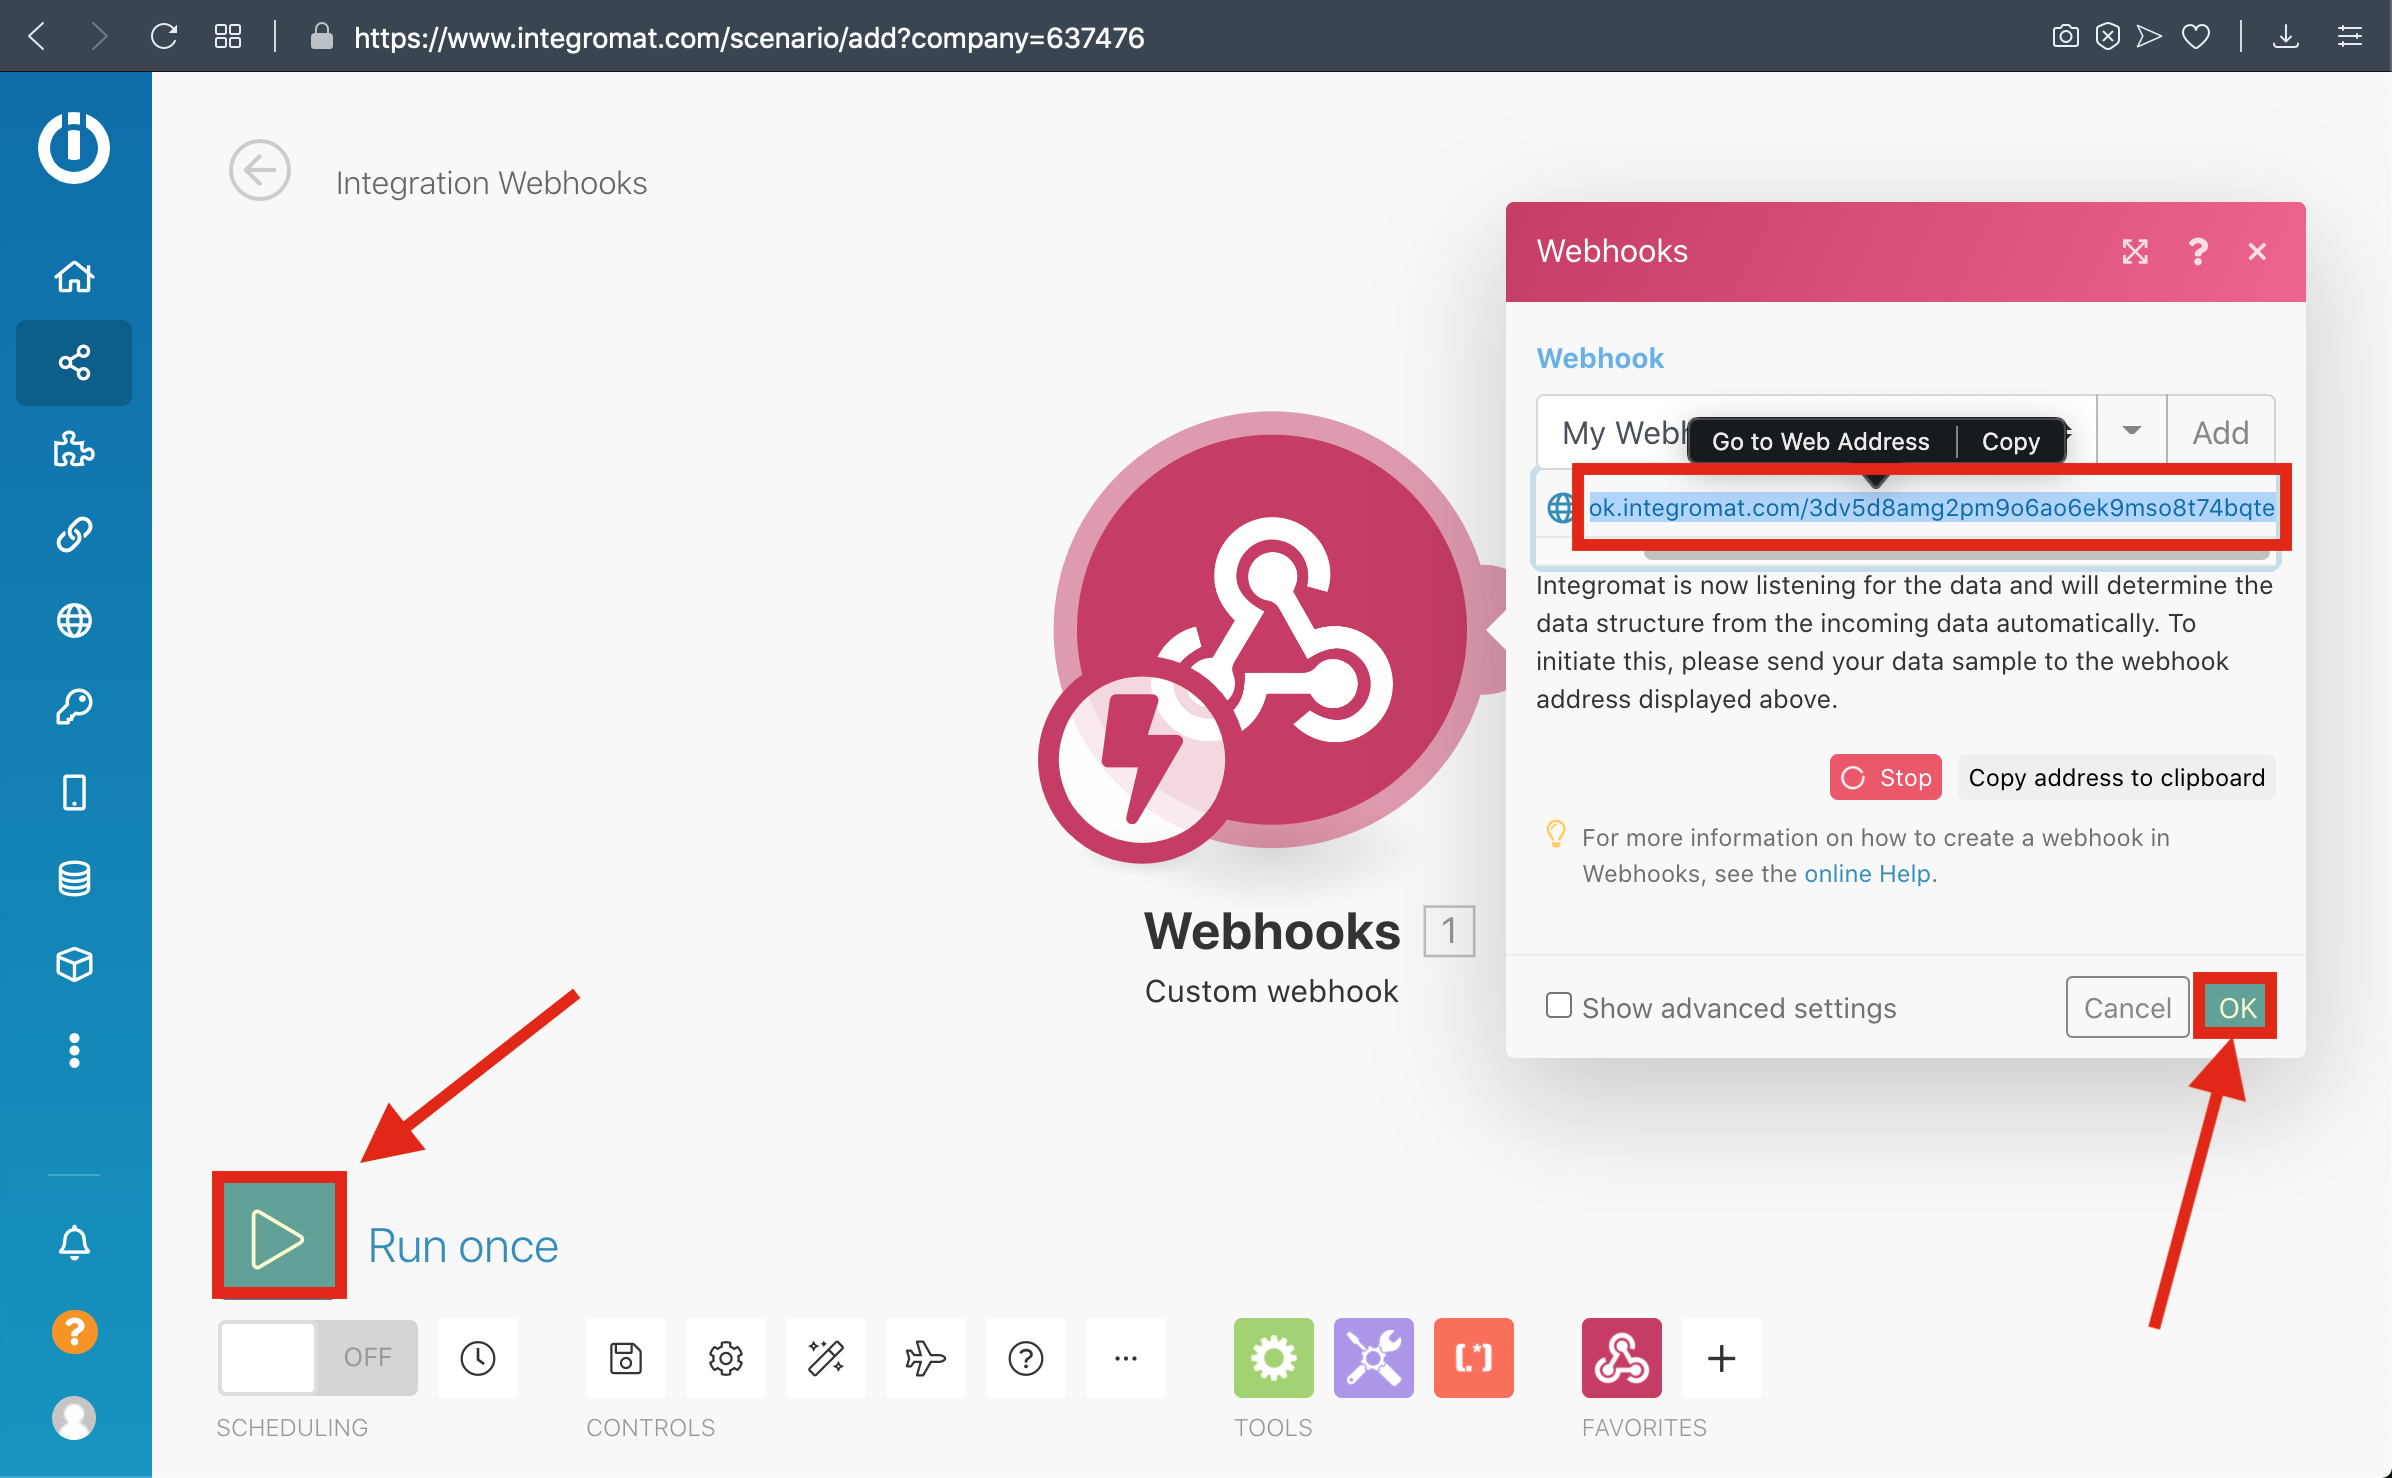
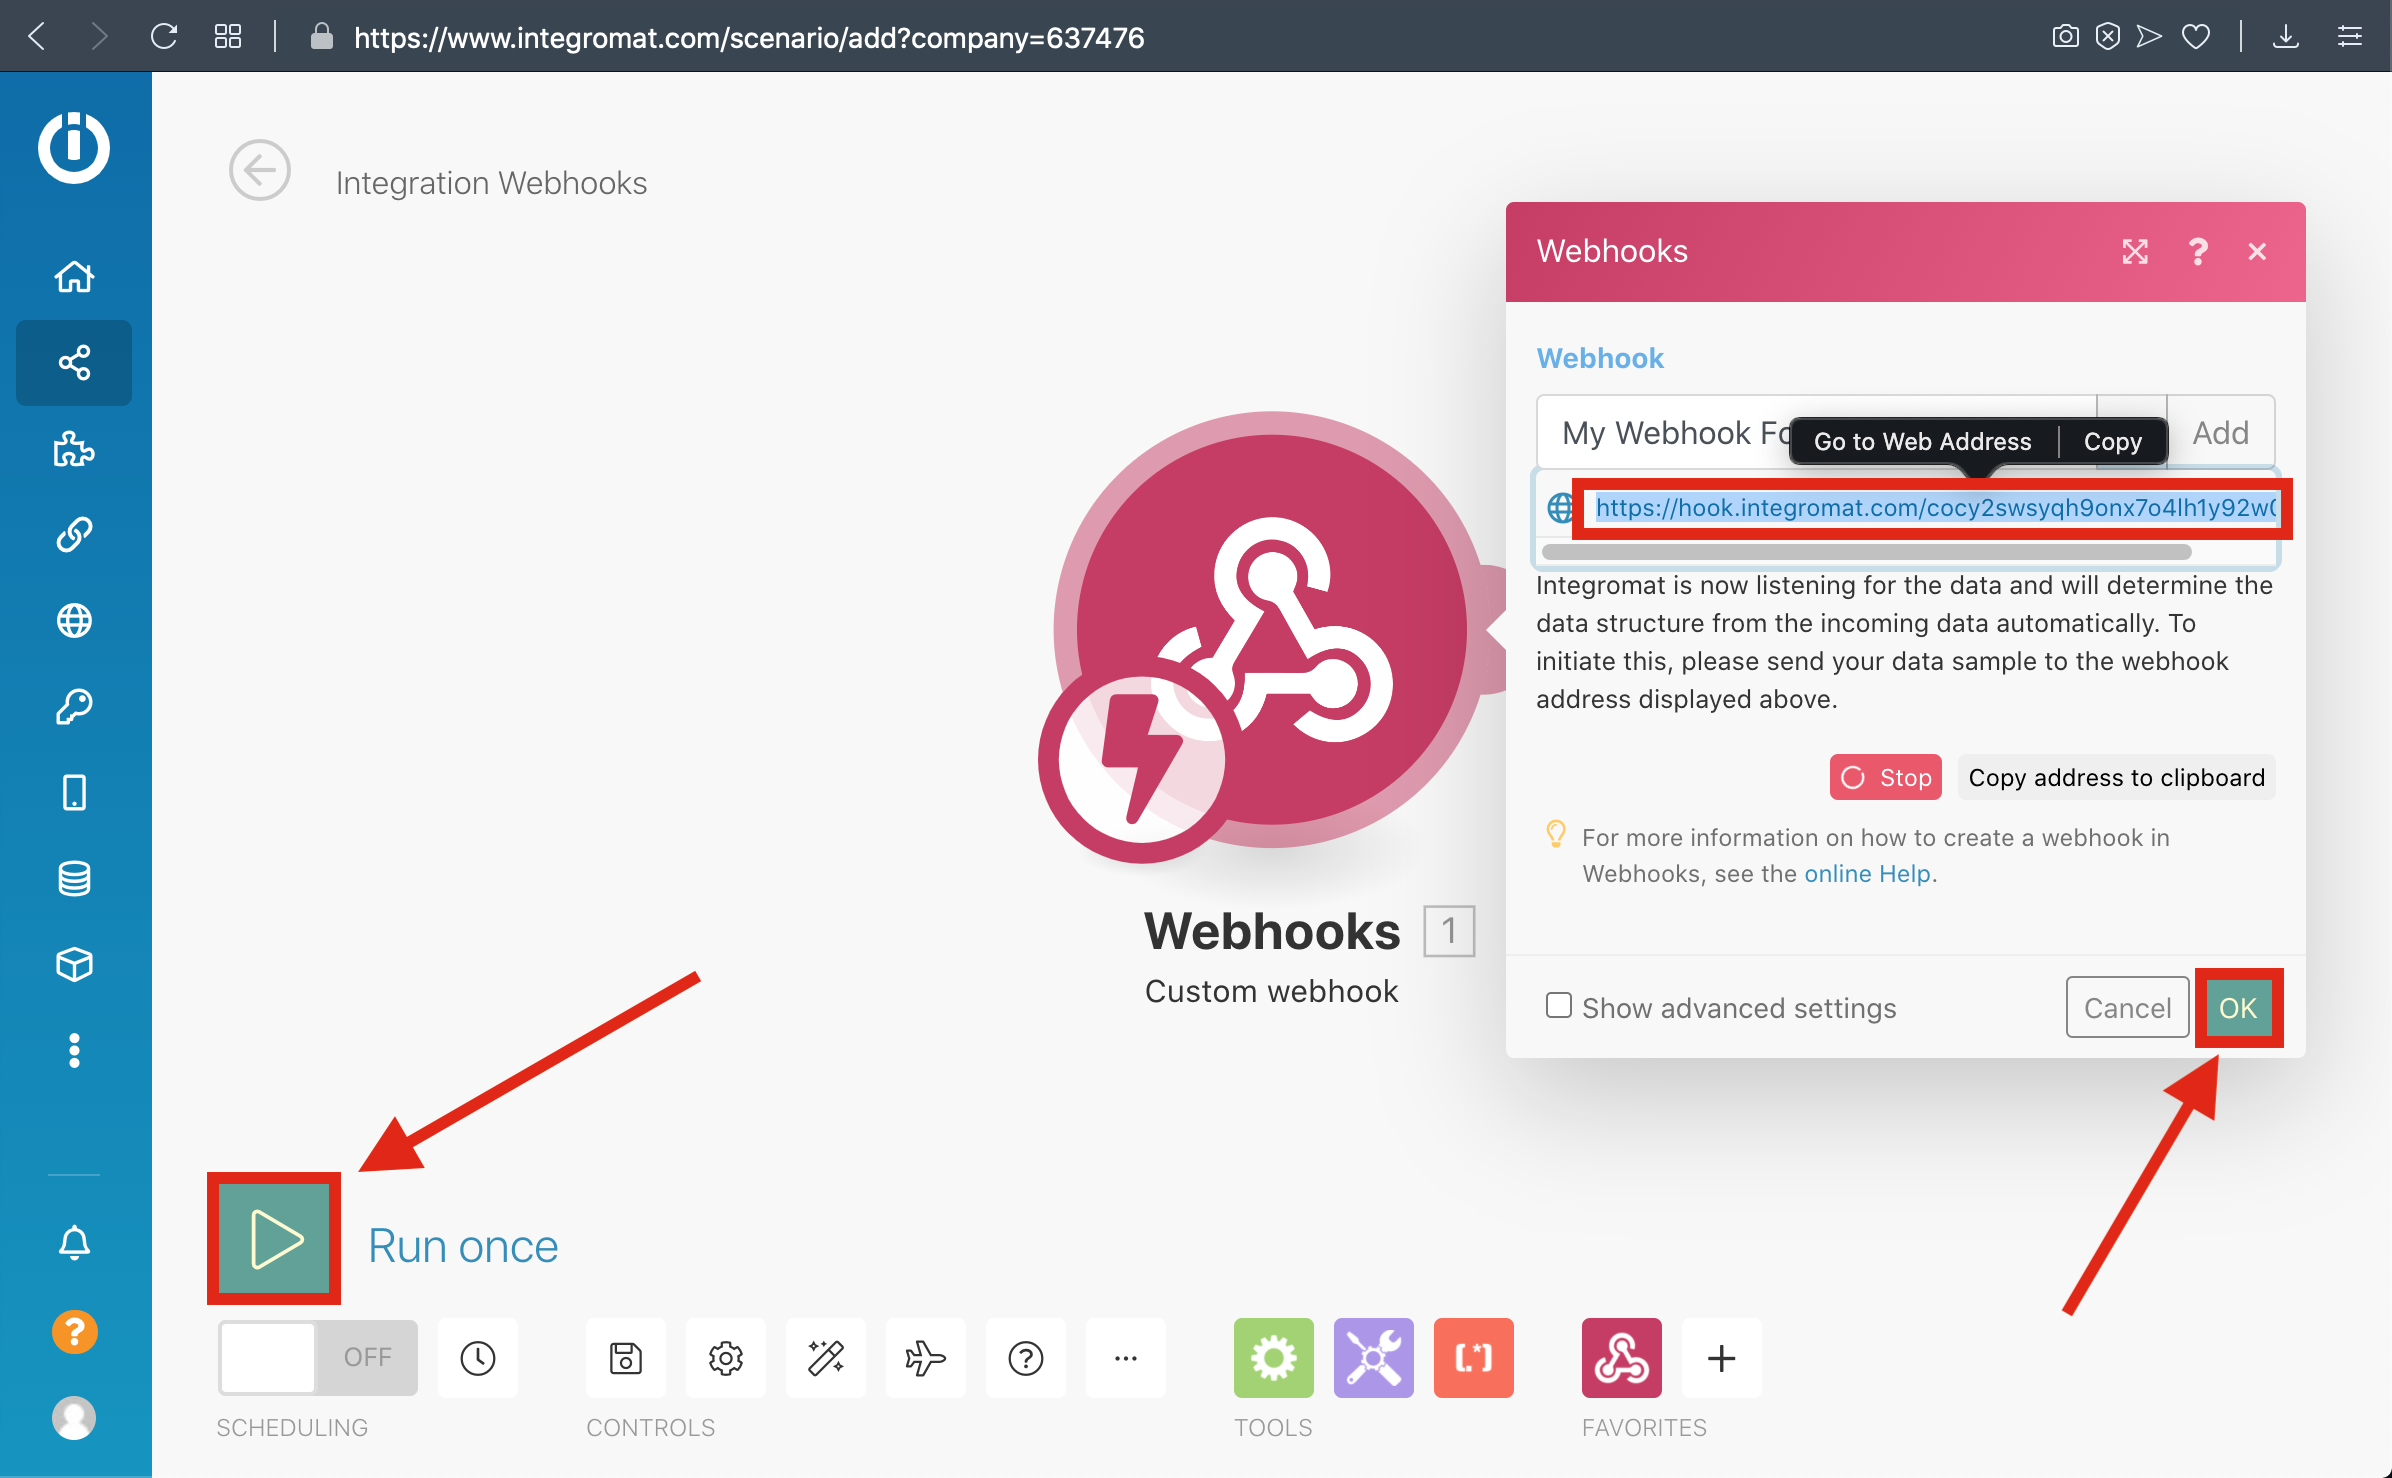
5-) Copy the Webhook URL to the clipboard and click 'OK' then click Run Once Button
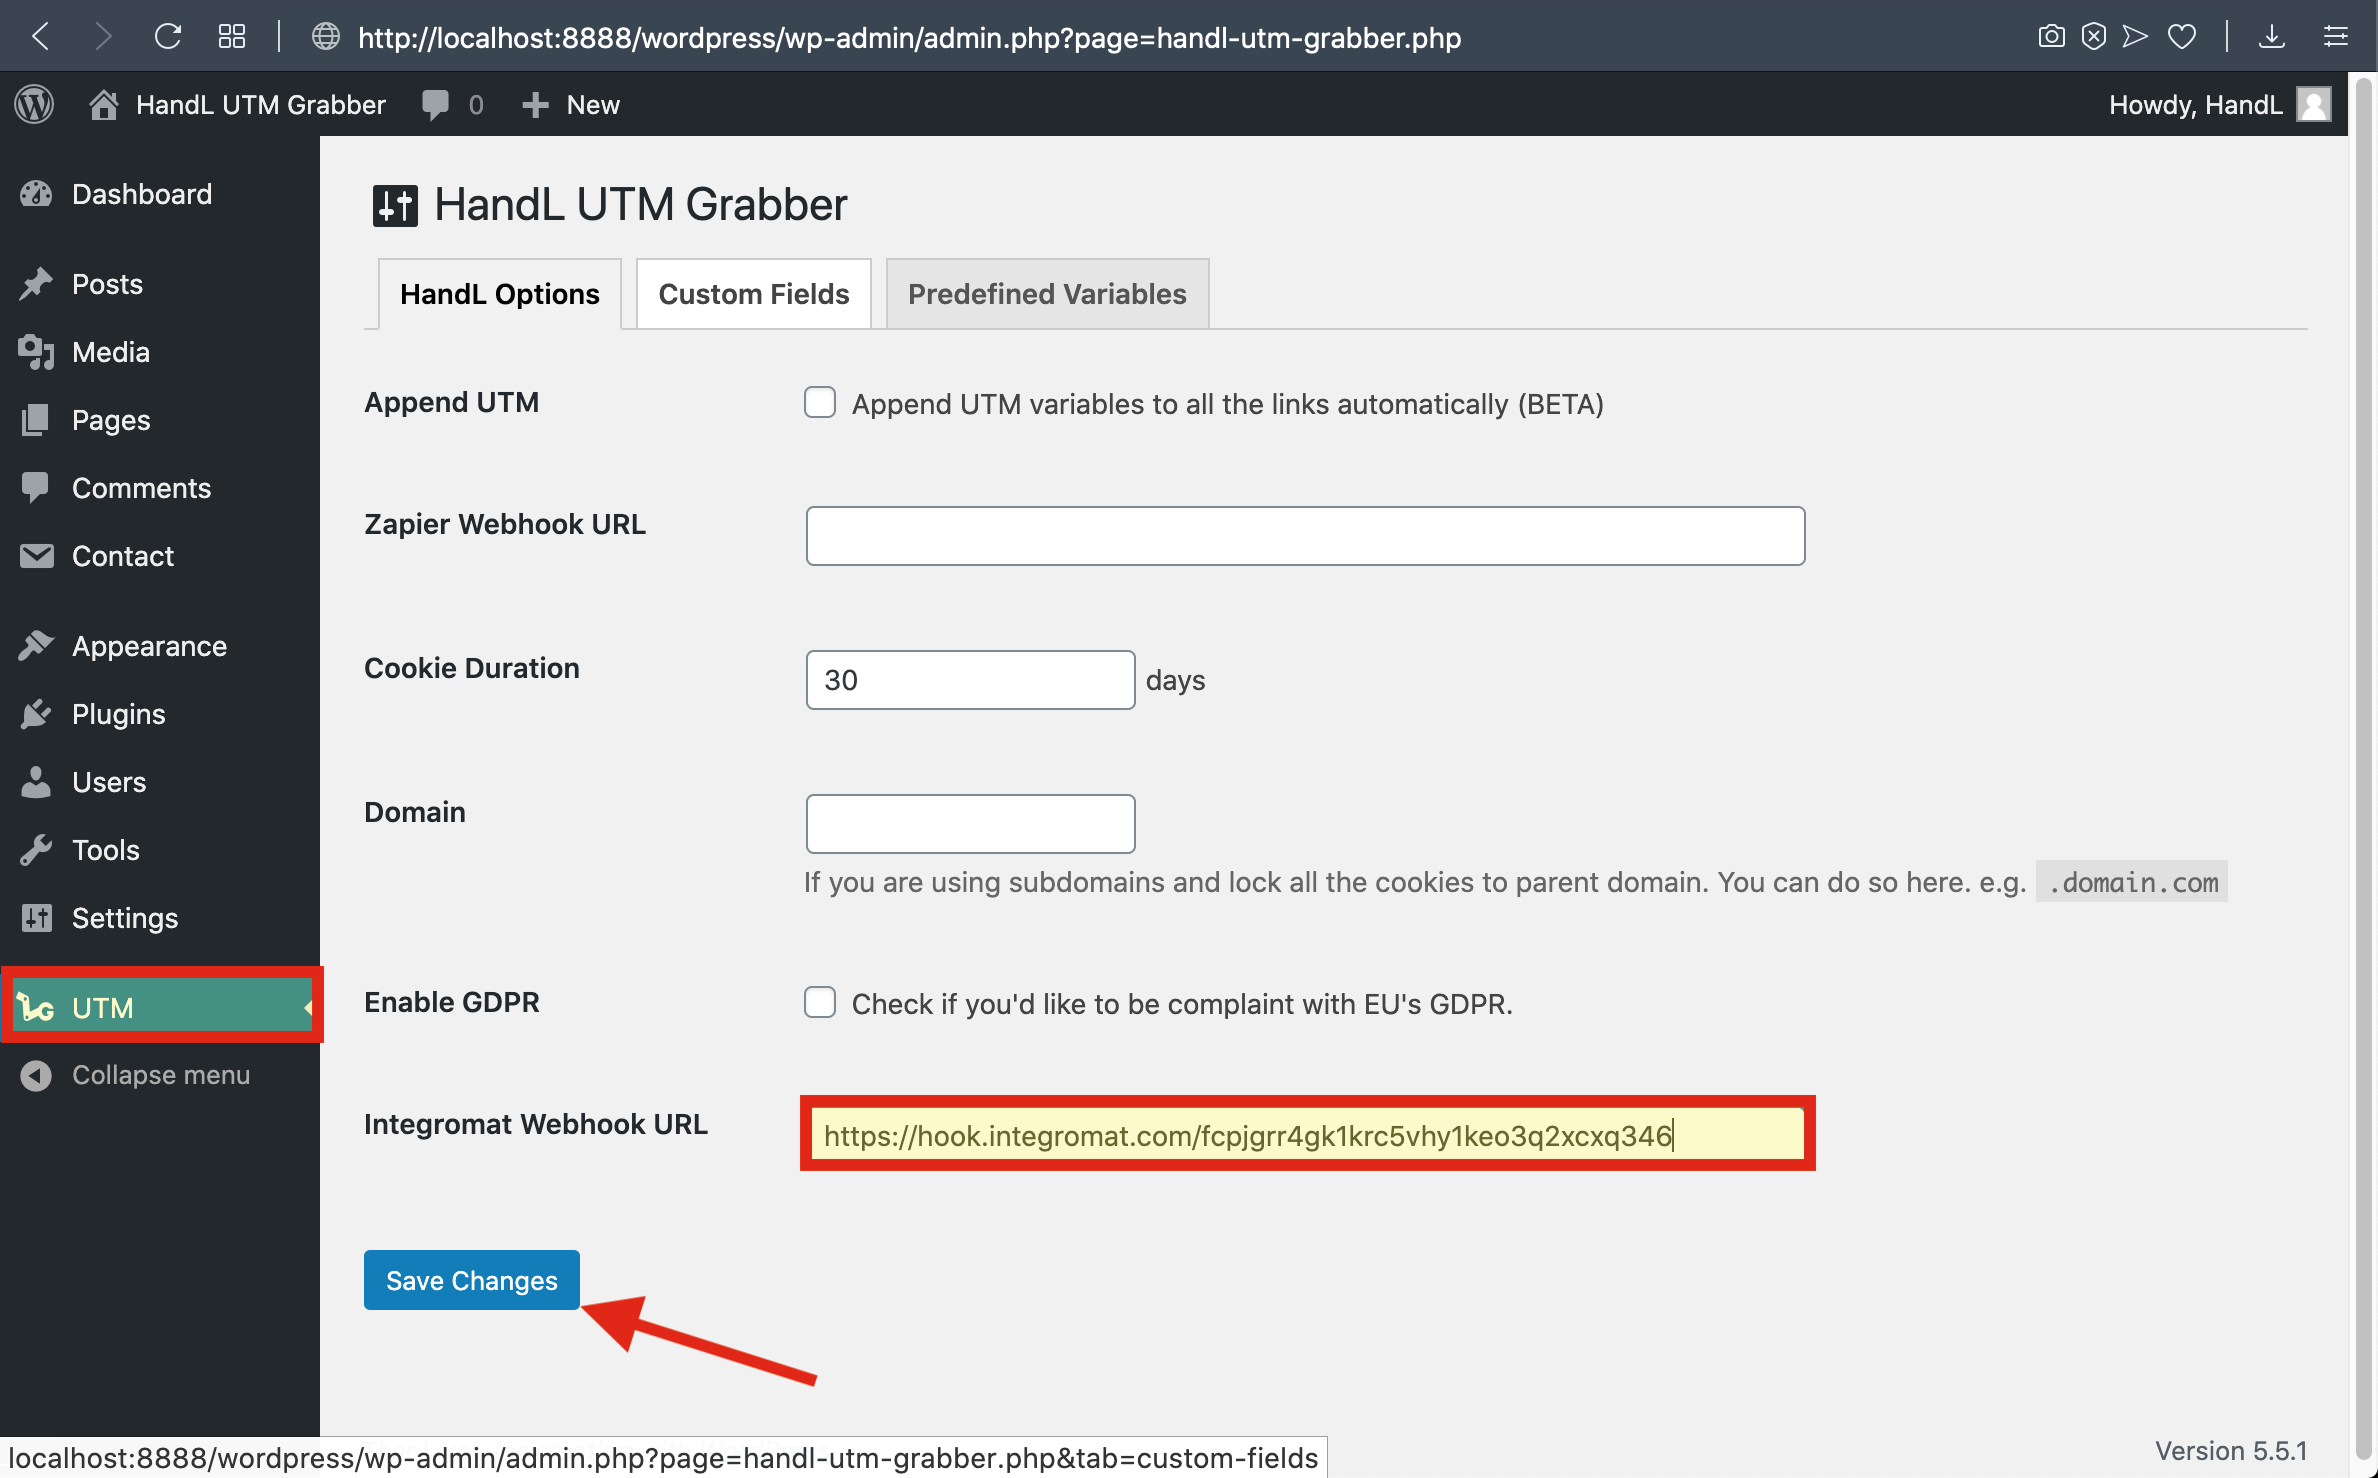
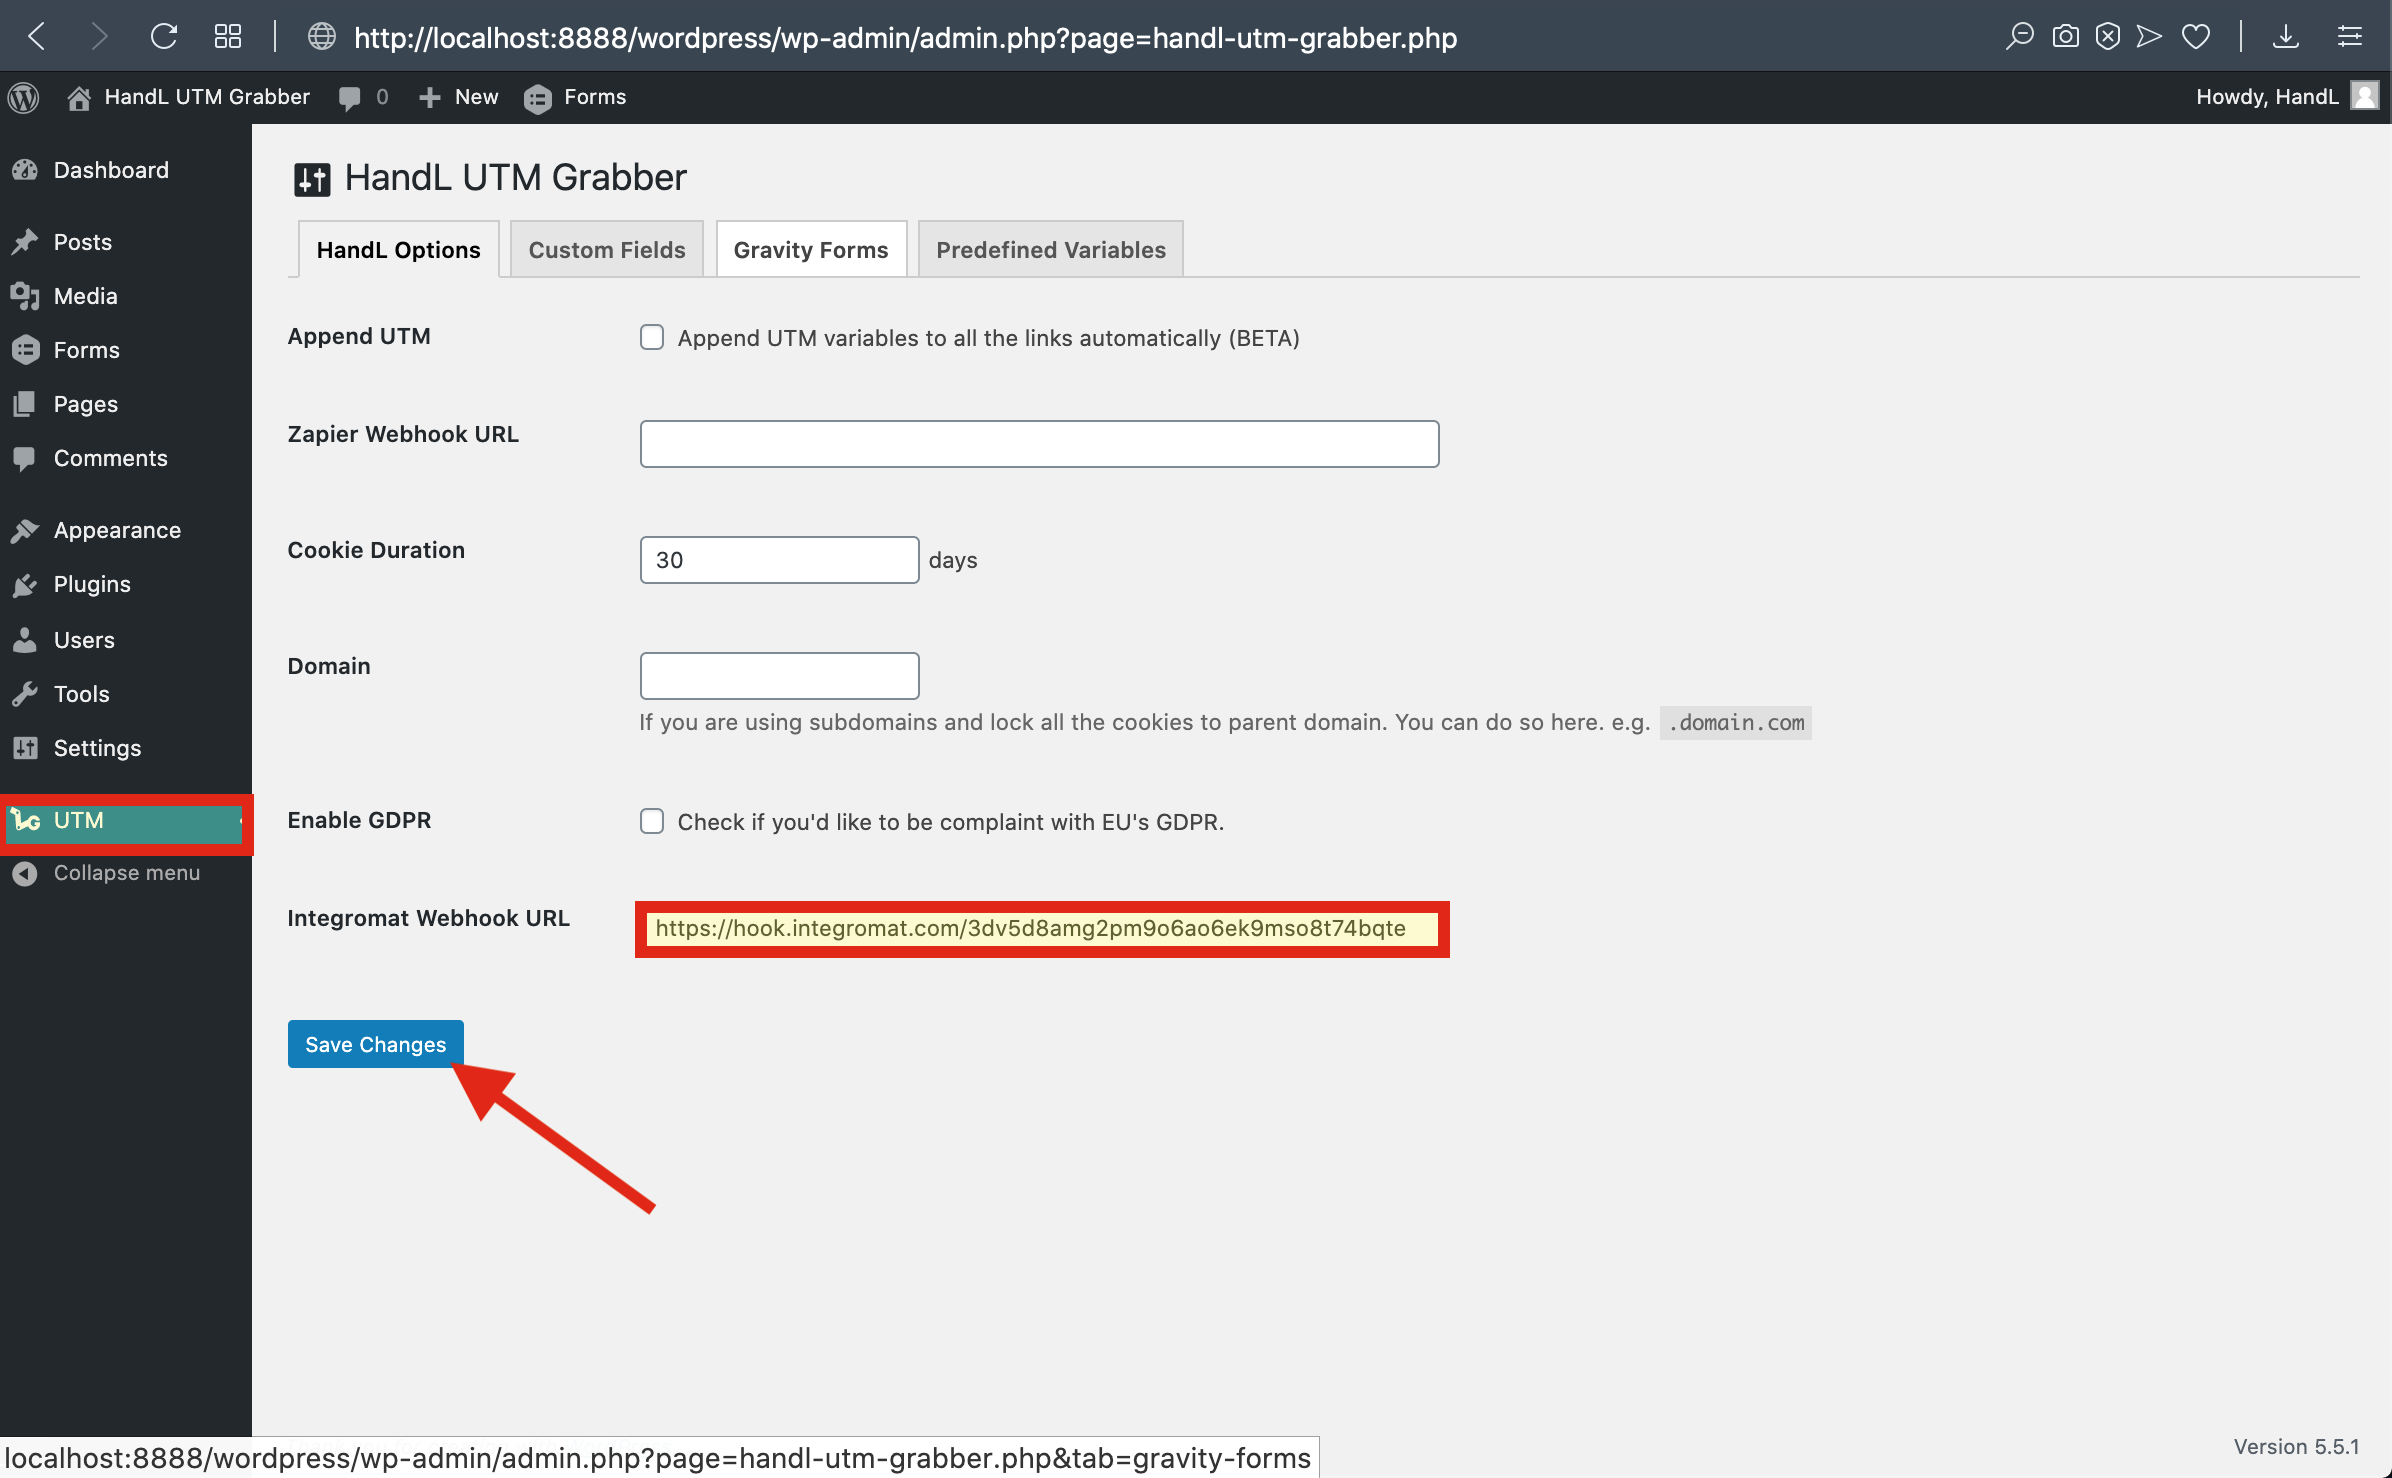
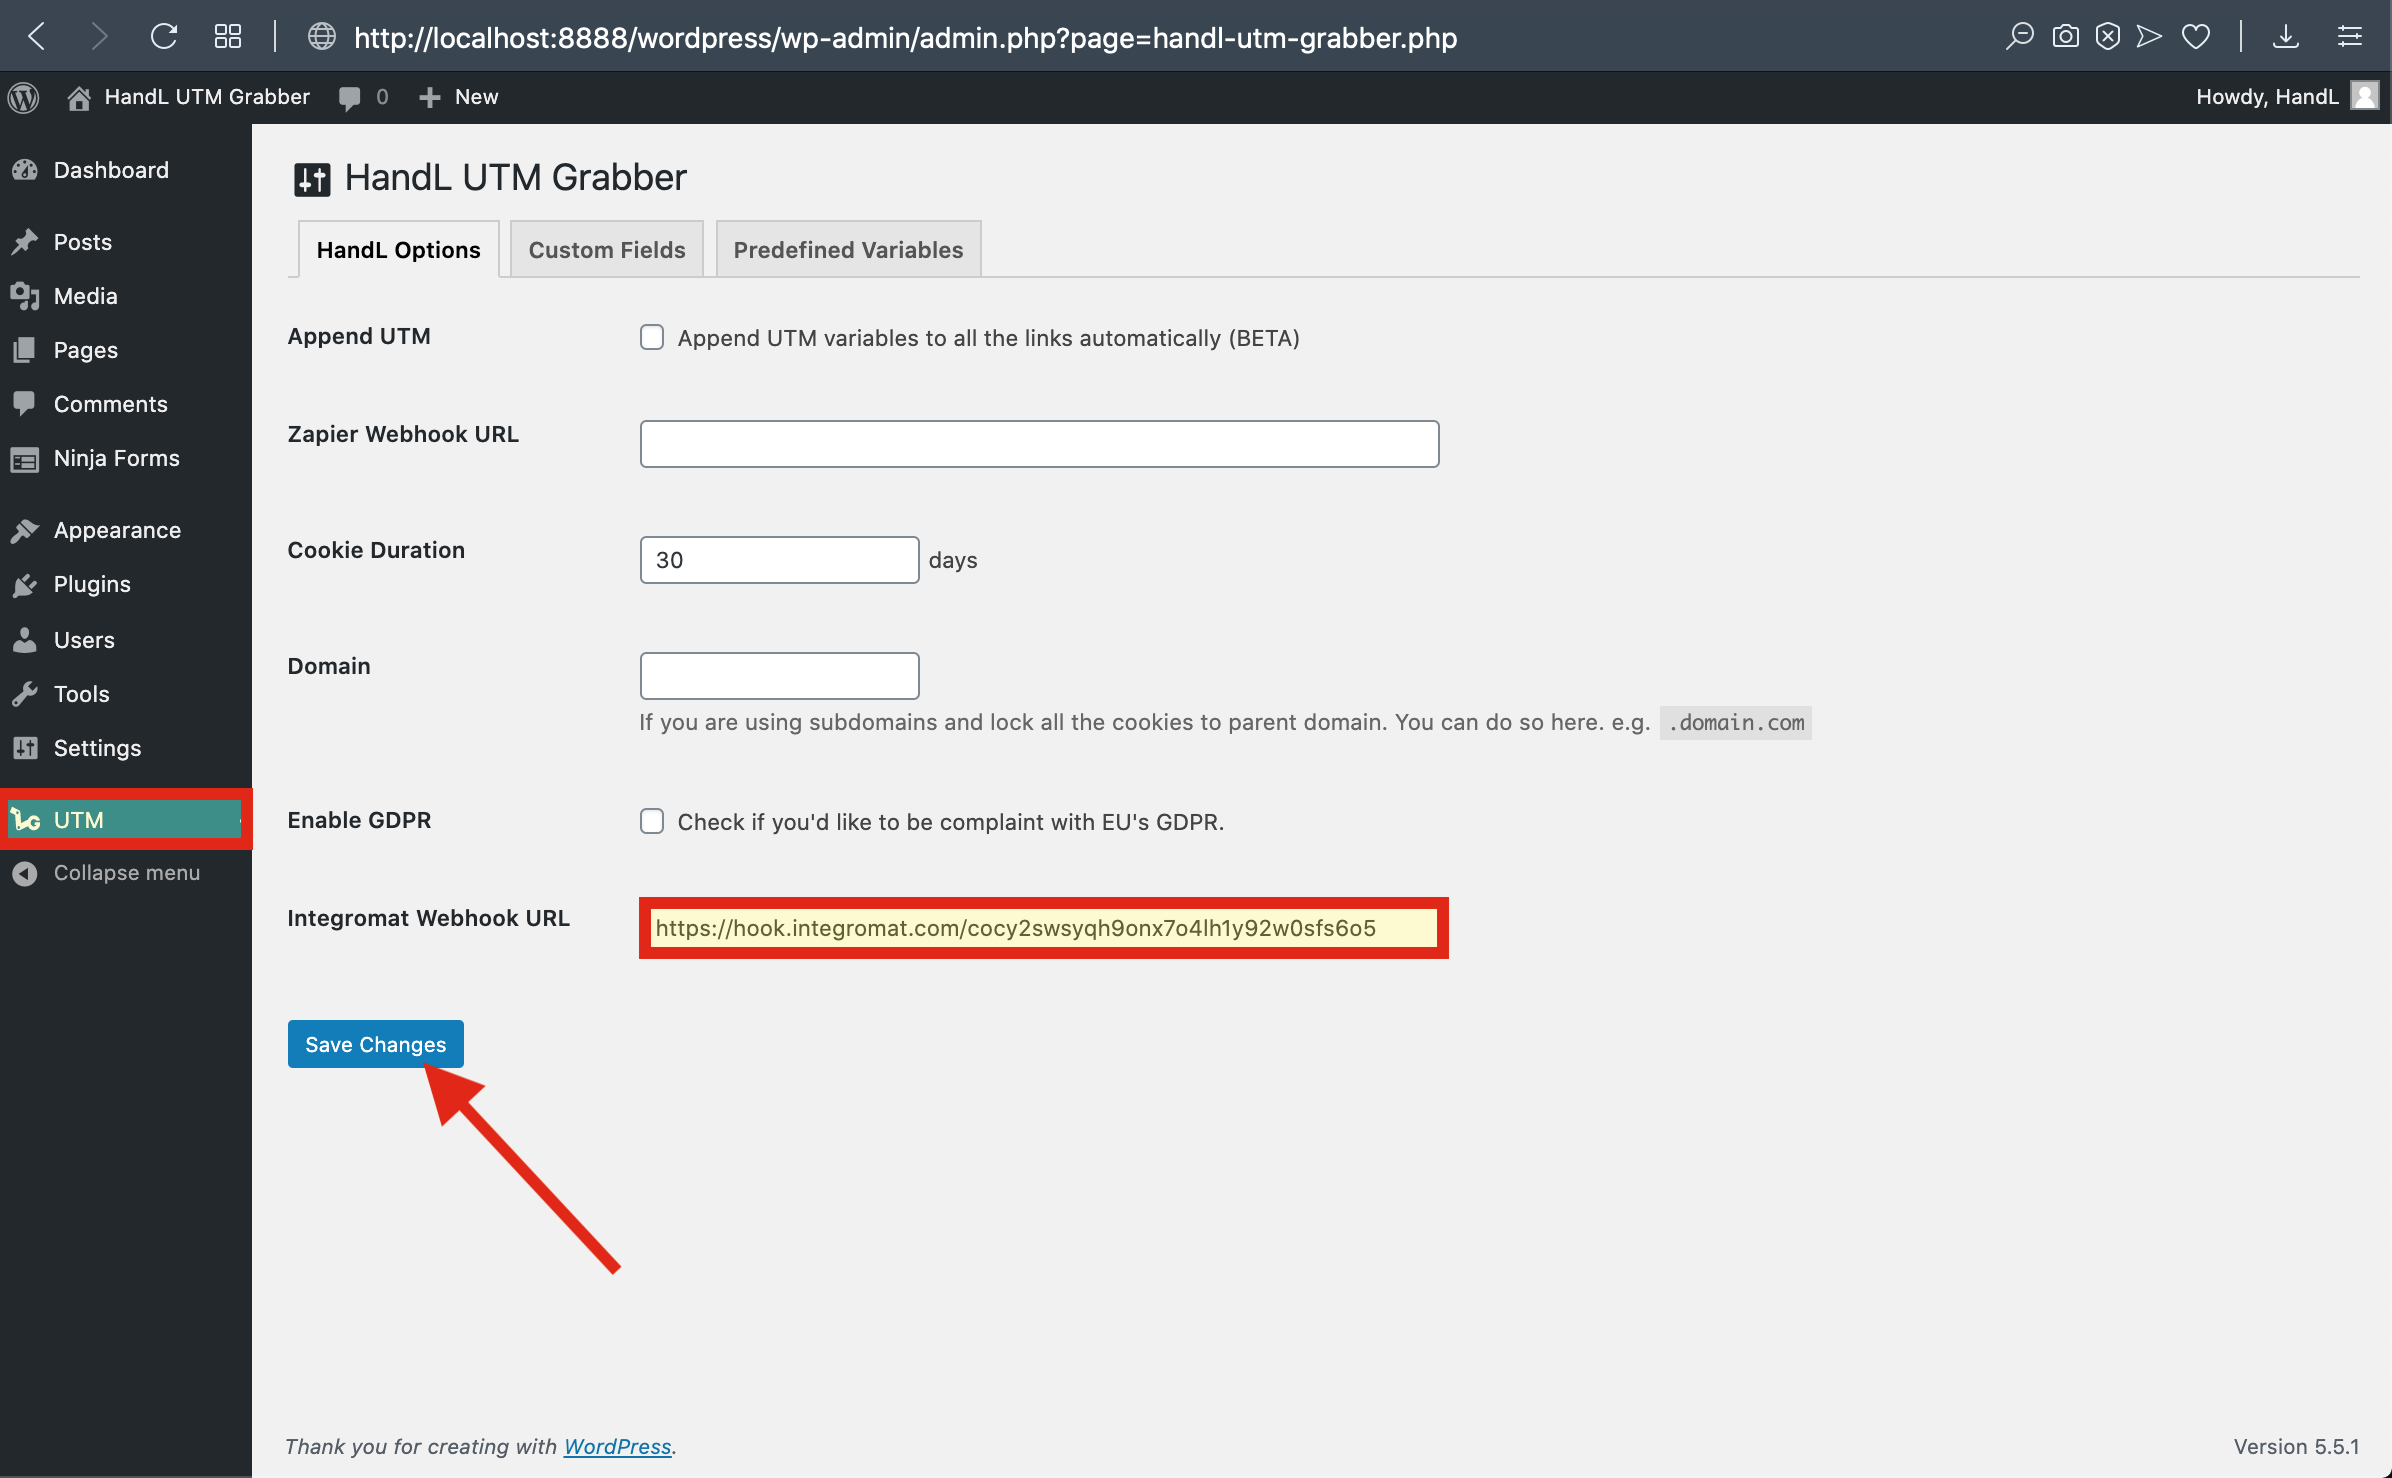
6-) Paste The Webhook URL that you copied before to the Integromat section From UTM Settings
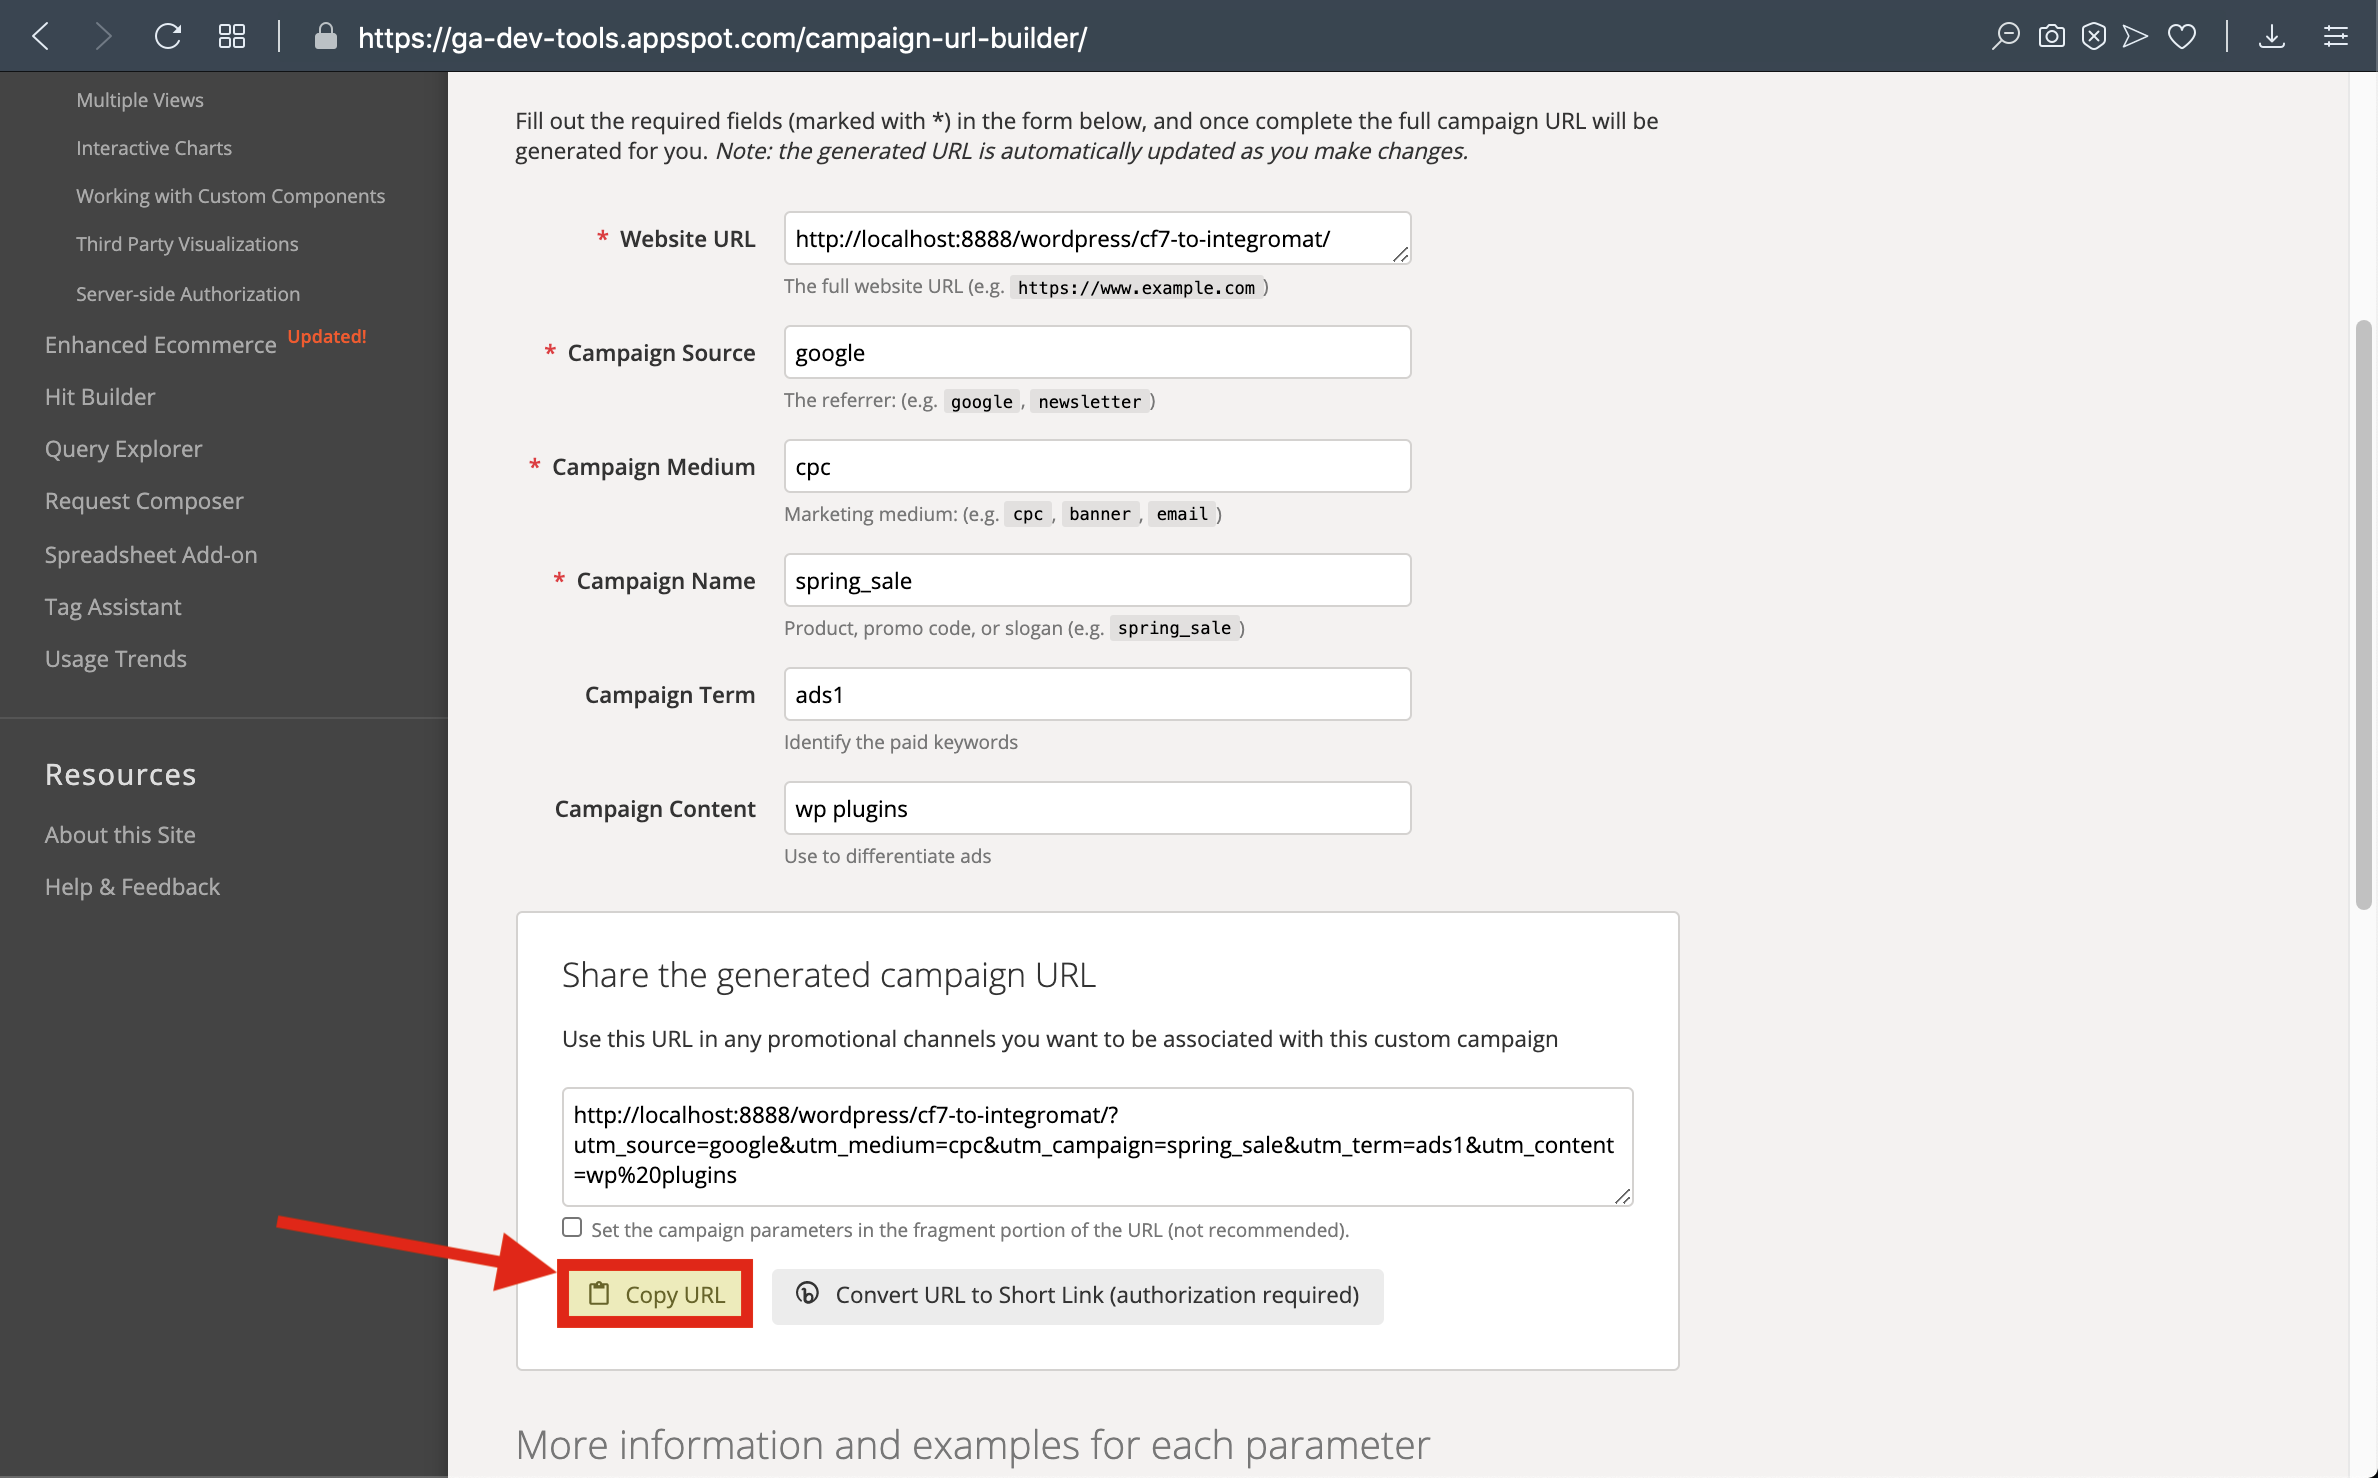
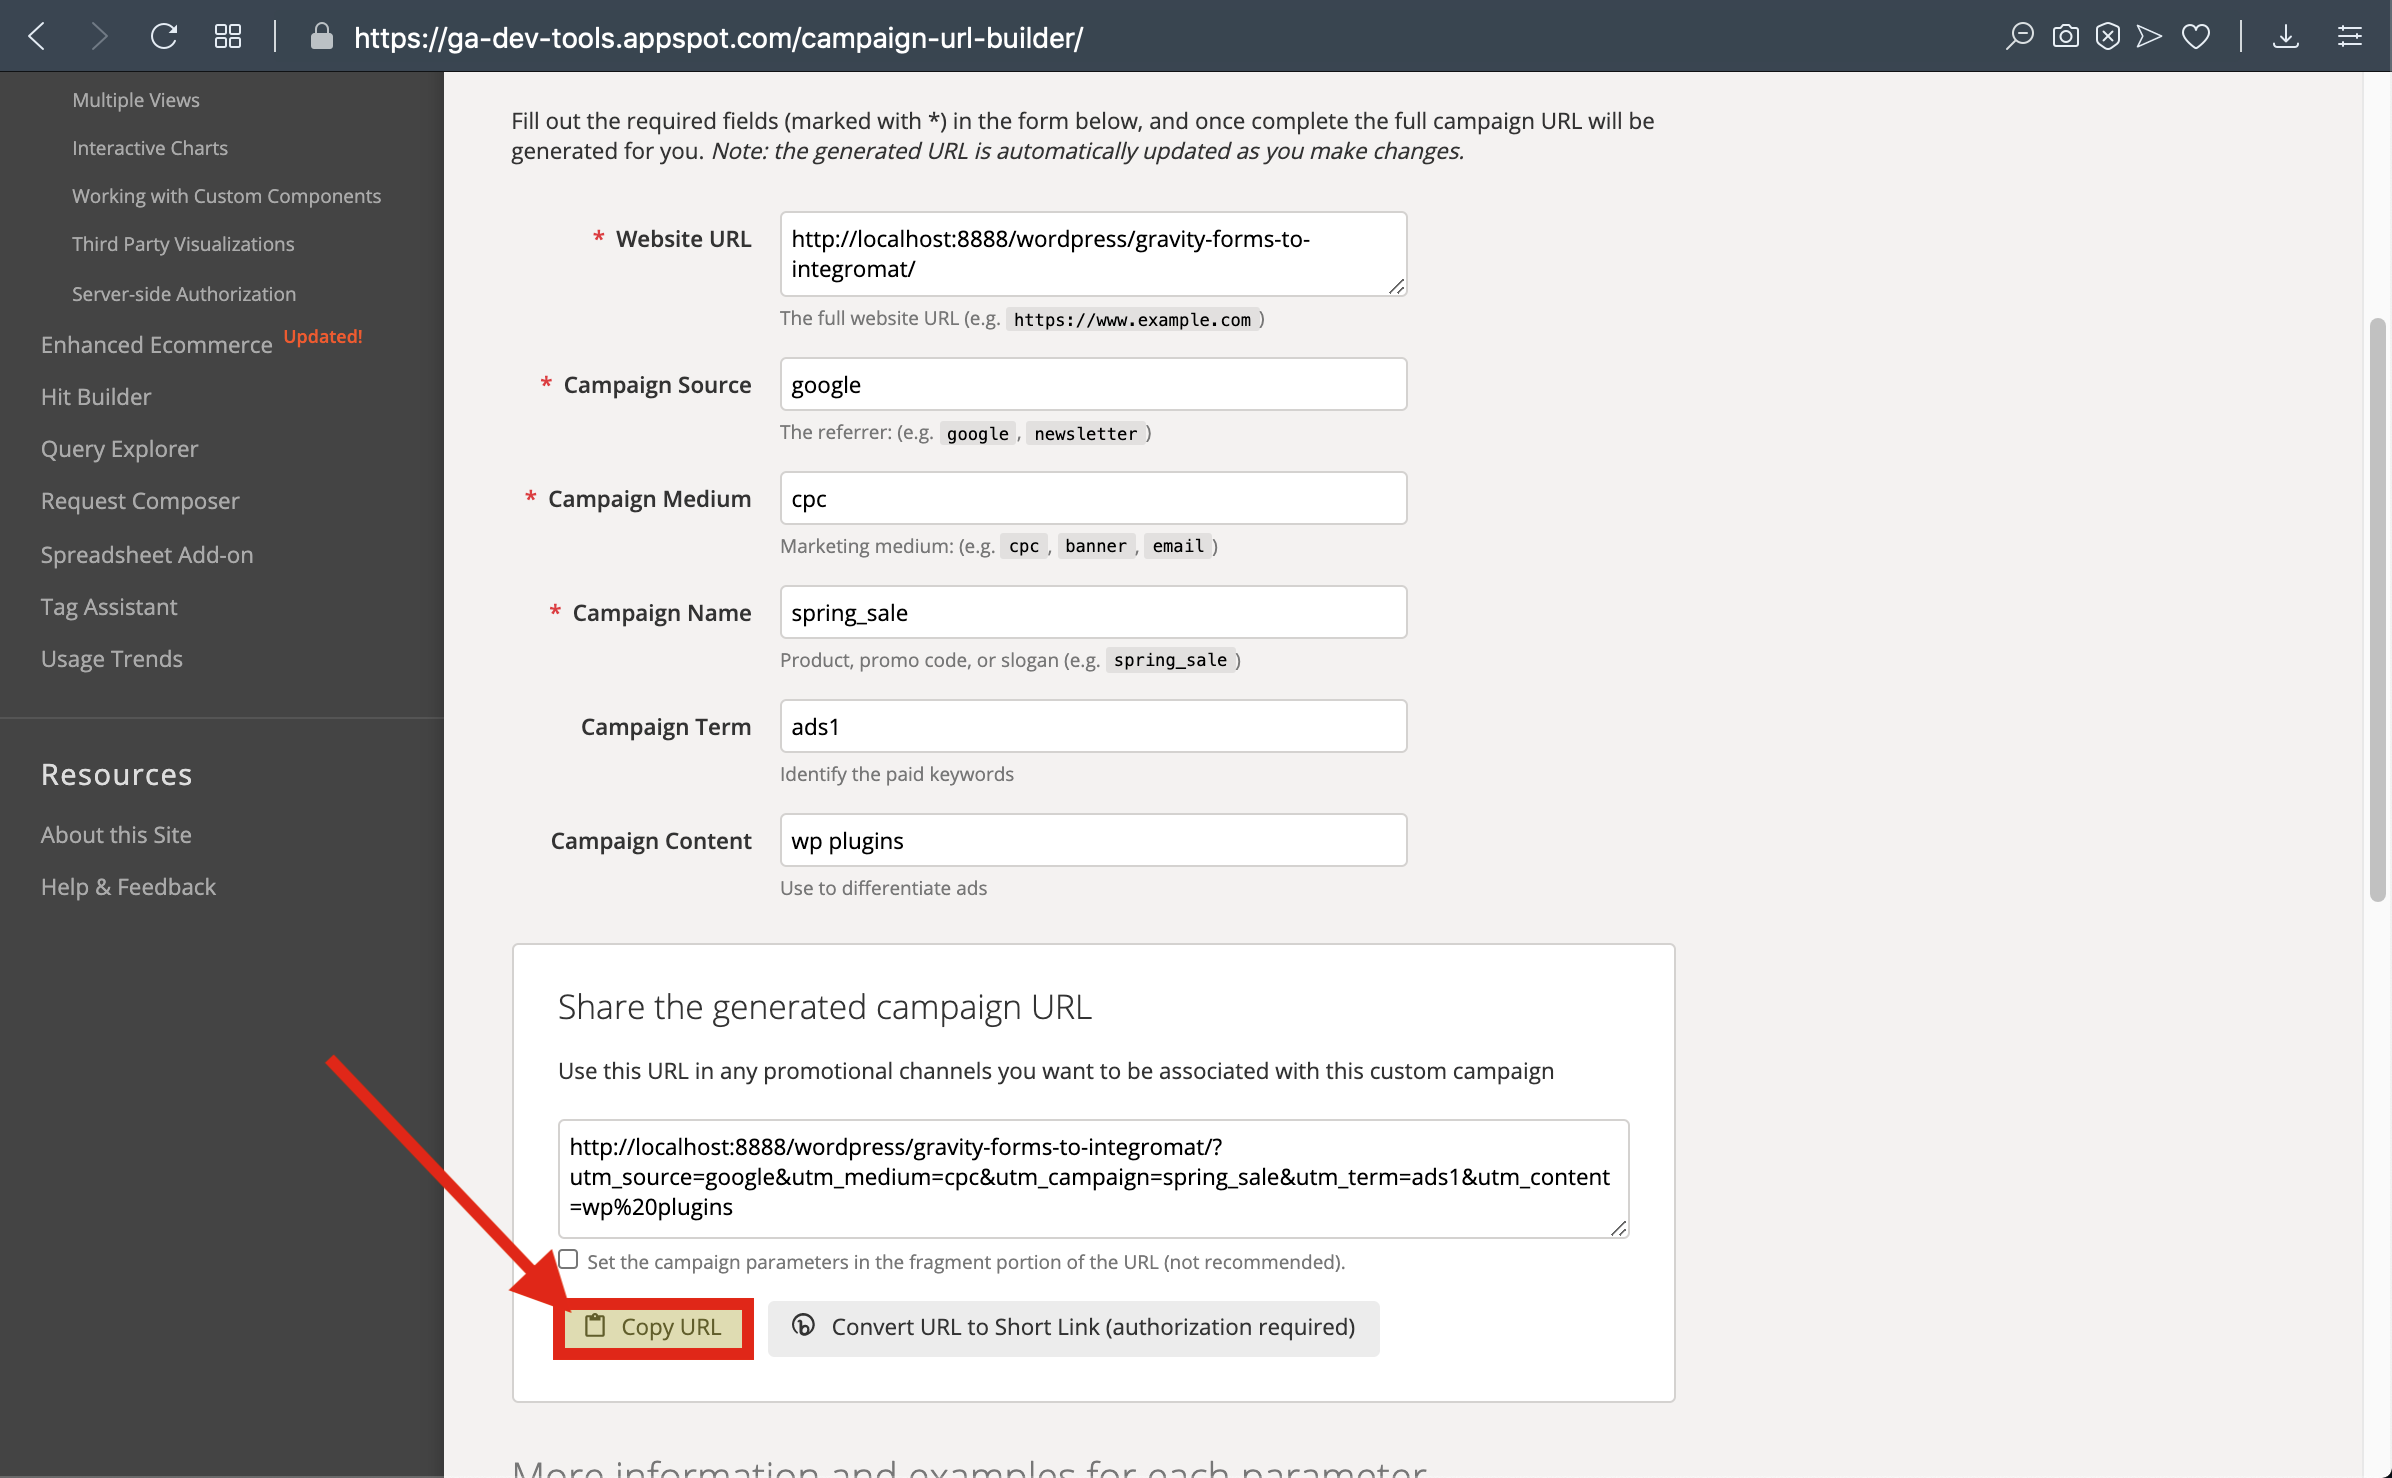
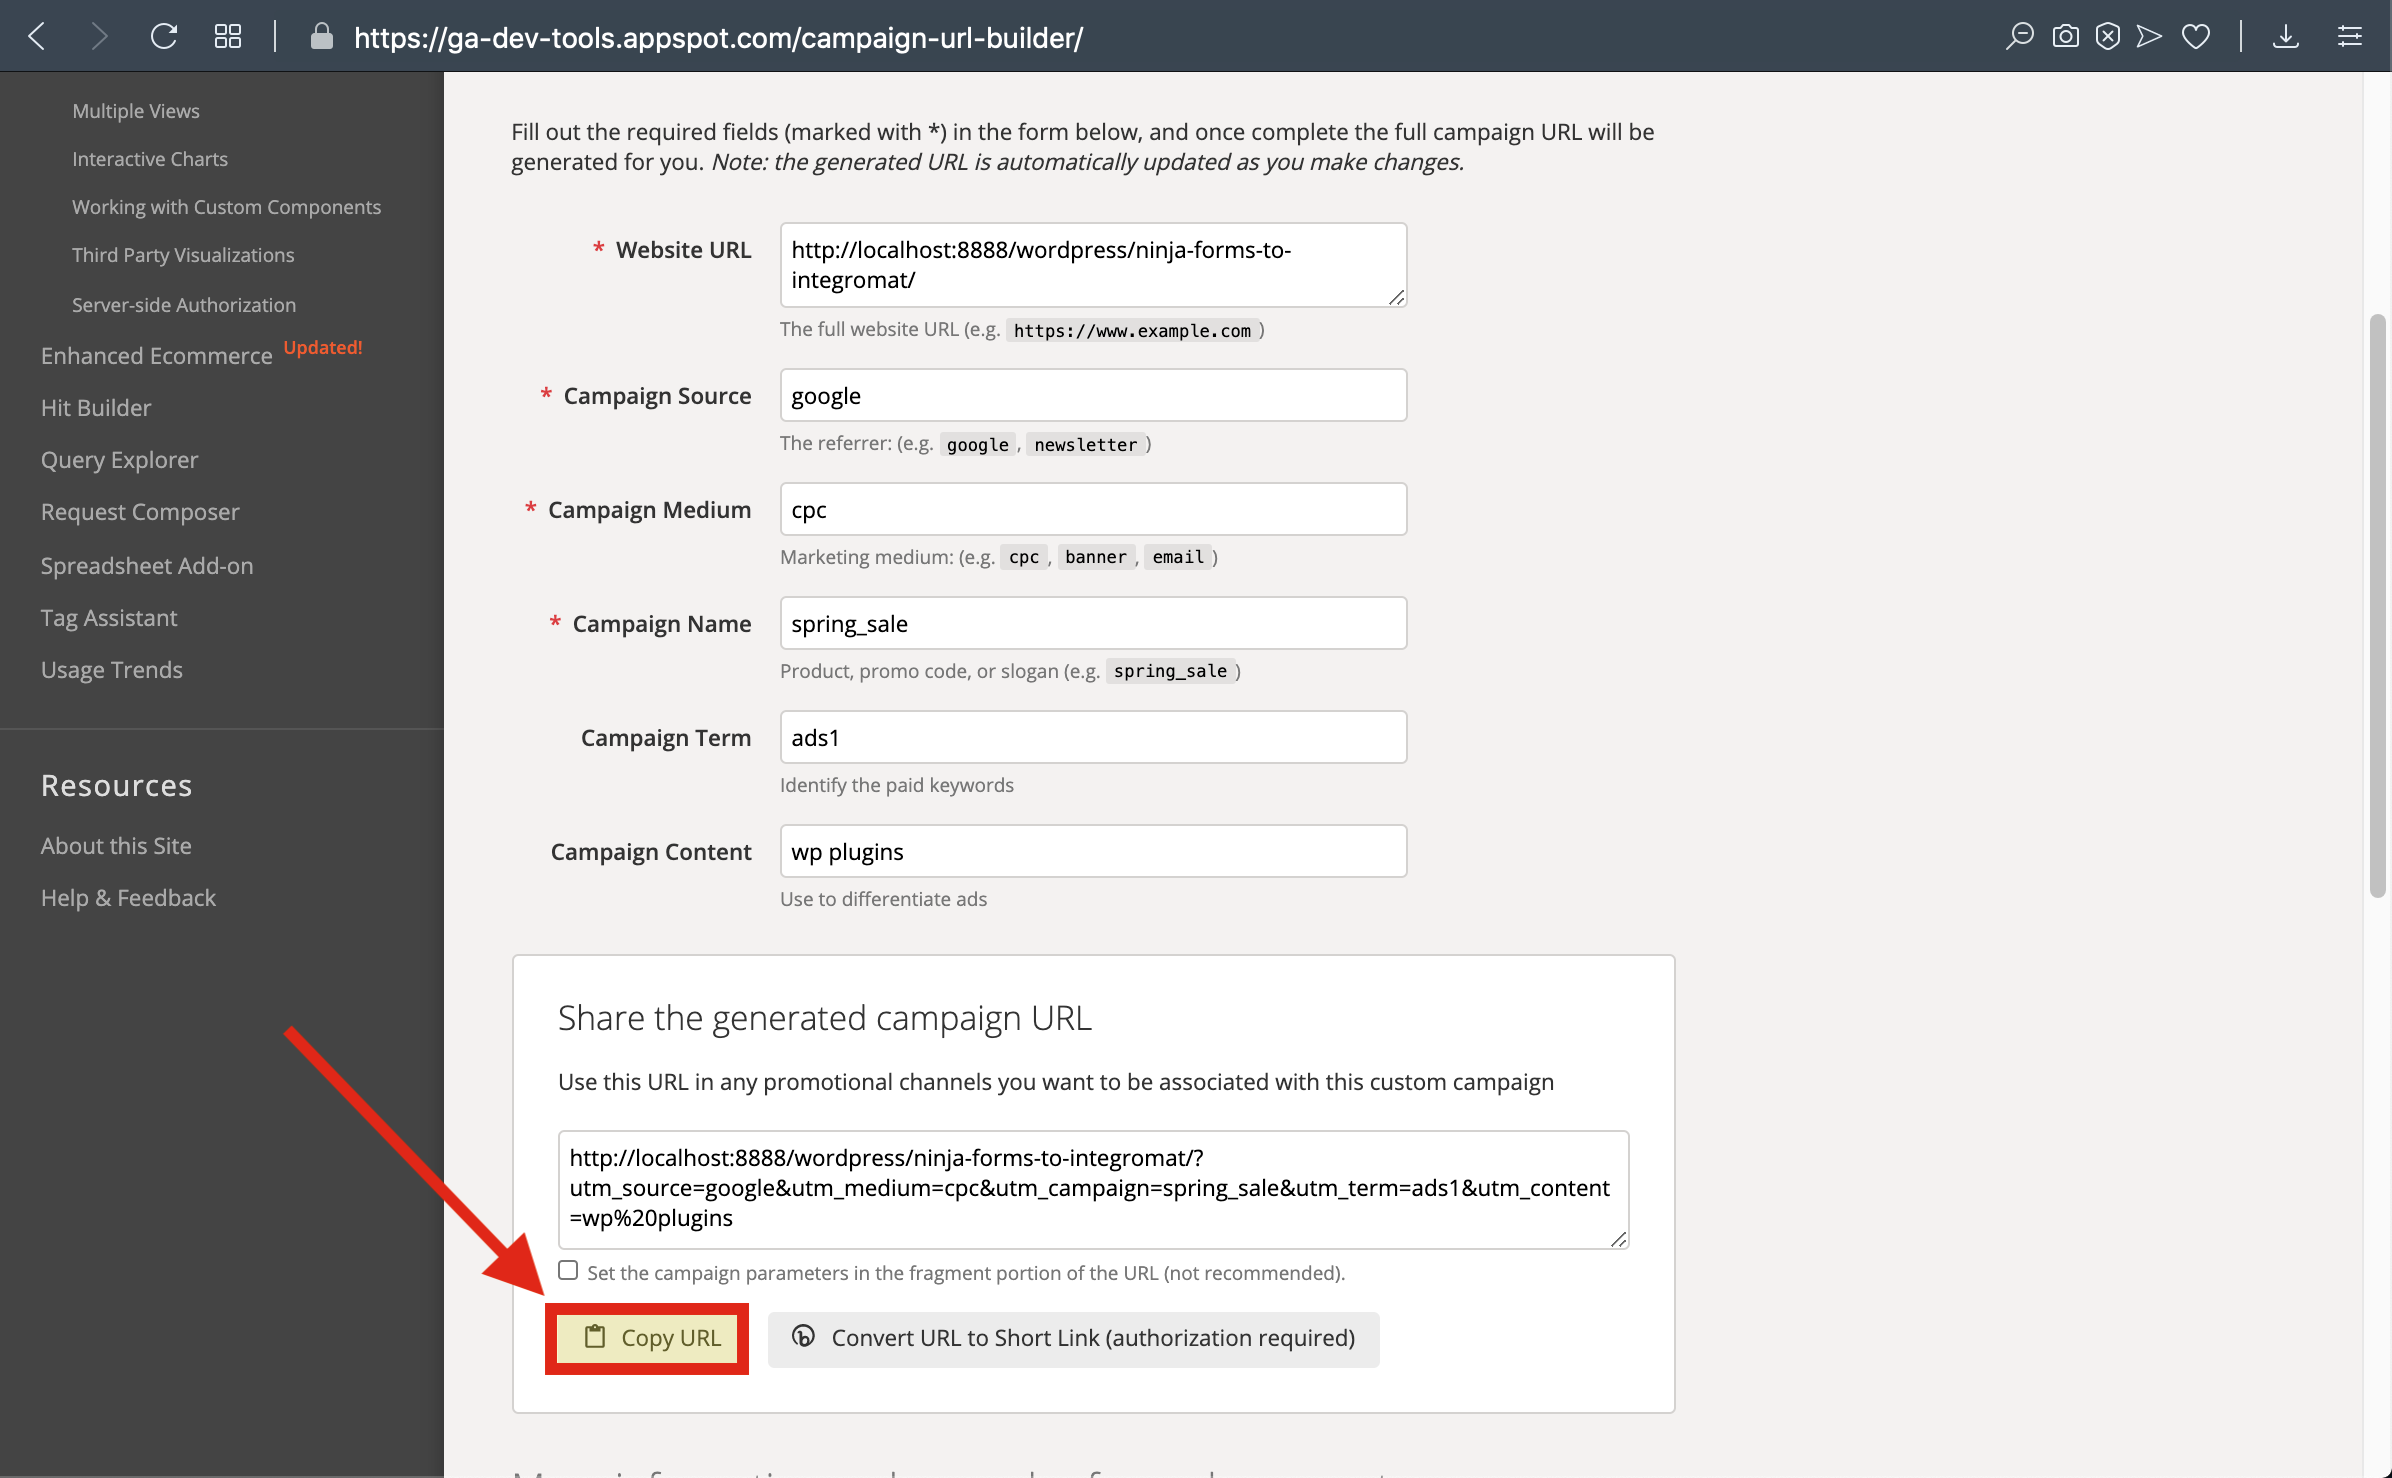
7-) Go To Campaign URL Builder and Copy The URL
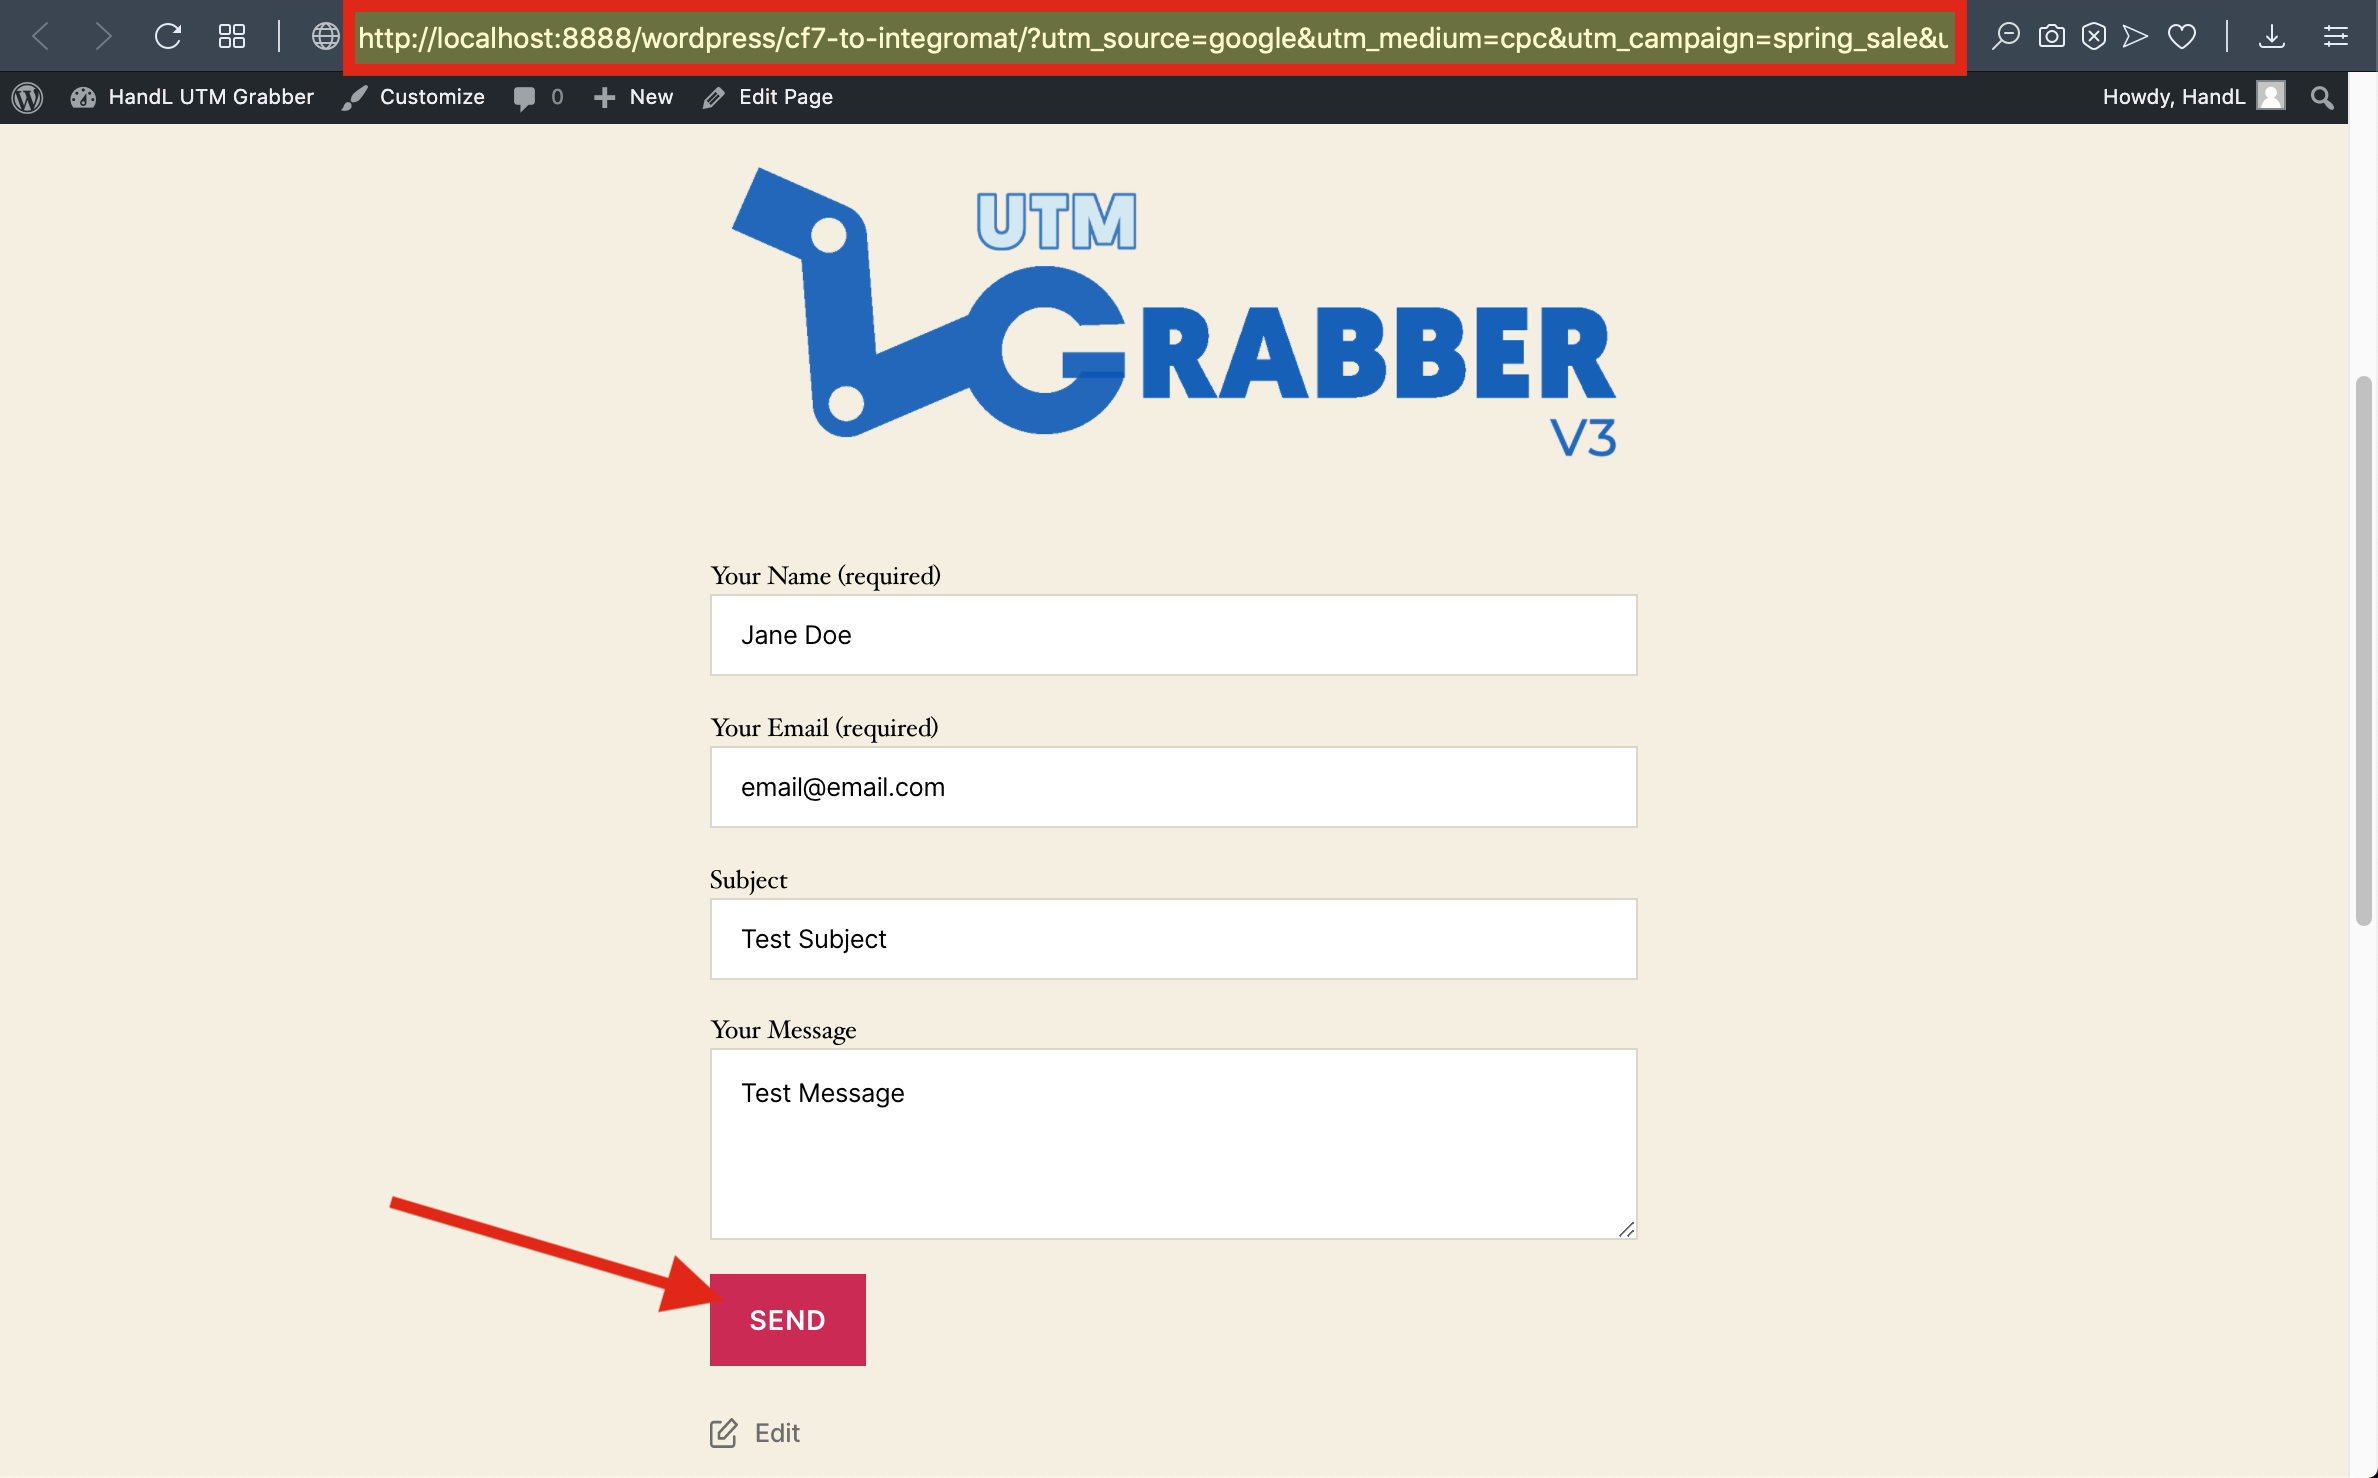
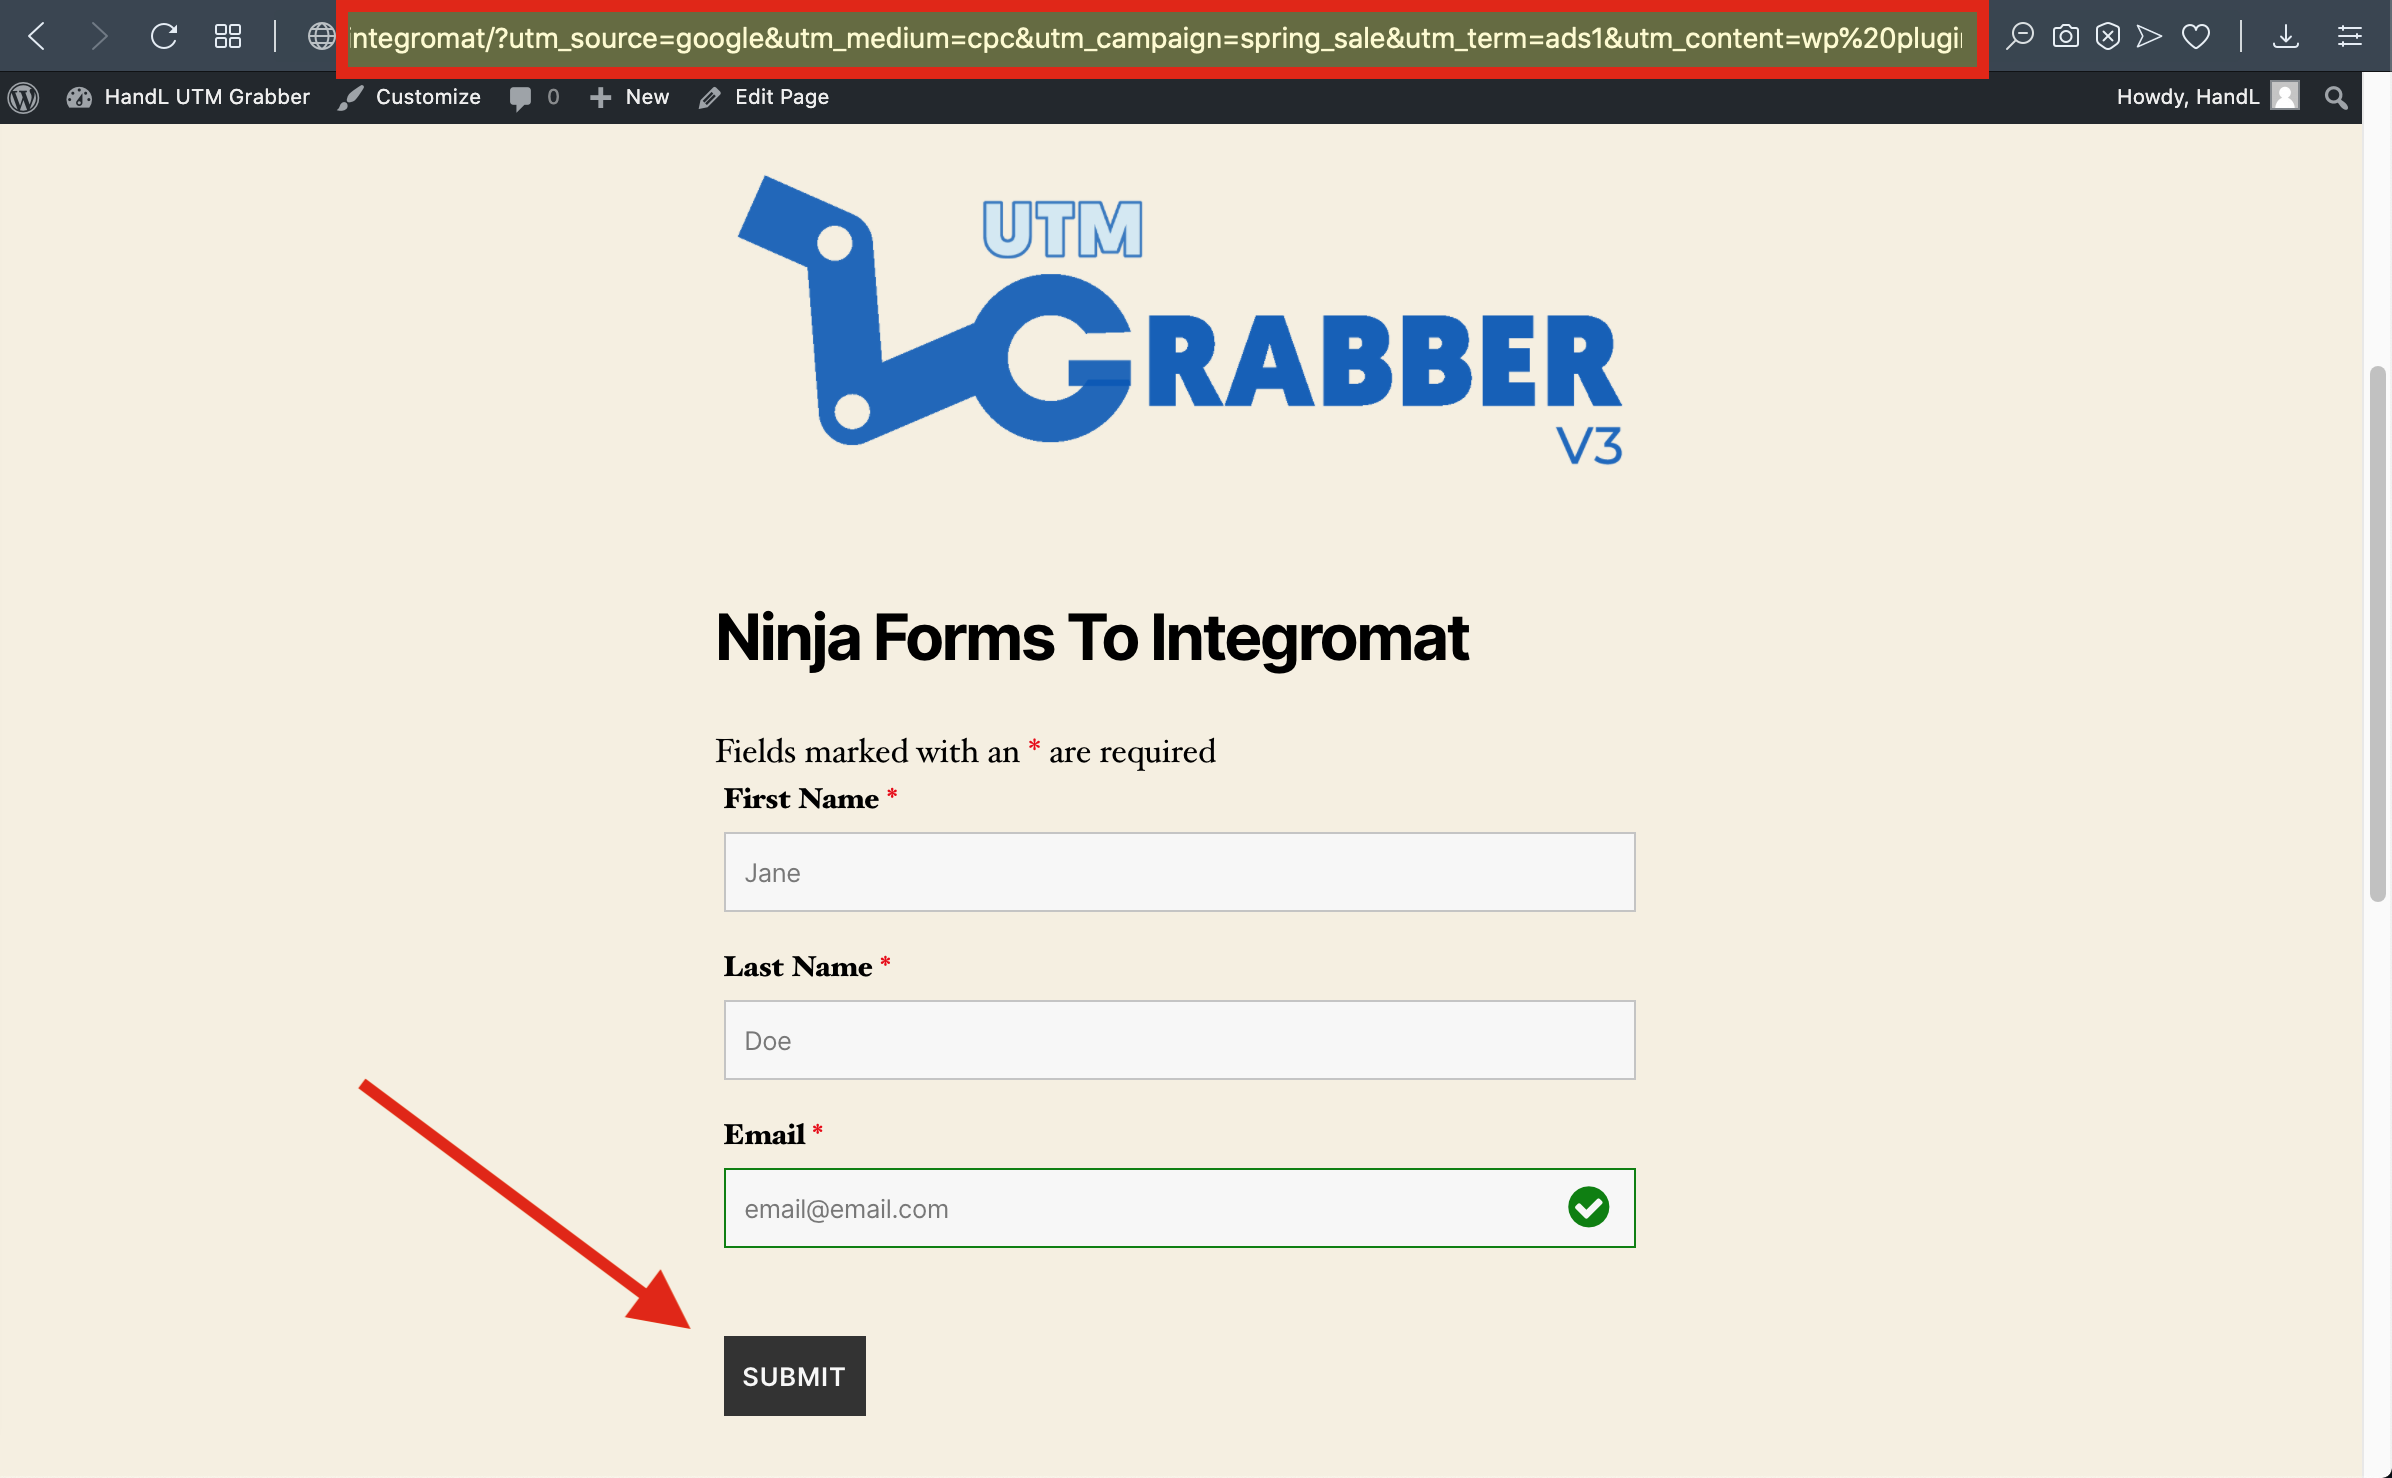
8-) Paste The URL and Fill The form then send it
9-) Go To Scenarios to see your Data
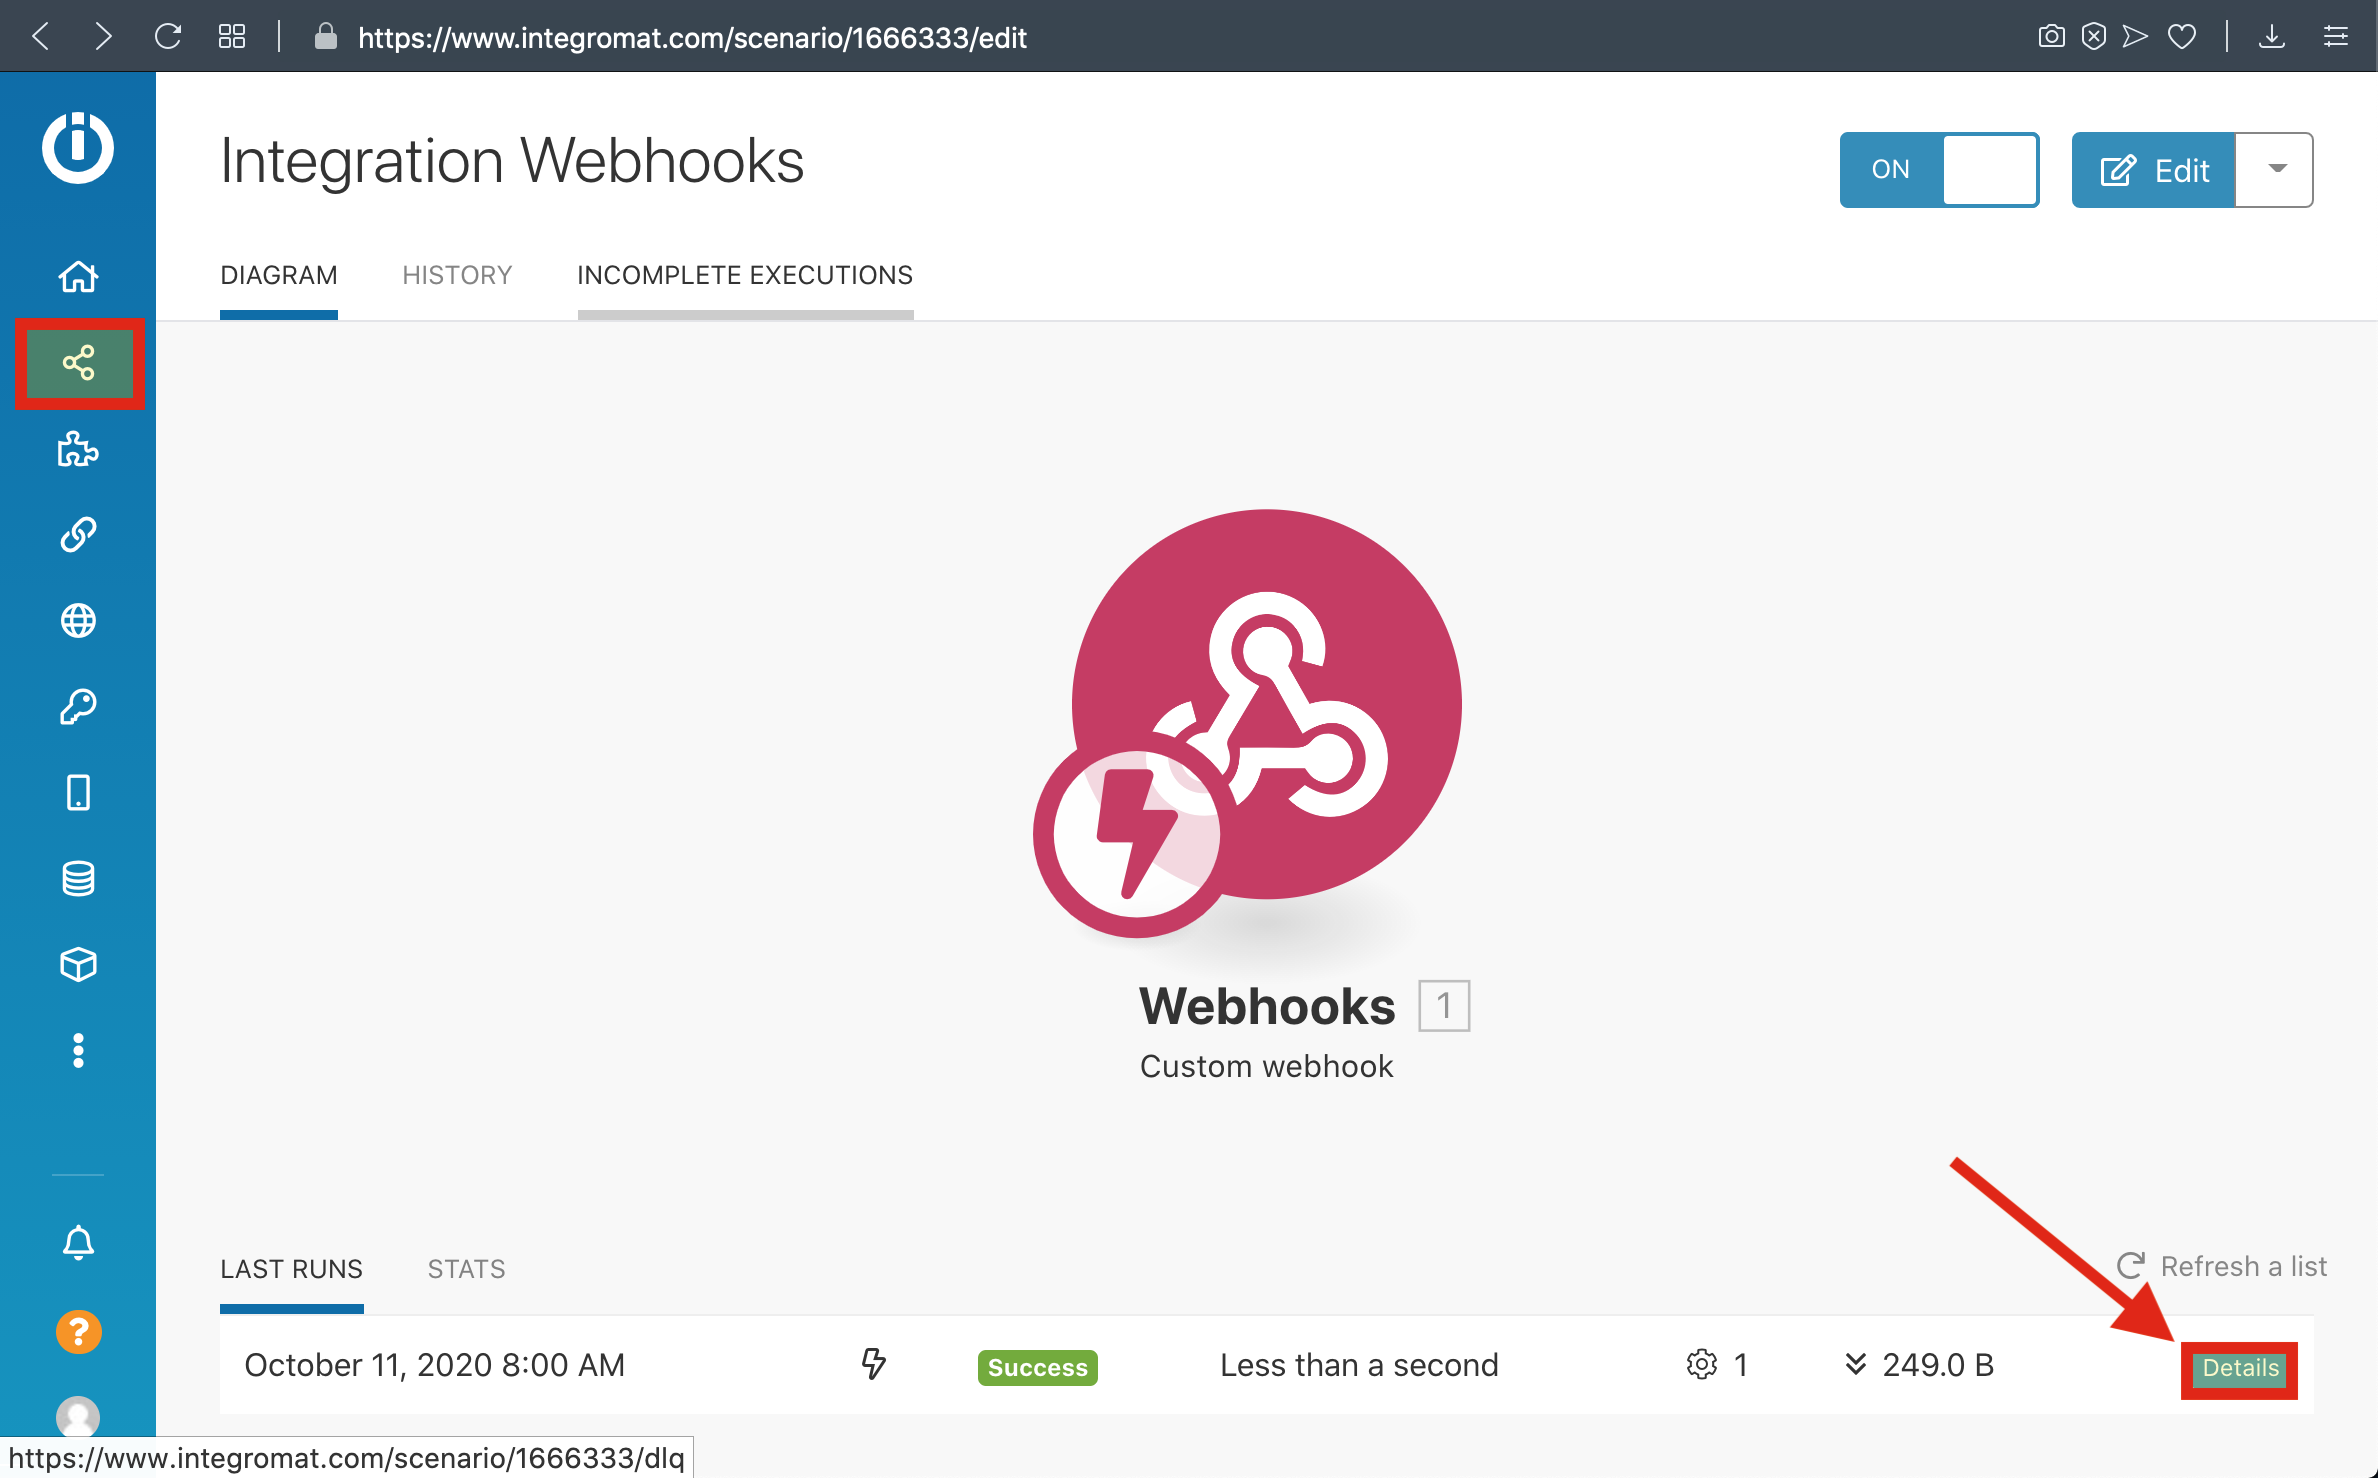
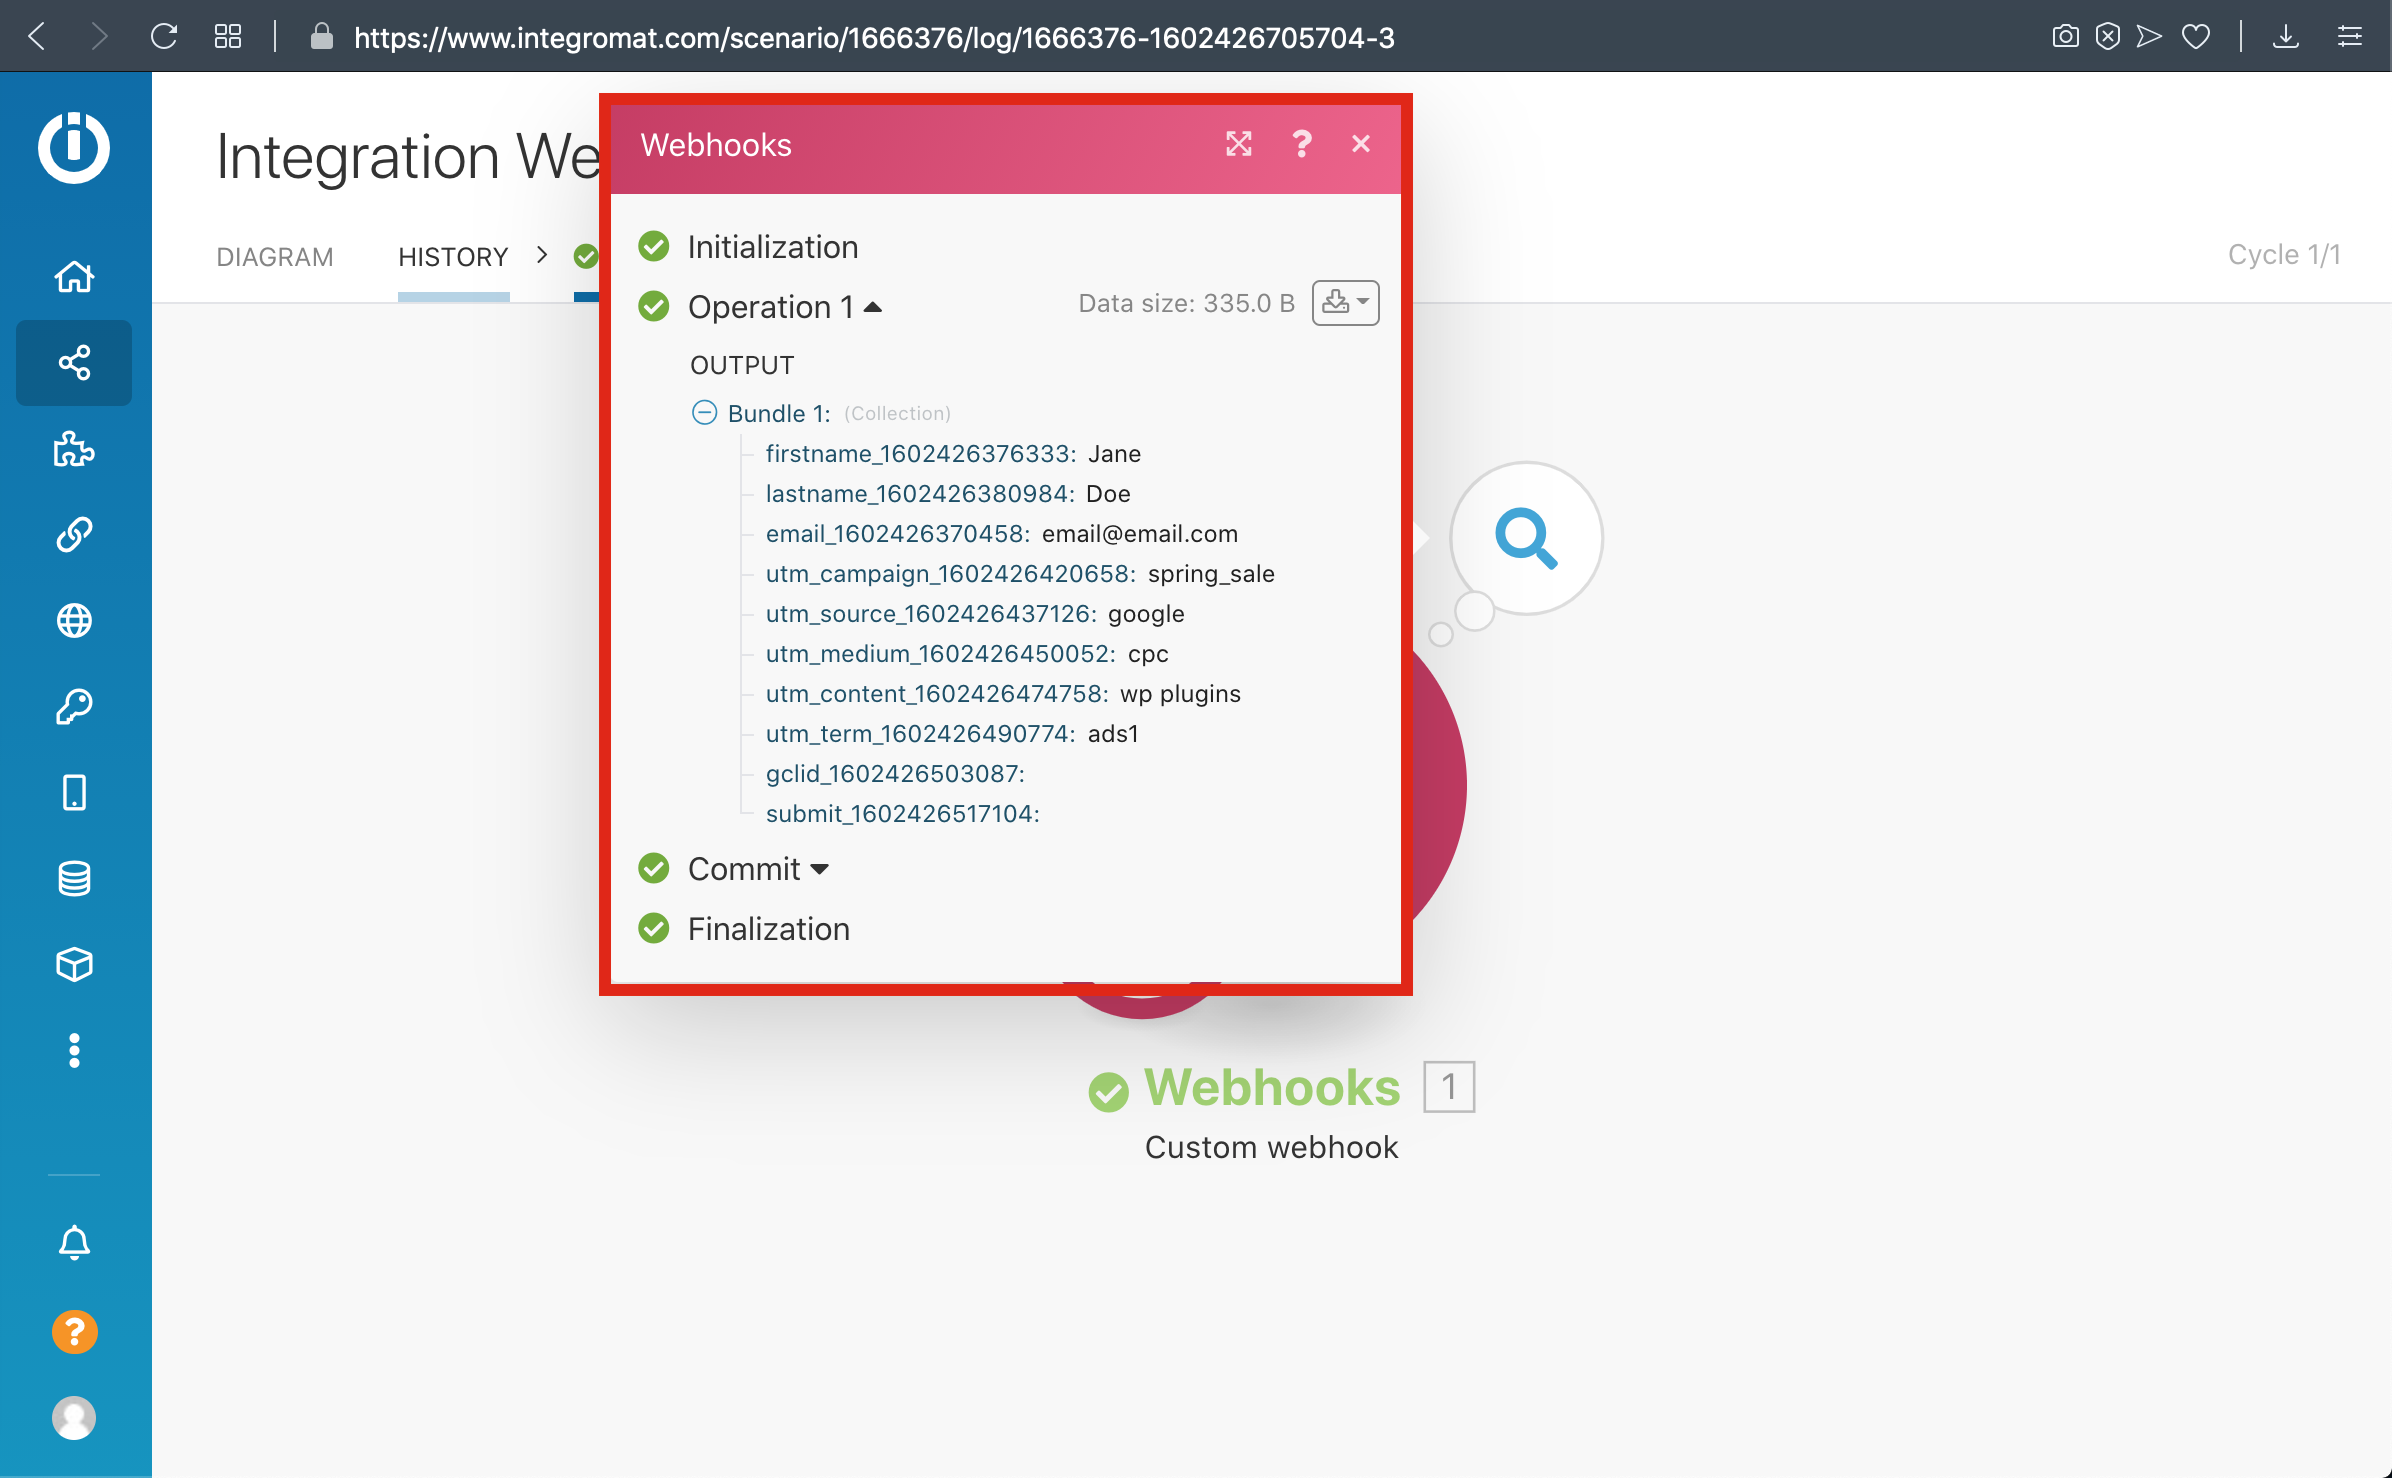
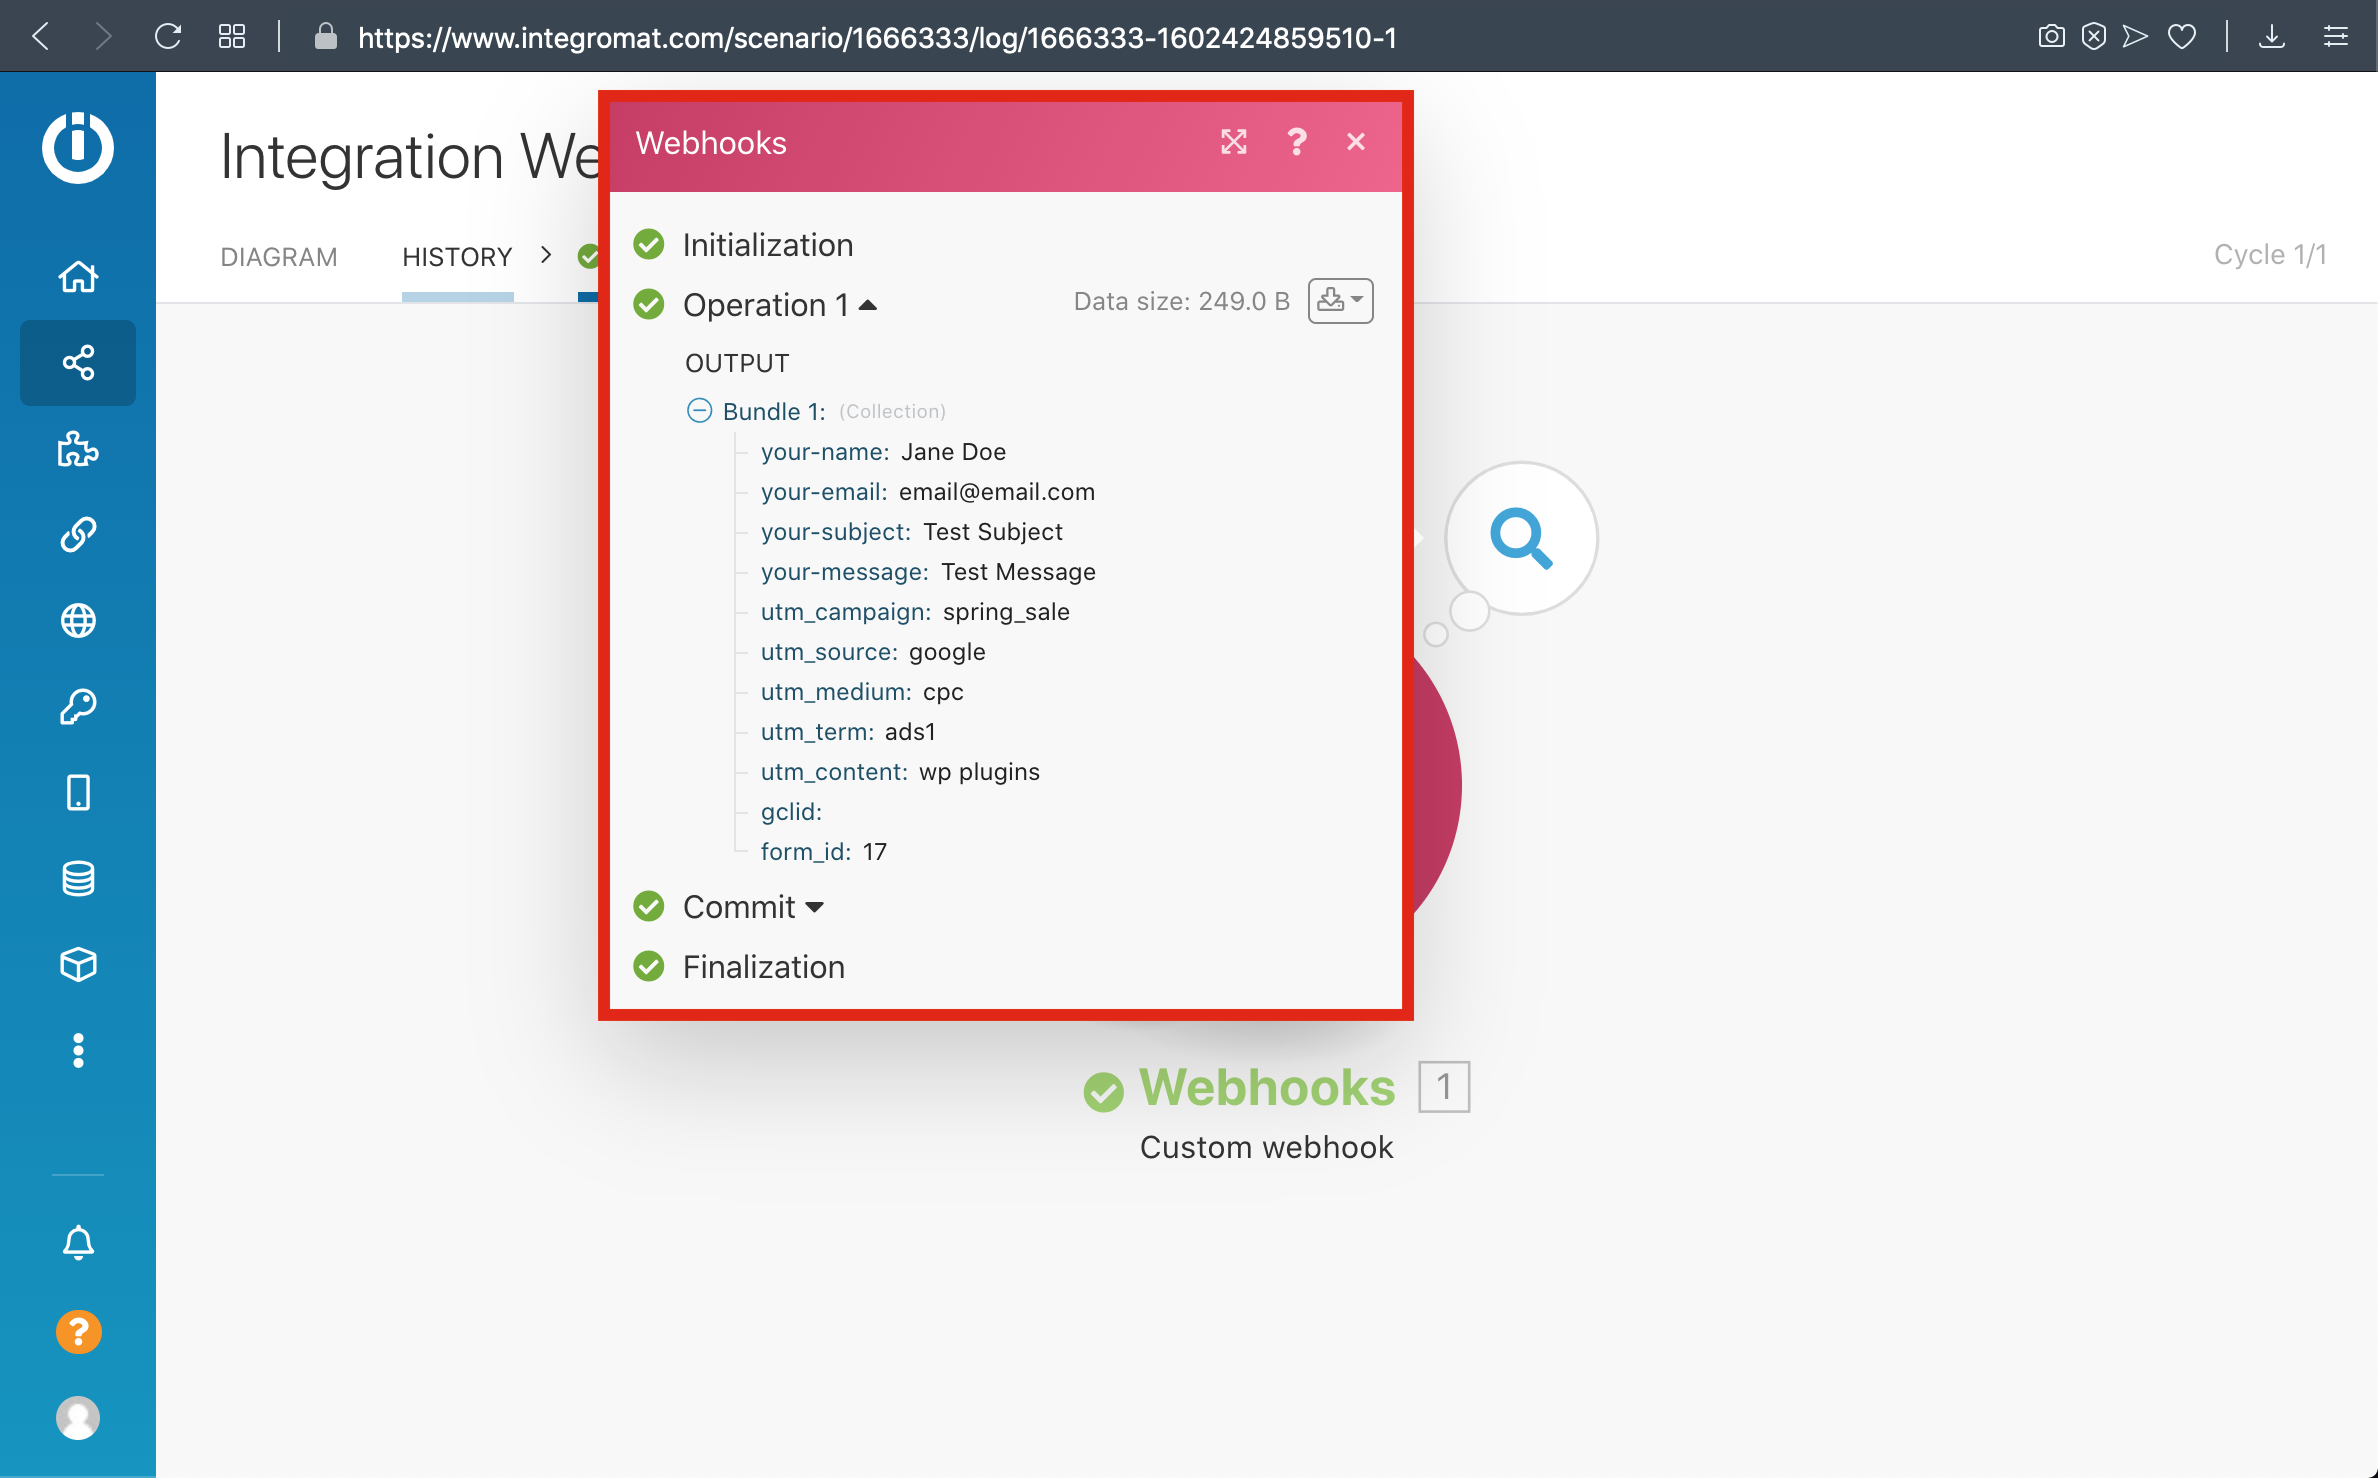
10-) Here is Your Result
Please watch the related Video Tutorial below
and click right to the video and open link in new tab
Contact Form 7 to Integromat -Video Tutorial - HandL UTM Grabber Guide
UTM attribution overview
This guide explains Contact Form 7 to Integromat -Video Tutorial - HandL UTM Grabber Guide. It helps you send UTM and click ID data into automations, webhooks, reports, and connected tools and keep the marketing context needed for accurate reporting across forms, bookings, signups, and sales.
Please watch the related Video Tutorial below
and click right to the video and open link in new tab
Gravity Forms To Integromat - HandL UTM Grabber Guide
UTM attribution overview
This guide explains Gravity Forms To Integromat - HandL UTM Grabber Guide. It helps you send UTM and click ID data into automations, webhooks, reports, and connected tools and keep the marketing context needed for accurate reporting across forms, bookings, signups, and sales.
1-) Create a new Scenario

2-) Select Webhook and Click Continue
3-) Select Custom Webhook
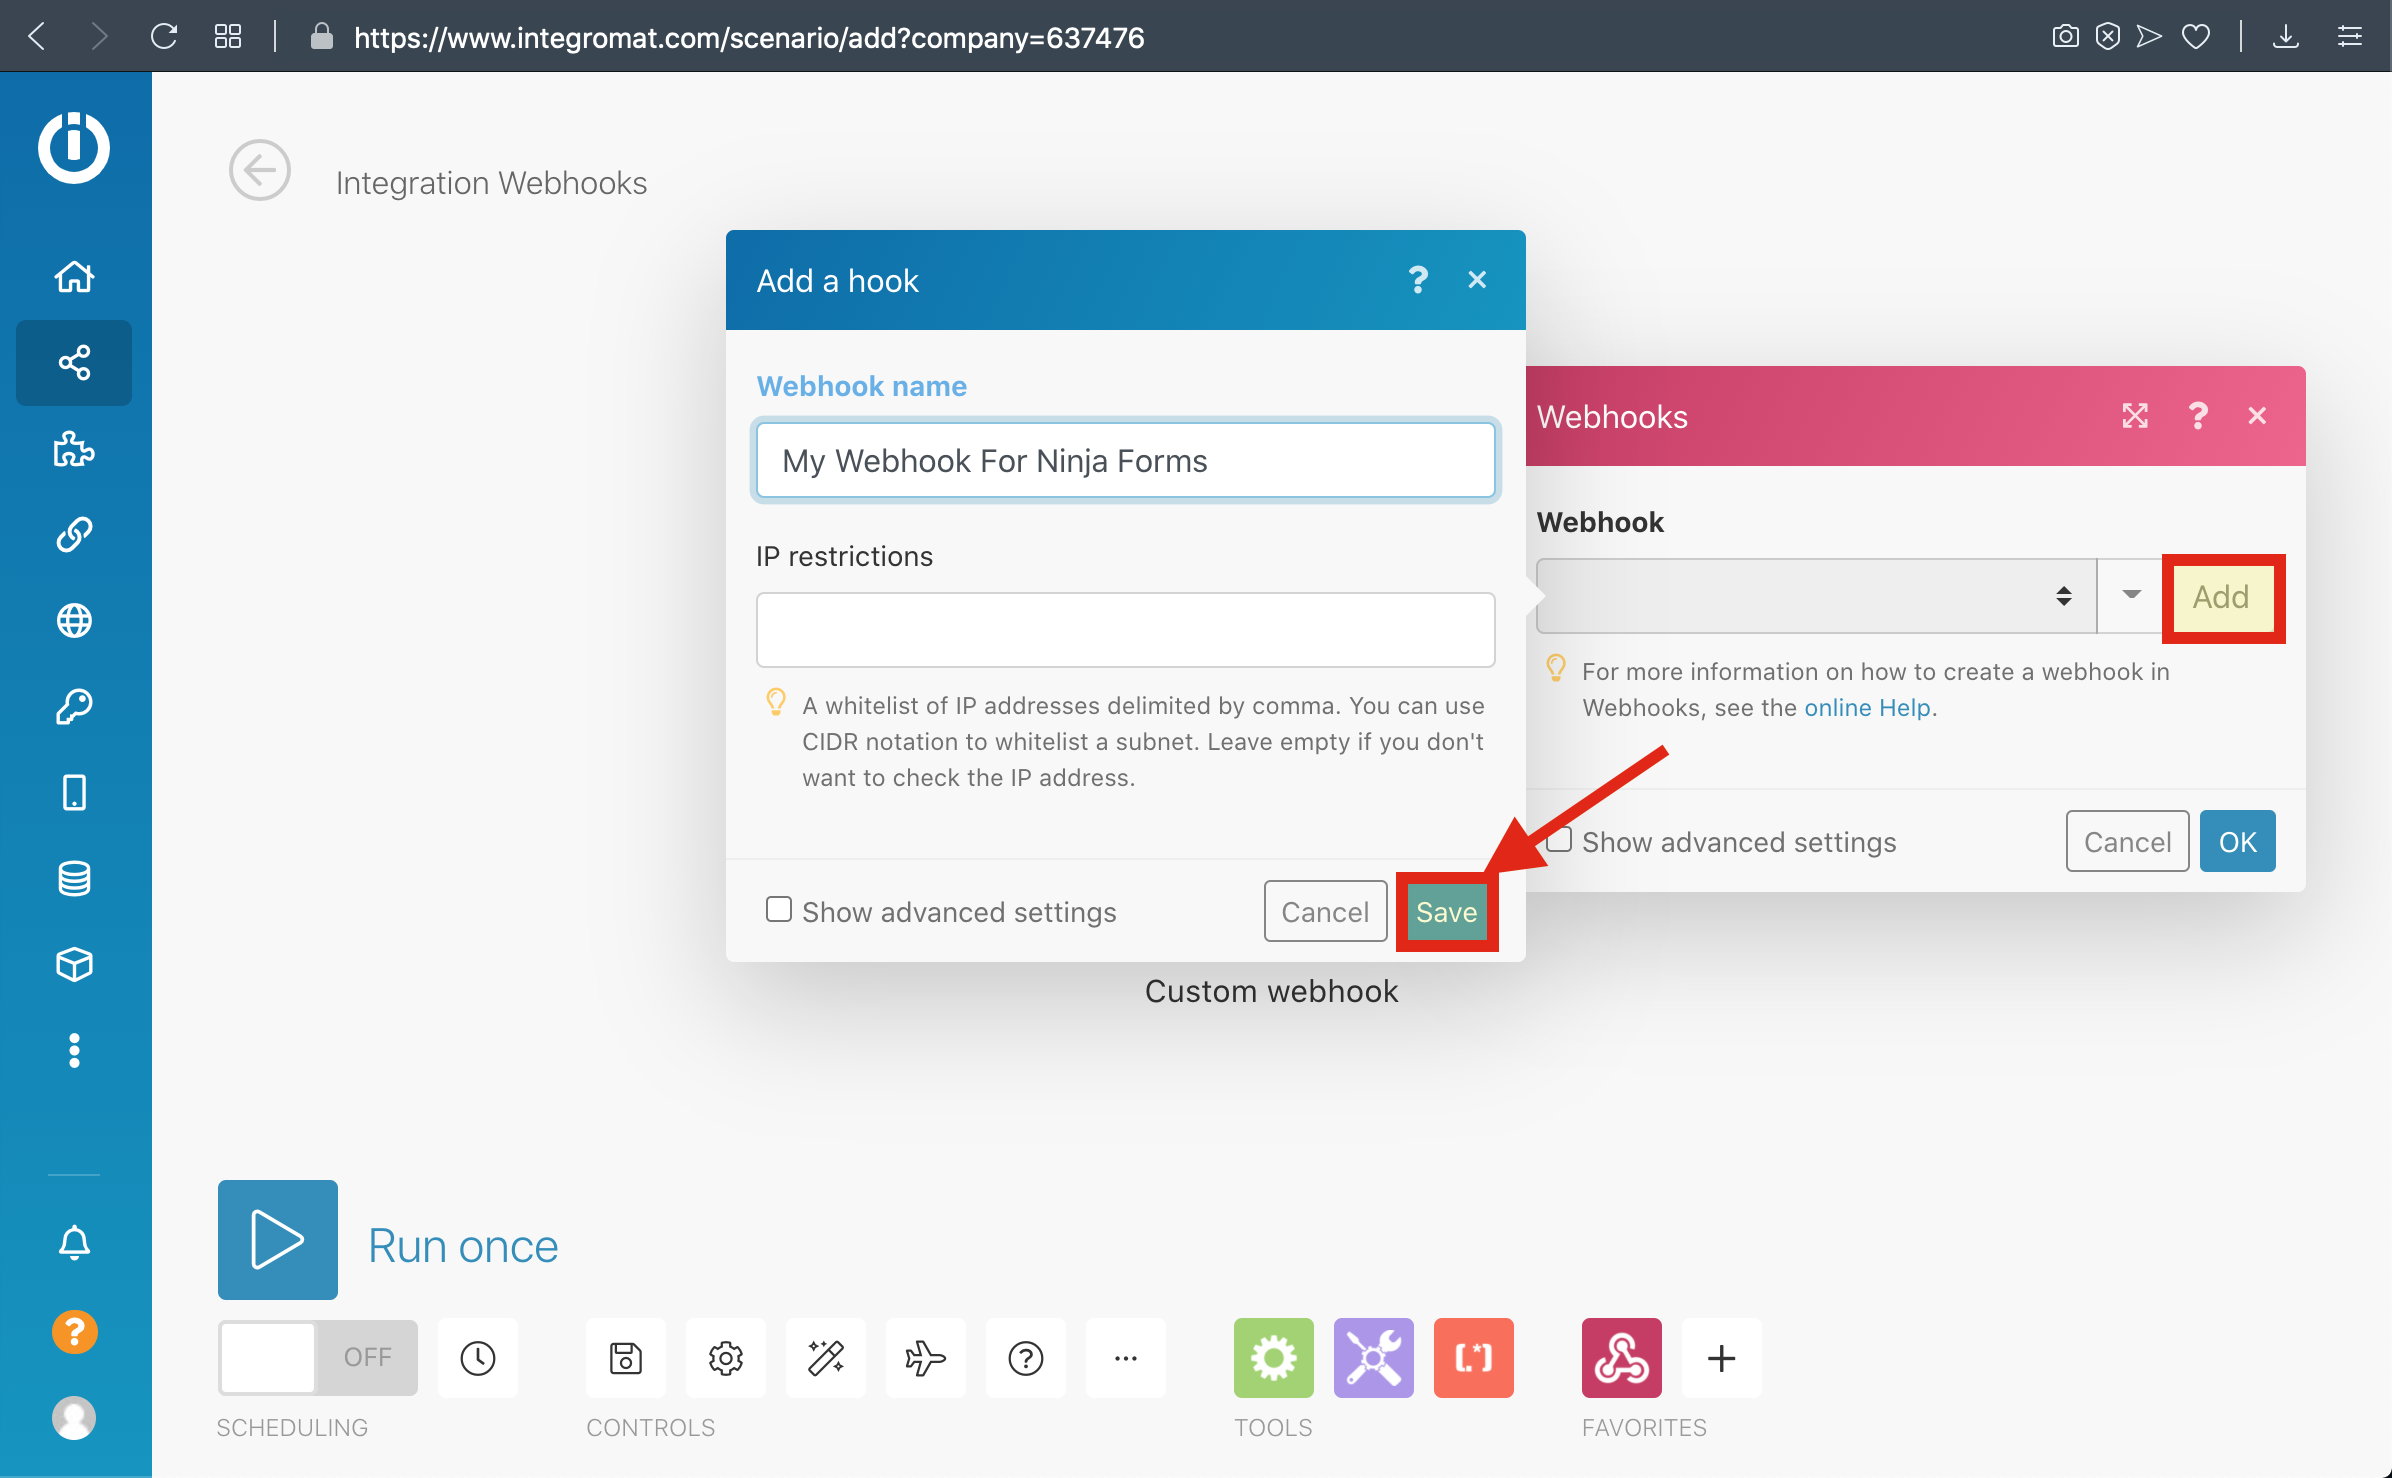
4-) Click Add and Enter your Webhook Name then save it

5-) Copy the Webhook URL to the clipboard and click 'OK' then click Run Once Button
6-) Paste The Webhook URL that you copied before to the Integromat section From UTM Settings
7-) Go To Campaign URL Builder and Copy The URL
8-) Paste The URL and Fill The form then send it
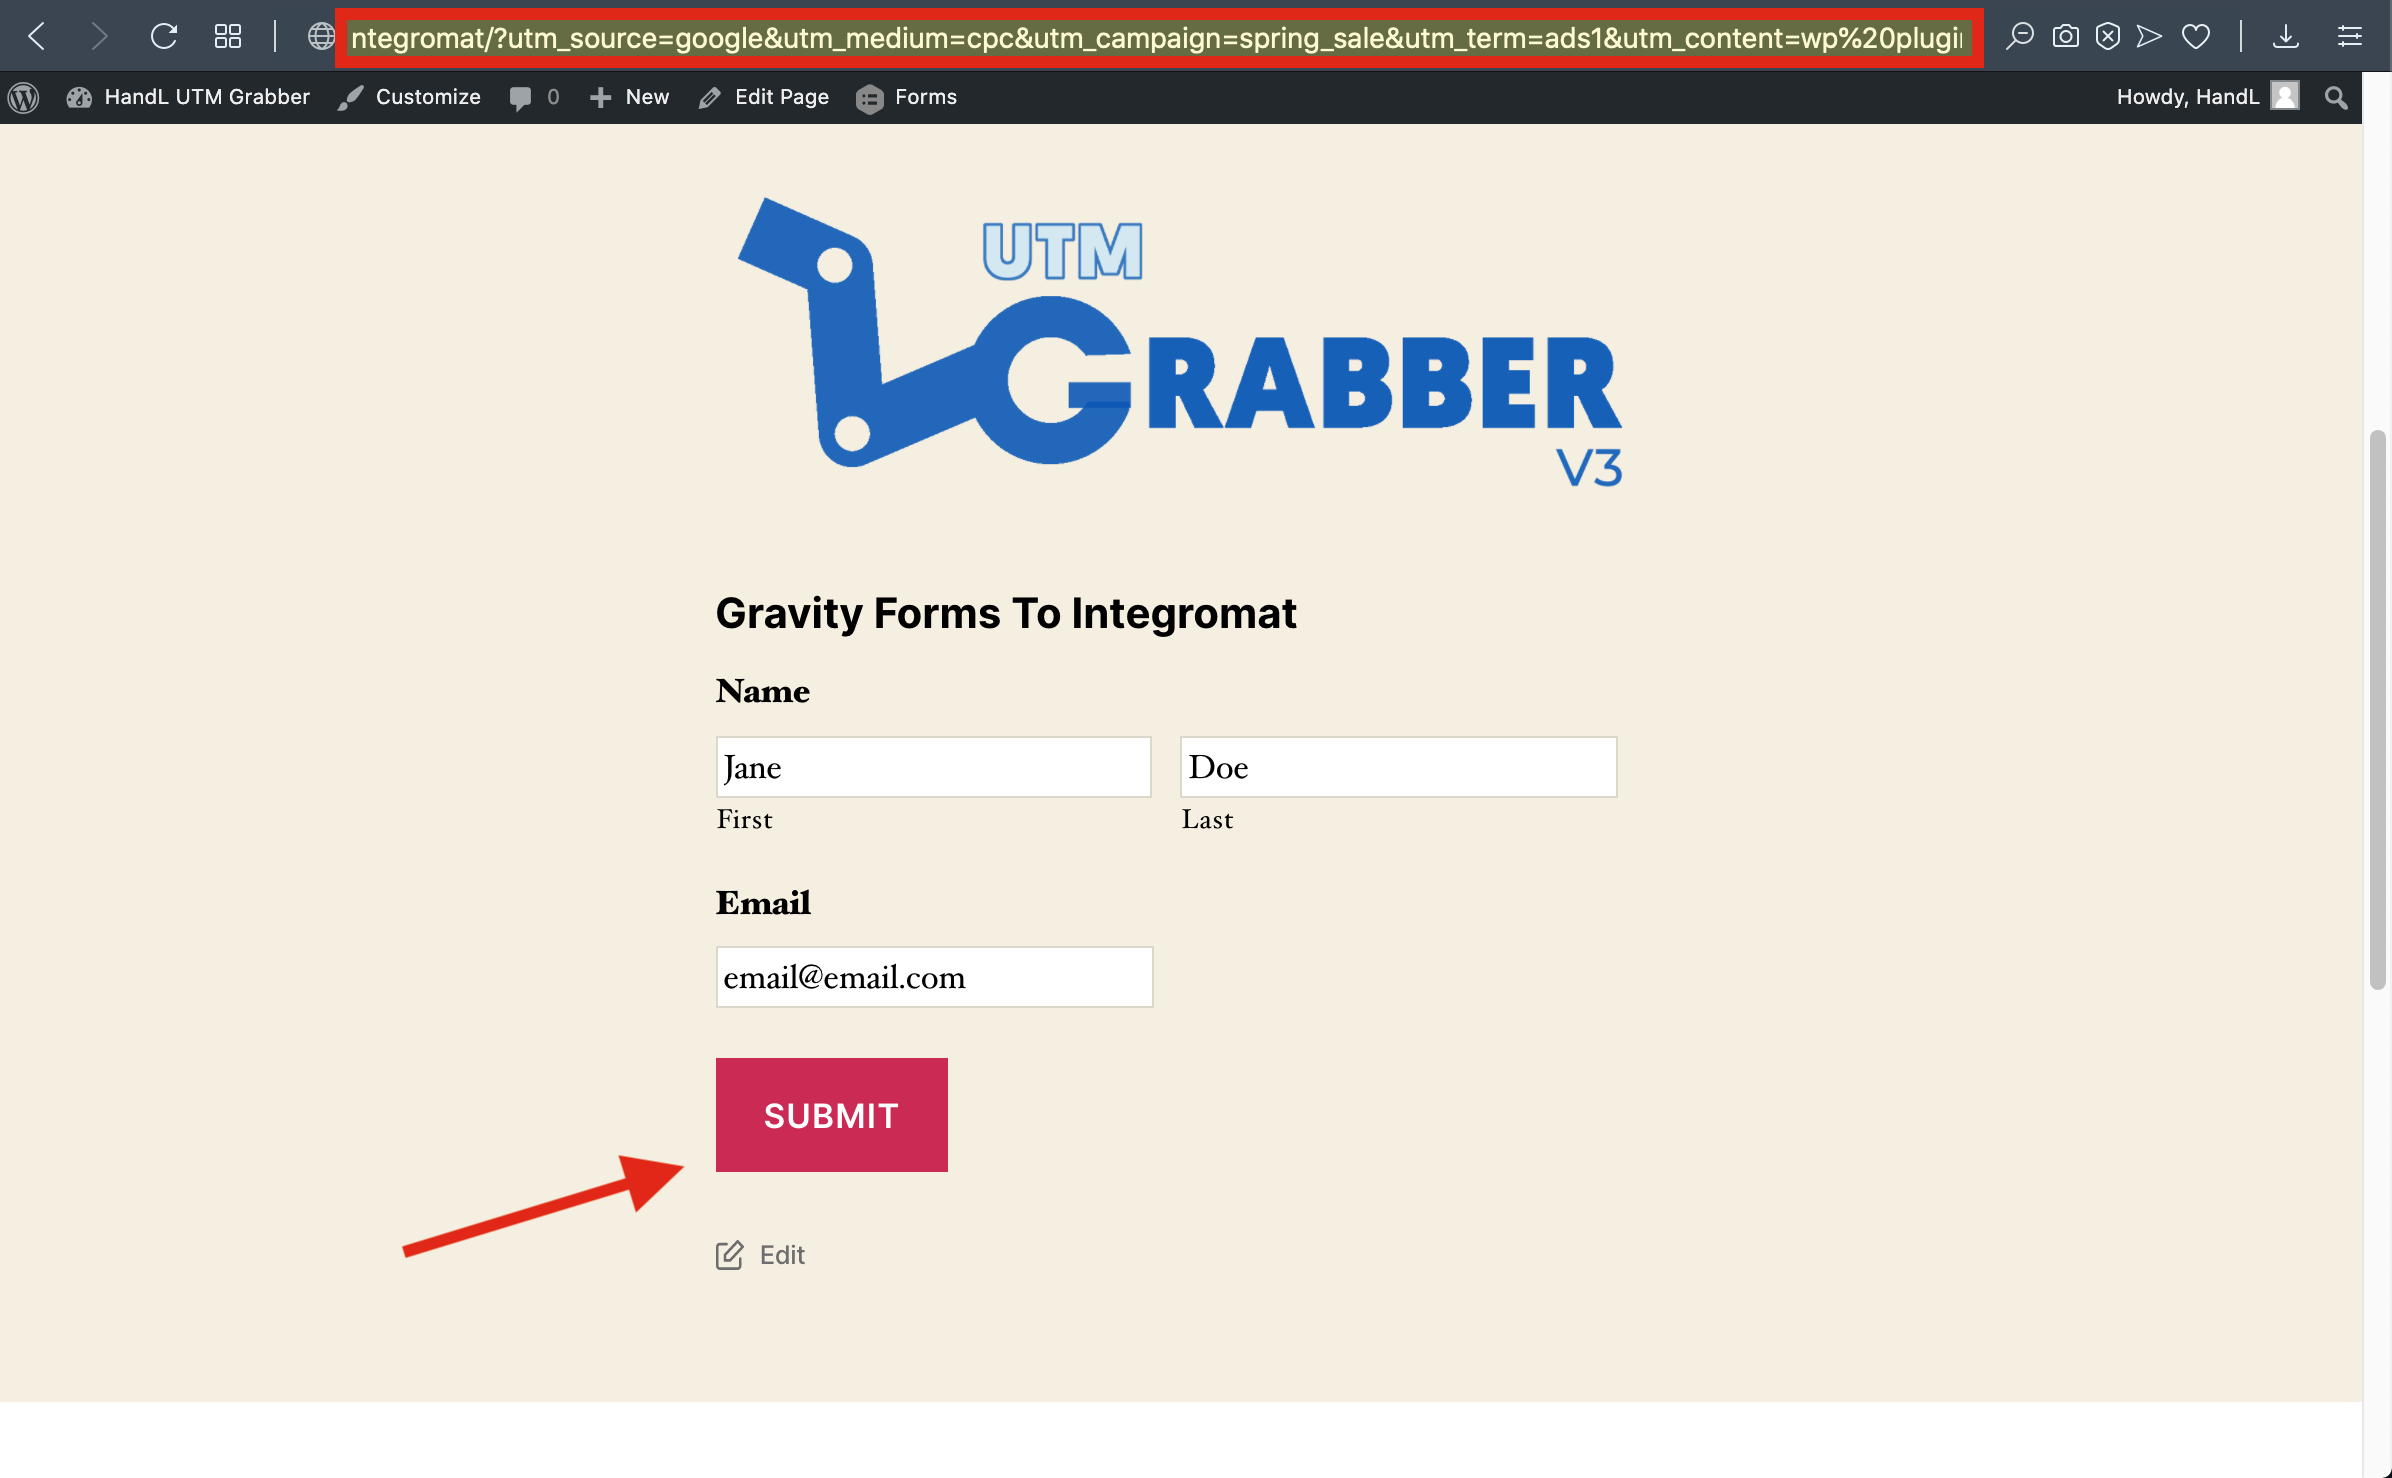
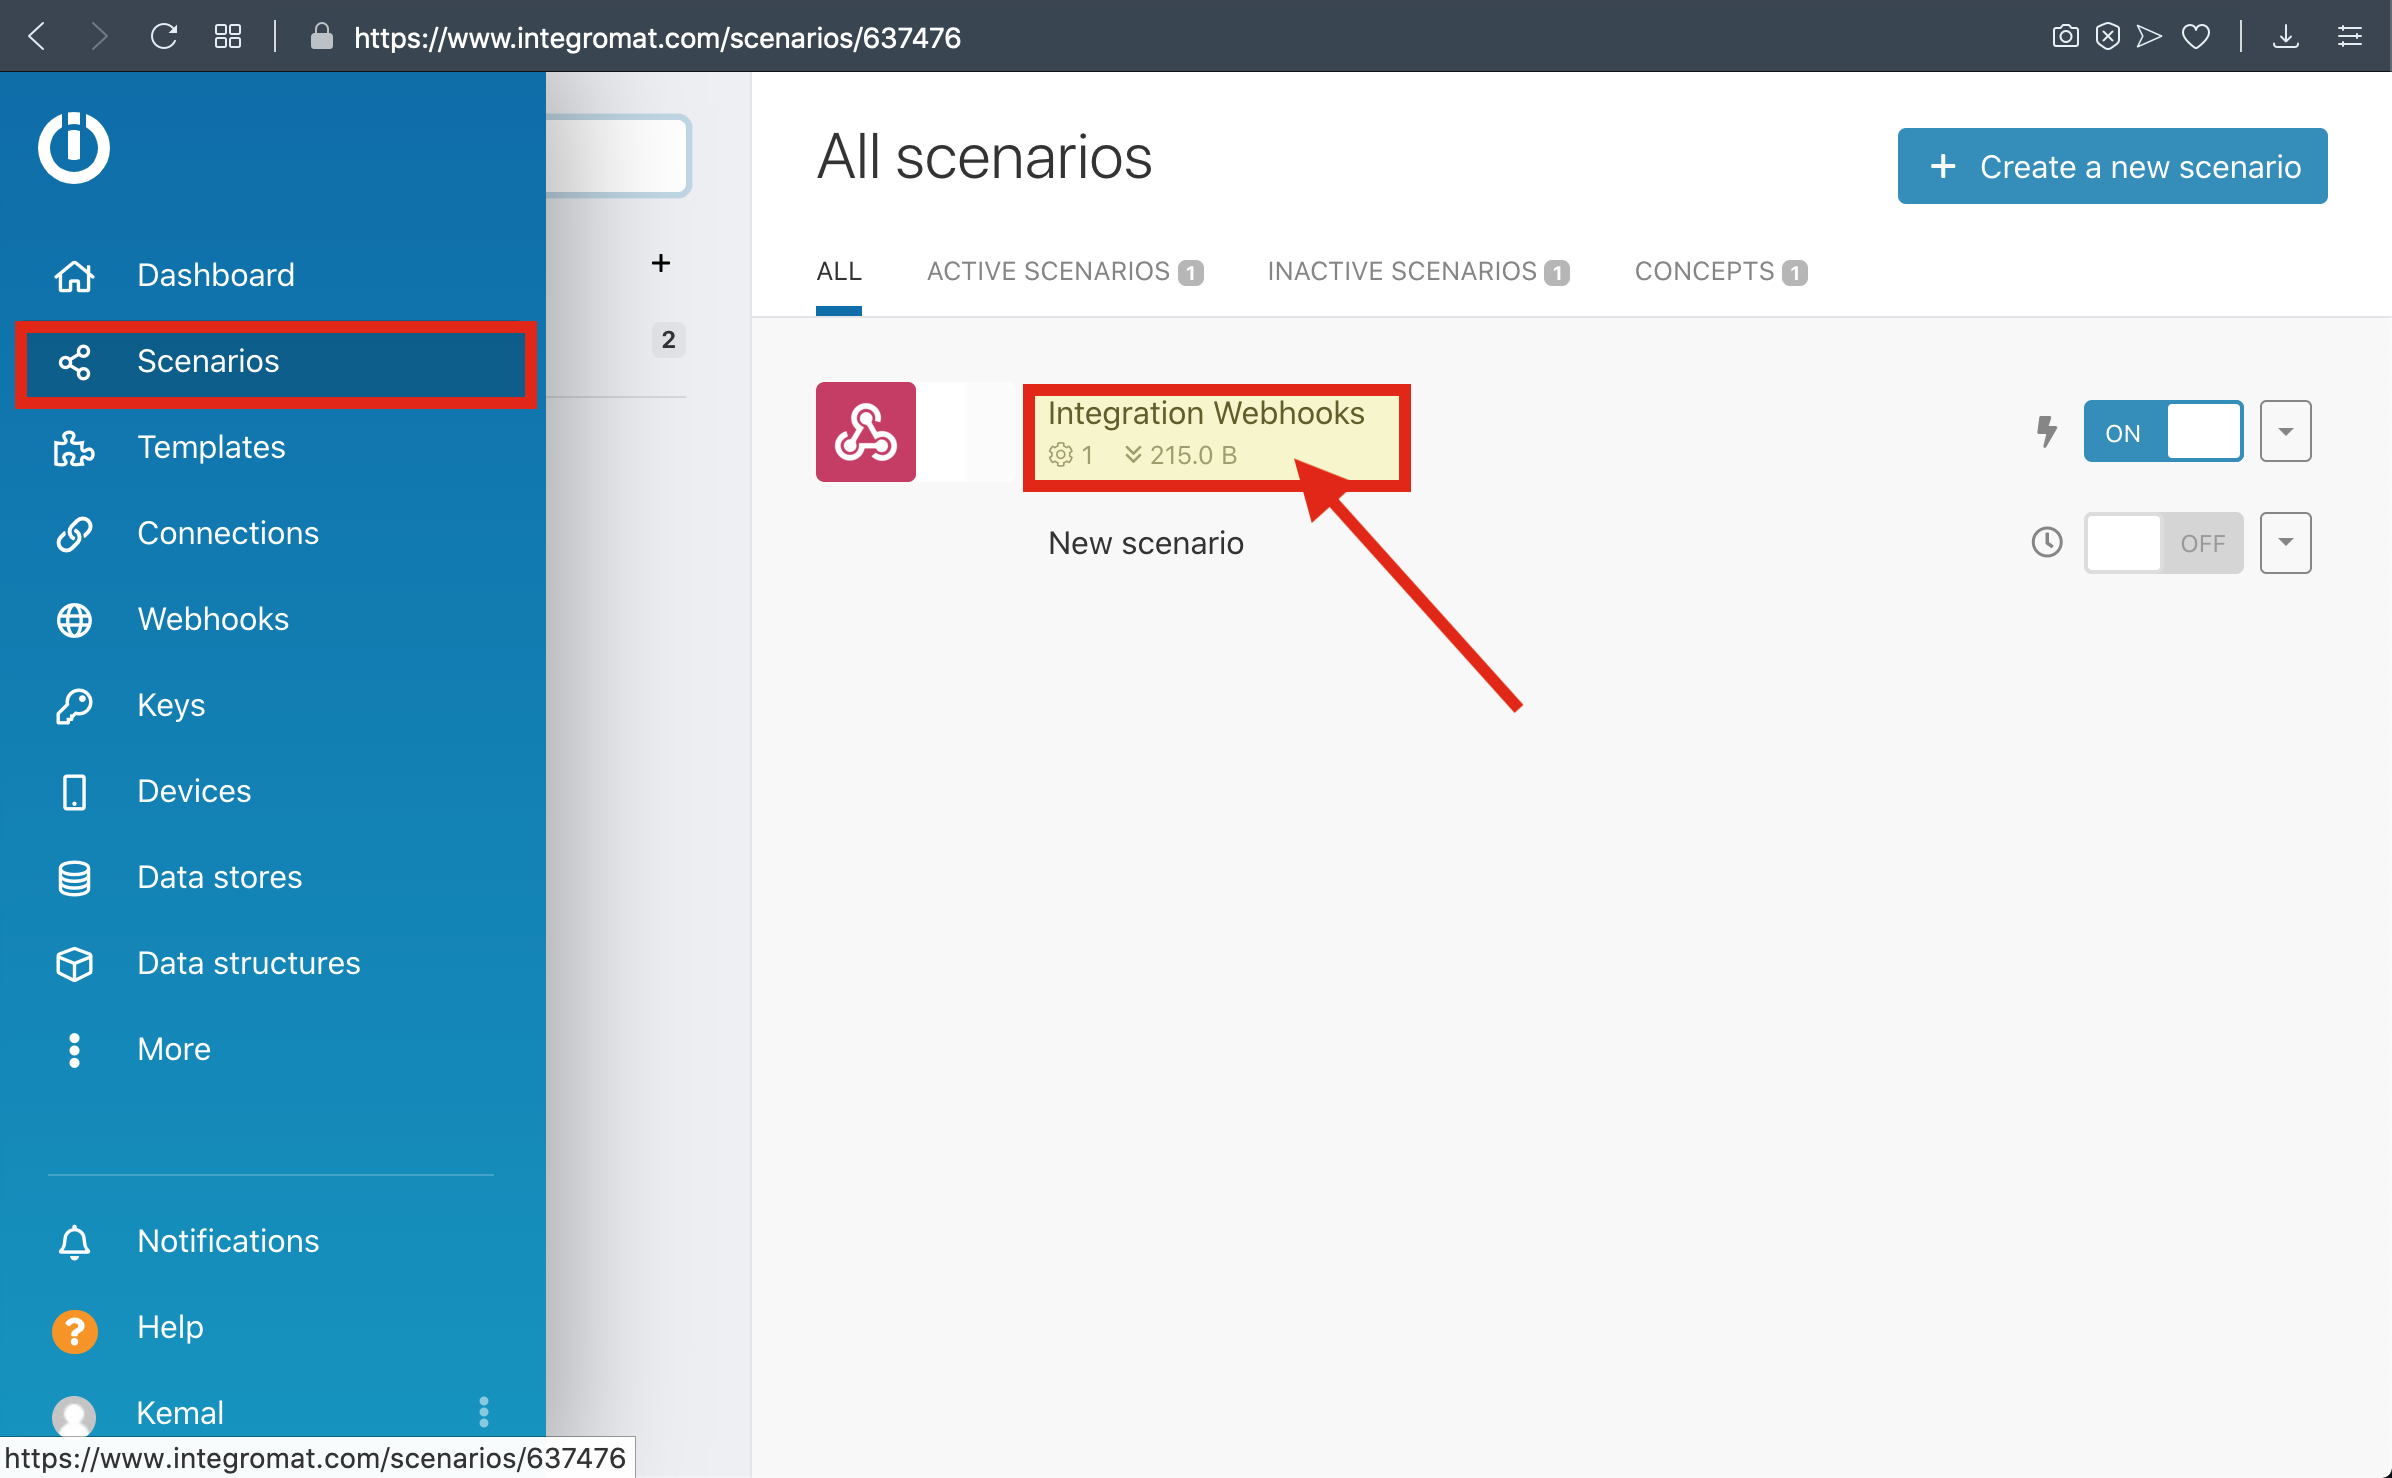
9-) Go To Scenarios to see your Data
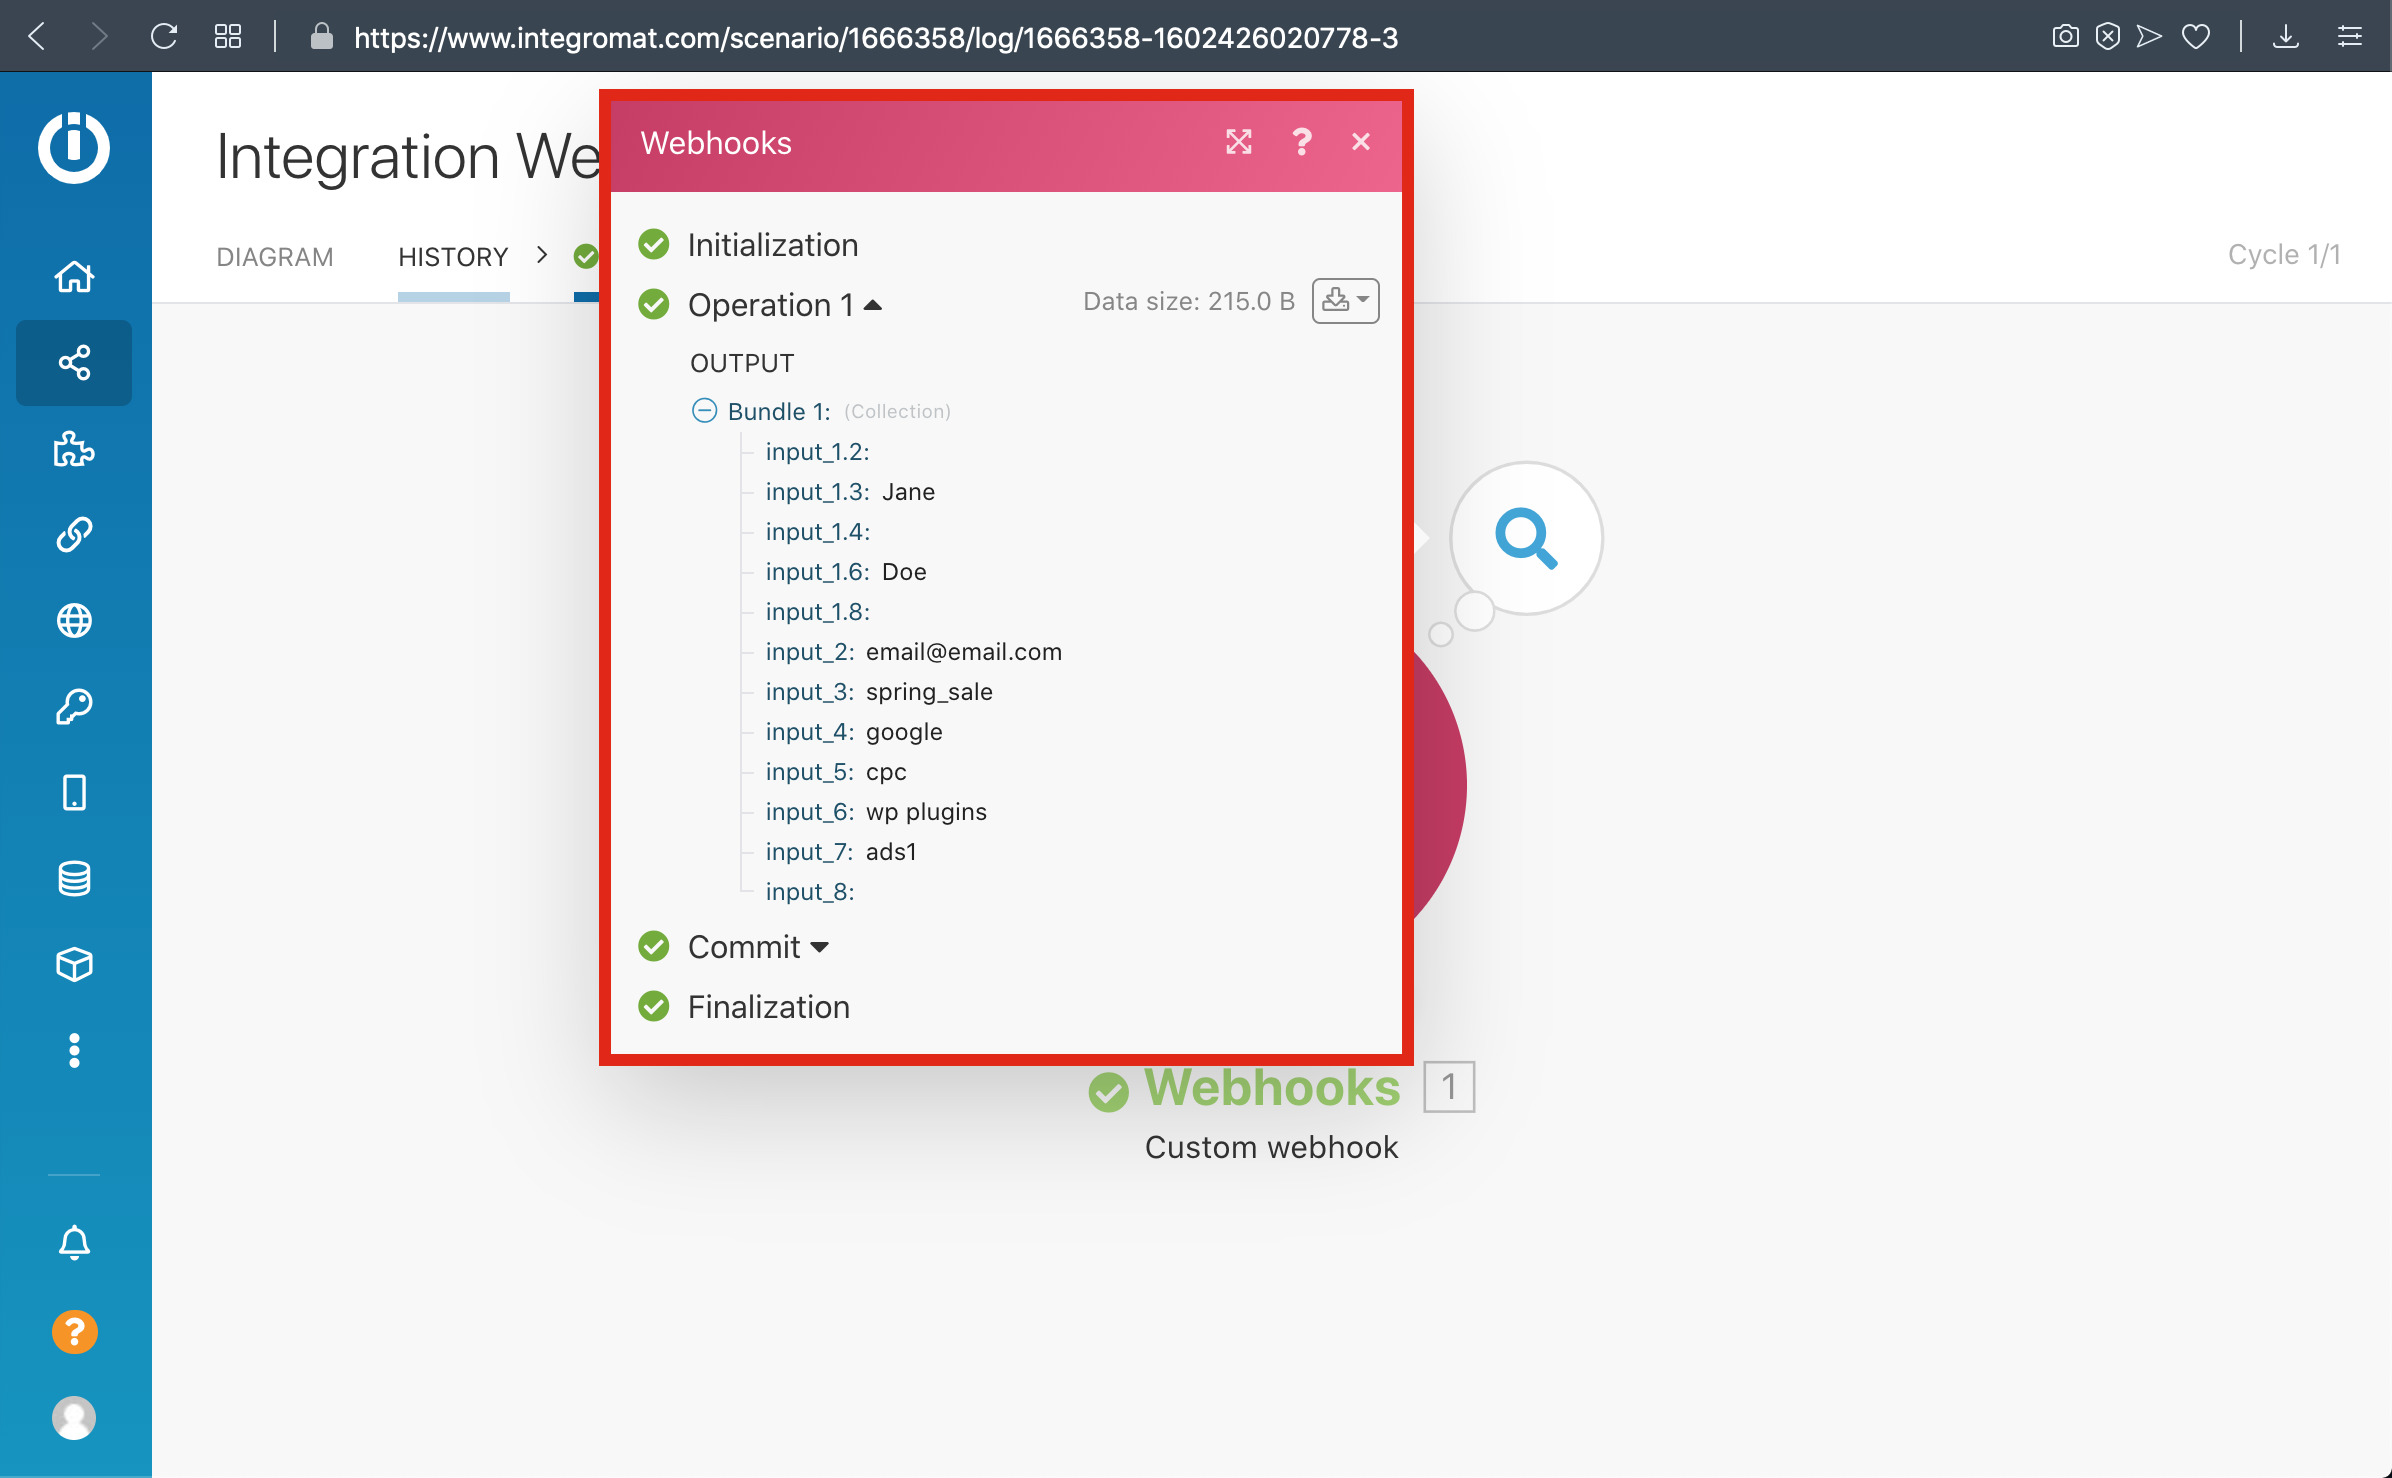
10-) Here is Your Result
Ninja Forms To Integromat - HandL UTM Grabber Guide
UTM attribution overview
This guide explains Ninja Forms To Integromat - HandL UTM Grabber Guide. It helps you send UTM and click ID data into automations, webhooks, reports, and connected tools and keep the marketing context needed for accurate reporting across forms, bookings, signups, and sales.
1-) Create a new Scenario

2-) Select Webhook and Click Continue

3-) Select Custom Webhook

4-) Click Add and Enter your Webhook Name then save it
5-) Copy the Webhook URL to the clipboard and click 'OK' then click Run Once Button
6-) Paste The Webhook URL that you copied before to the Integromat section From UTM Settings
7-) Go To Campaign URL Builder and Copy The URL
8-) Paste The URL and Fill The form then send it
9-) Go To Scenarios to see your Data
10-) Here is Your Result