OptimizePress UTM Tracking Integration
Capture UTM parameters from OptimizePress pages and forms with HandL UTM Grabber so campaign source, medium, click ID, and referrer data follow each lead.
- OptimizePress UTM Tracking Integration
- OptimizePress and Infusionsoft UTM Tracking Integration
- OptimizePress Pages (Enable Scripts & Styles) - HandL UTM Grabber Guide
OptimizePress UTM Tracking Integration
UTM attribution overview
This guide explains how to capture UTM data in OptimizePress 3 opt-in forms with HandL UTM Grabber. It helps you capture UTM source, medium, campaign, term, content, click IDs, referrer, and landing page data and keep the marketing context needed for accurate reporting across forms, bookings, signups, and sales.
OptimizePress opt-in forms send each lead to the email service you connect, such as AWeber, ActiveCampaign, or Mailchimp. This guide adds hidden tracking fields to the form. HandL UTM Grabber fills them from the visitor's tracking cookies, and OptimizePress sends them to your email service together with the lead. The values are kept even when the visitor arrived with UTM parameters on a different page and converts later.
Before you start. In your email service, create one custom text field for each value you want to store. Use the same names HandL UTM Grabber uses, for example utm_source, utm_medium, and utm_campaign. OptimizePress reads its field list from the email service, so the fields must exist there first.
1. Allow HandL UTM Grabber on OptimizePress pages
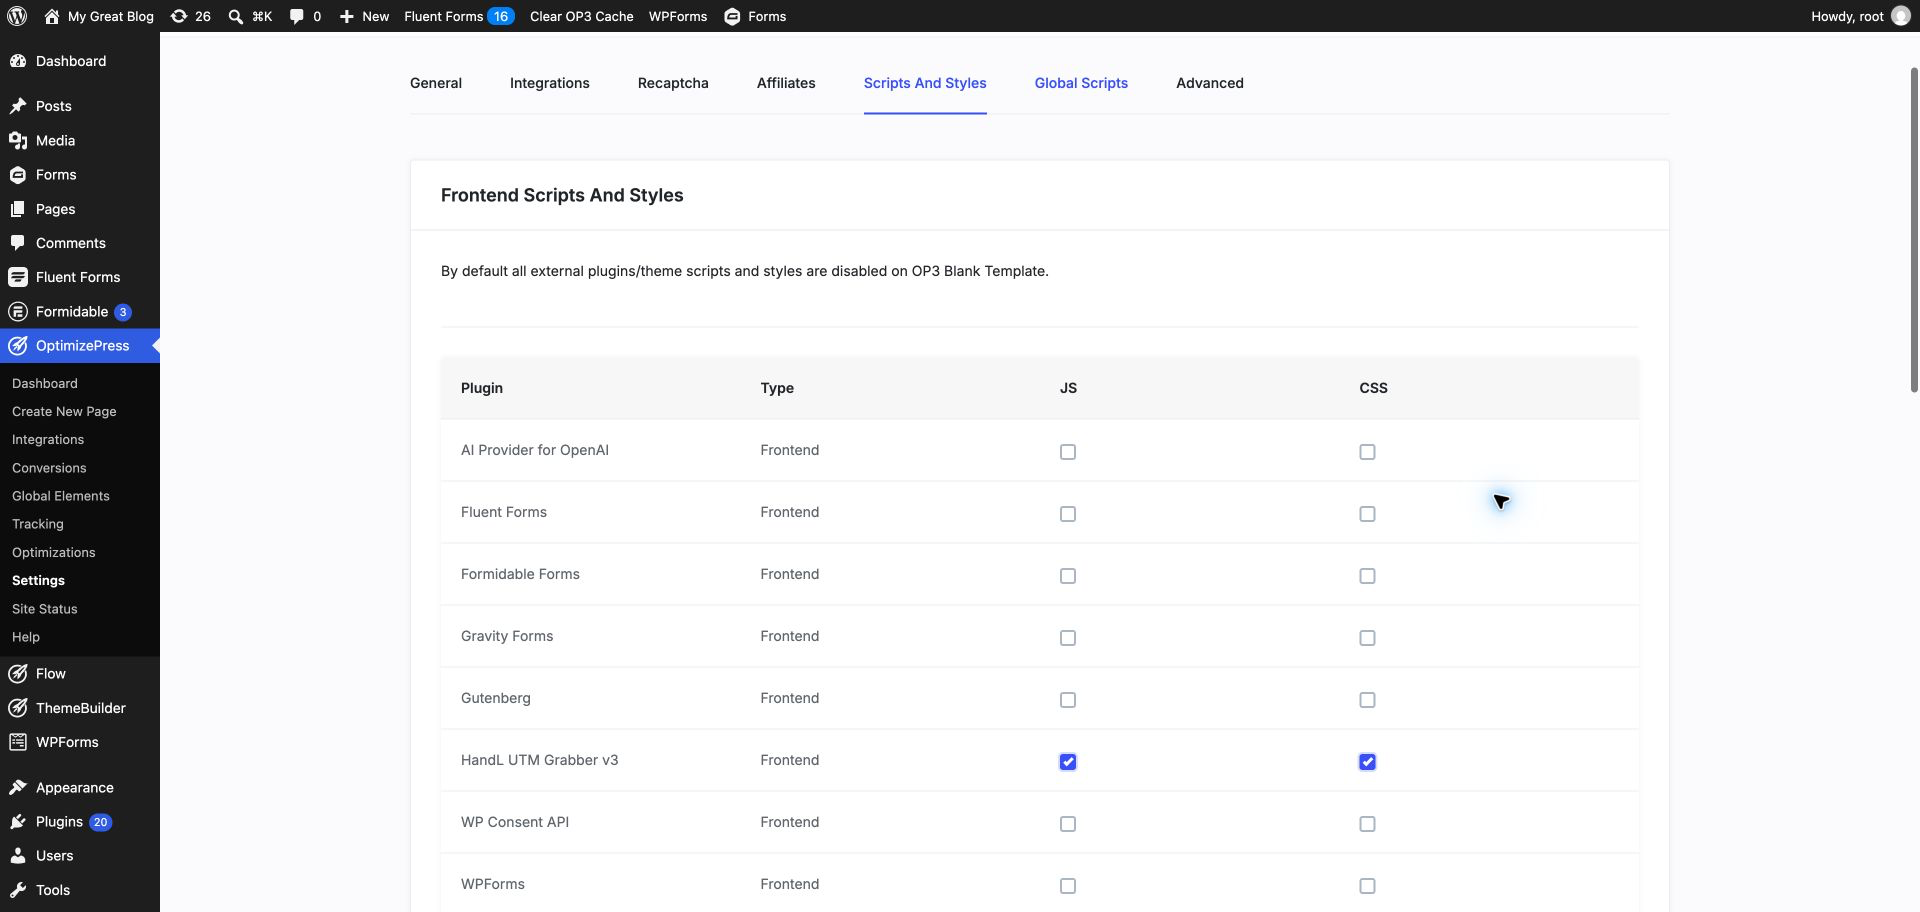
OptimizePress blocks other plugins' scripts on its pages by default. Go to OptimizePress, Settings, Scripts And Styles. Under Frontend Scripts And Styles, tick JS and CSS for HandL UTM Grabber v3 and click Save. See OptimizePress Pages (Enable Scripts & Styles) for details.
2. Select the opt-in form and open the integration
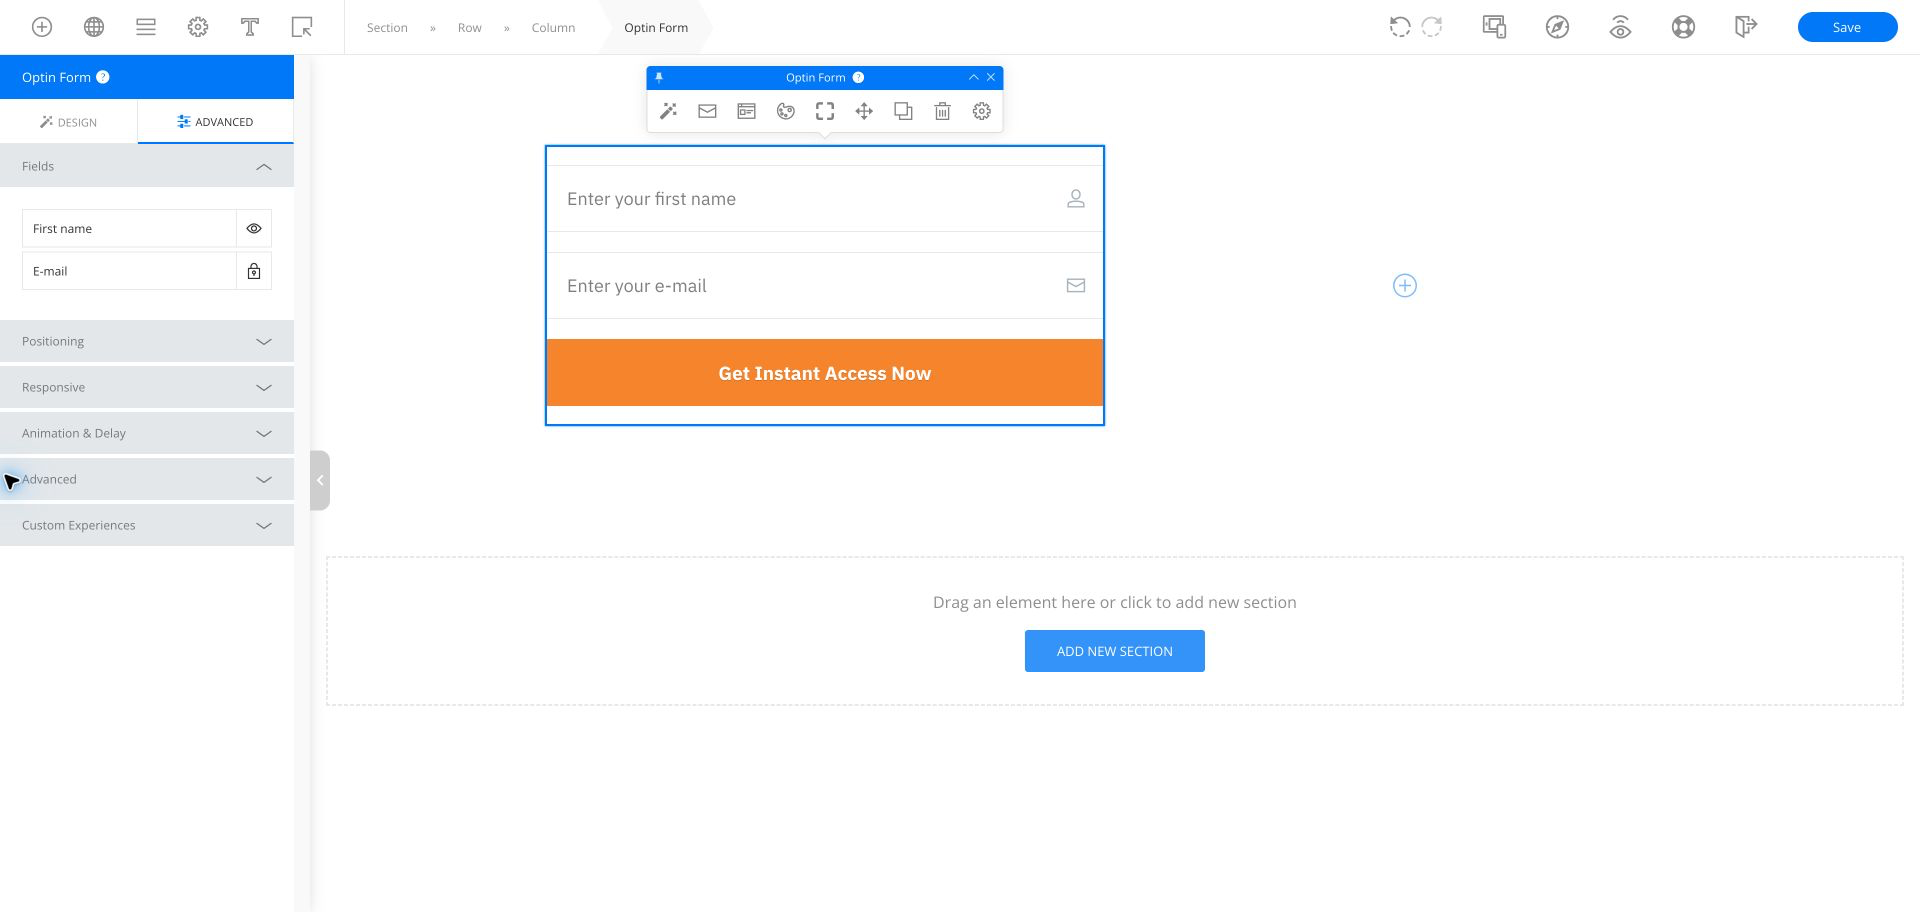
Open the page in OptimizeBuilder. Click the Optin Form element. In the floating toolbar, click the envelope icon, then Edit Integration.
3. Choose your email service
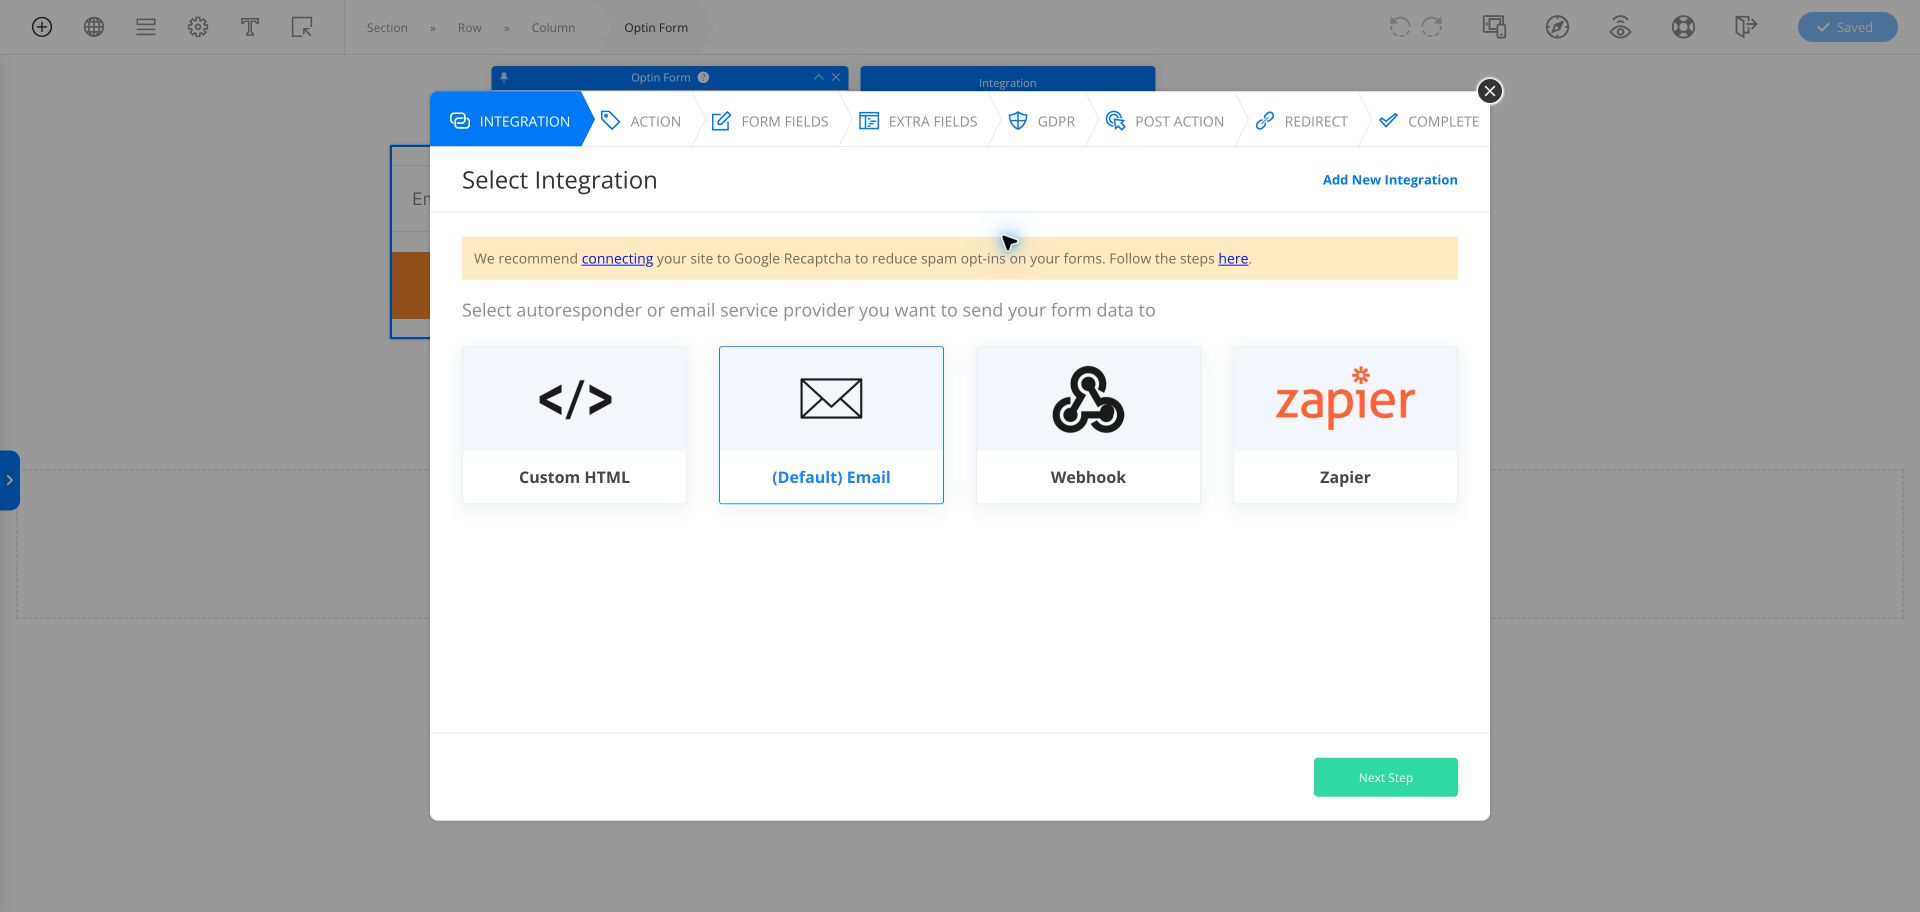
Select the email service that receives your leads and click Next Step. If your service is not in the list, click Add New Integration and connect it first.
4. Select the tracking fields
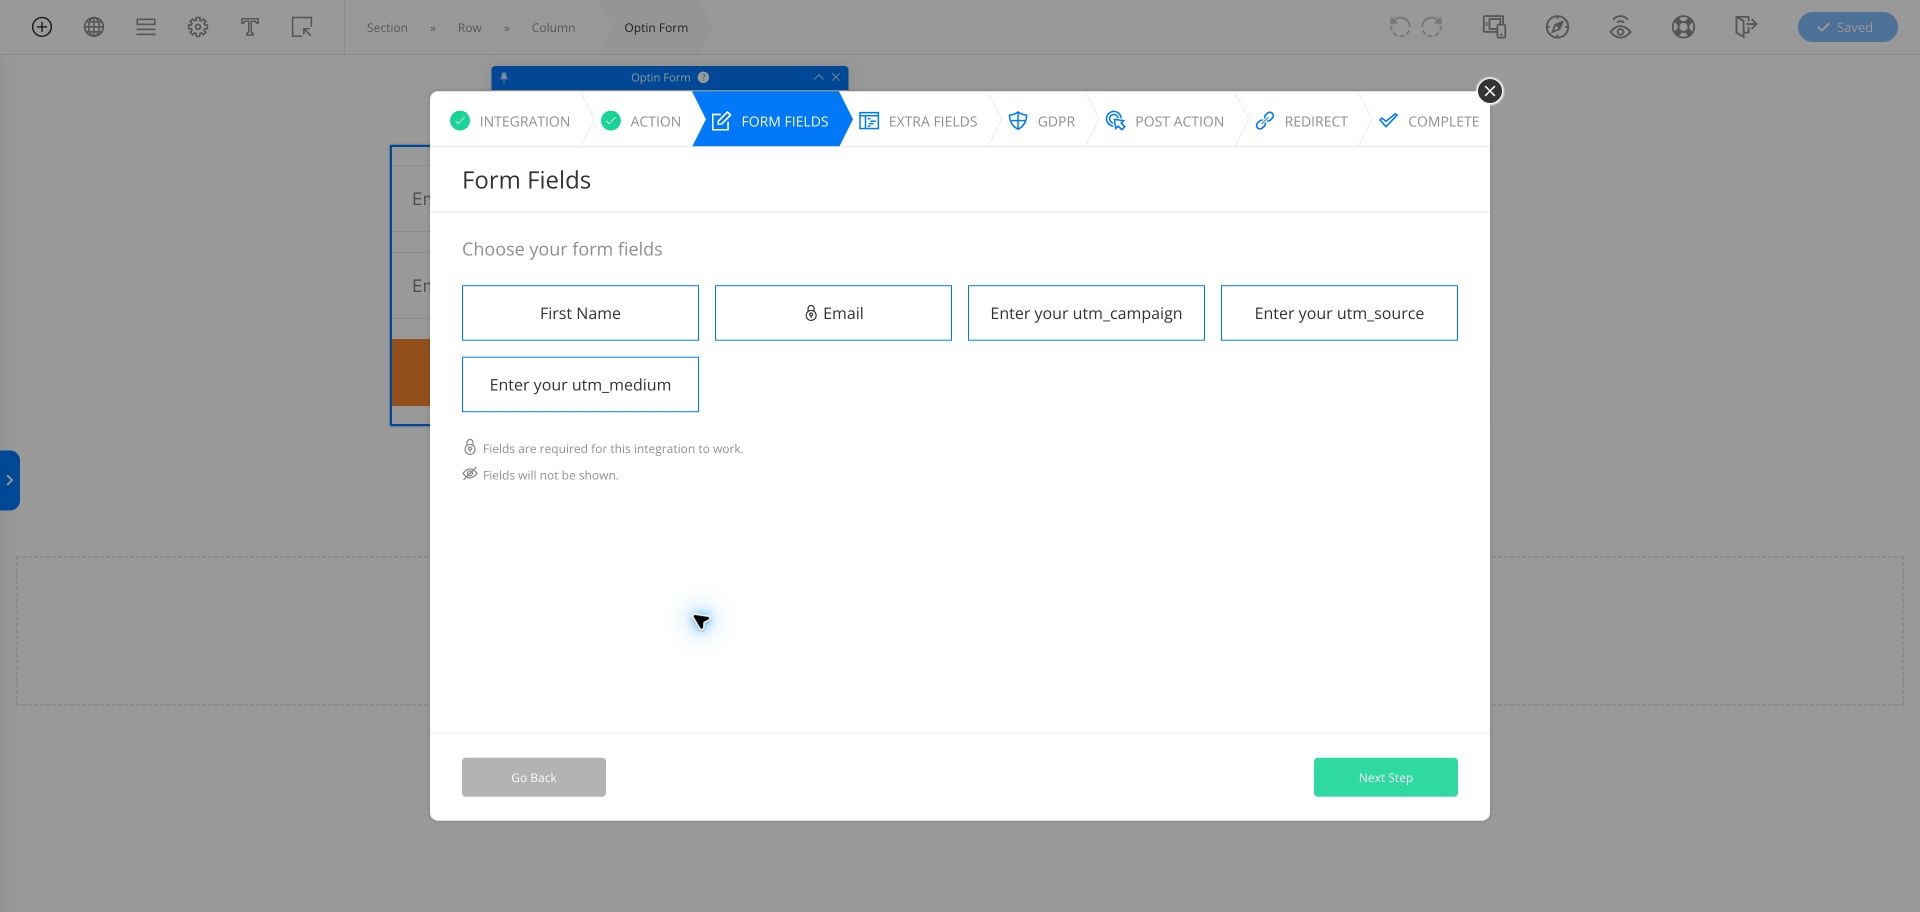
On the Form Fields step, click every tracking field you created in your email service. A selected field shows a blue outline. Keep your name and email fields selected as well. Click Next Step and complete the wizard.
5. Add the tracking parameter as a CSS class
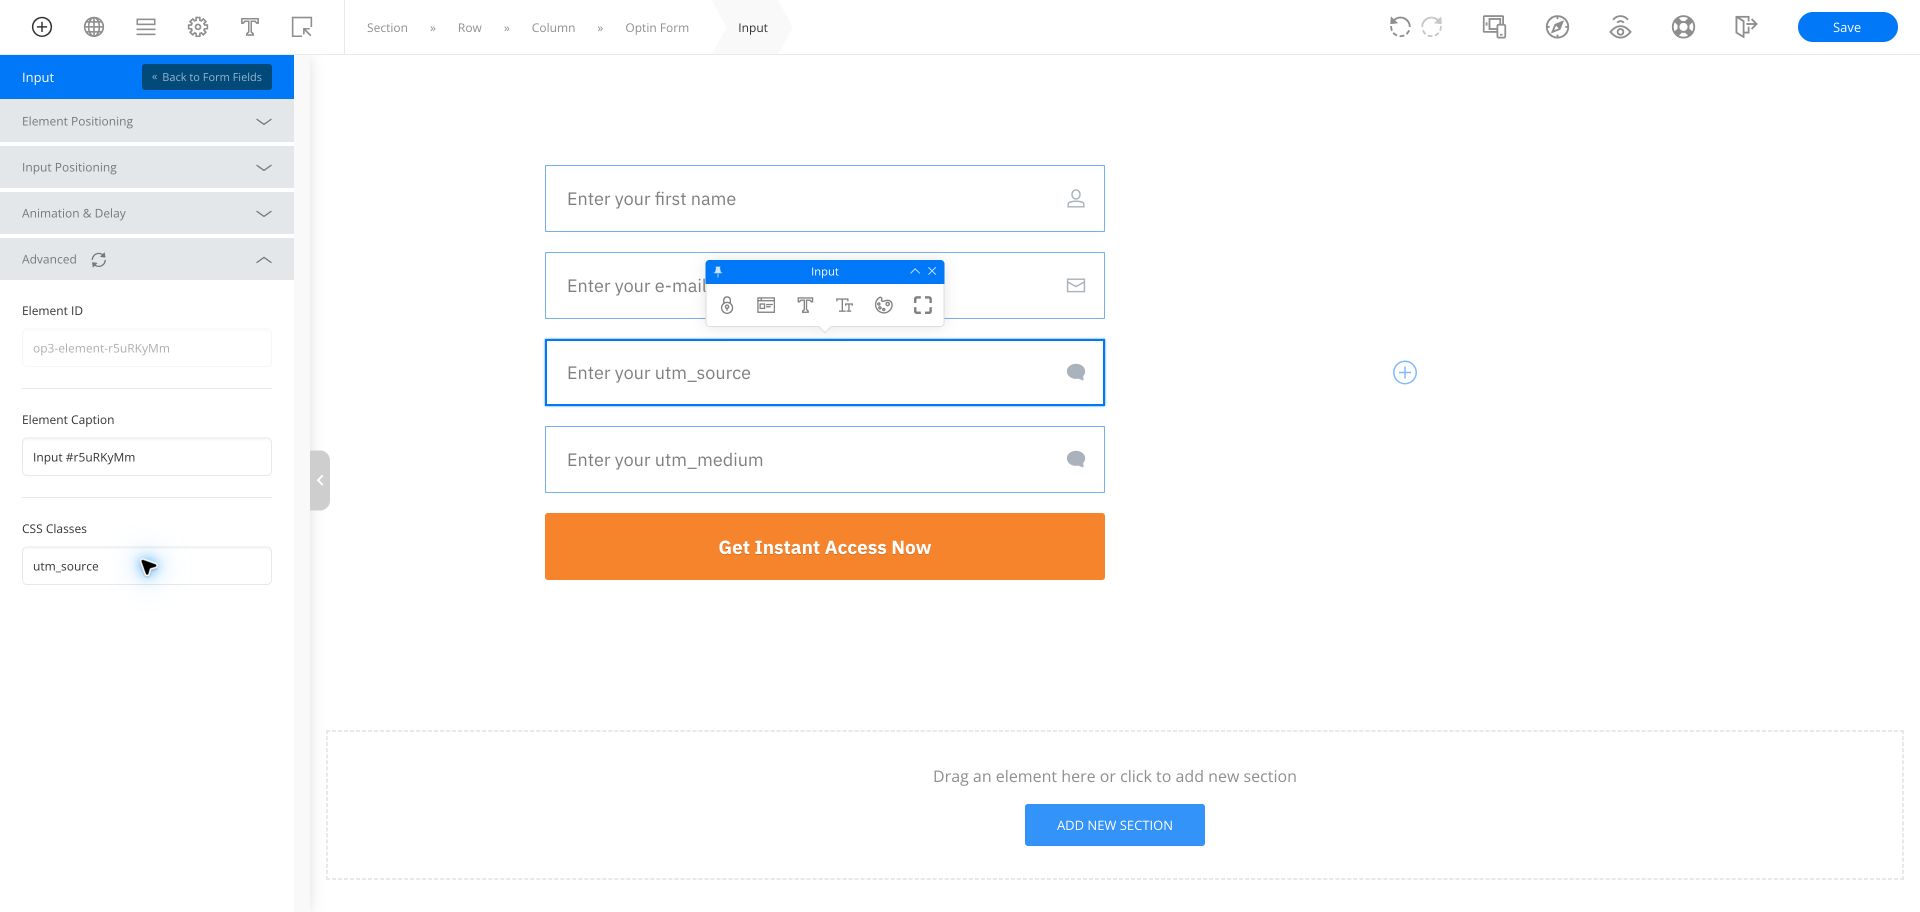
Click a tracking field on the page. In the left sidebar, expand Advanced and find CSS Classes. Type the tracking parameter name, for example utm_source, and press Enter. Repeat for every tracking field. HandL UTM Grabber uses this class to know which value belongs in the field.
6. Hide the tracking fields
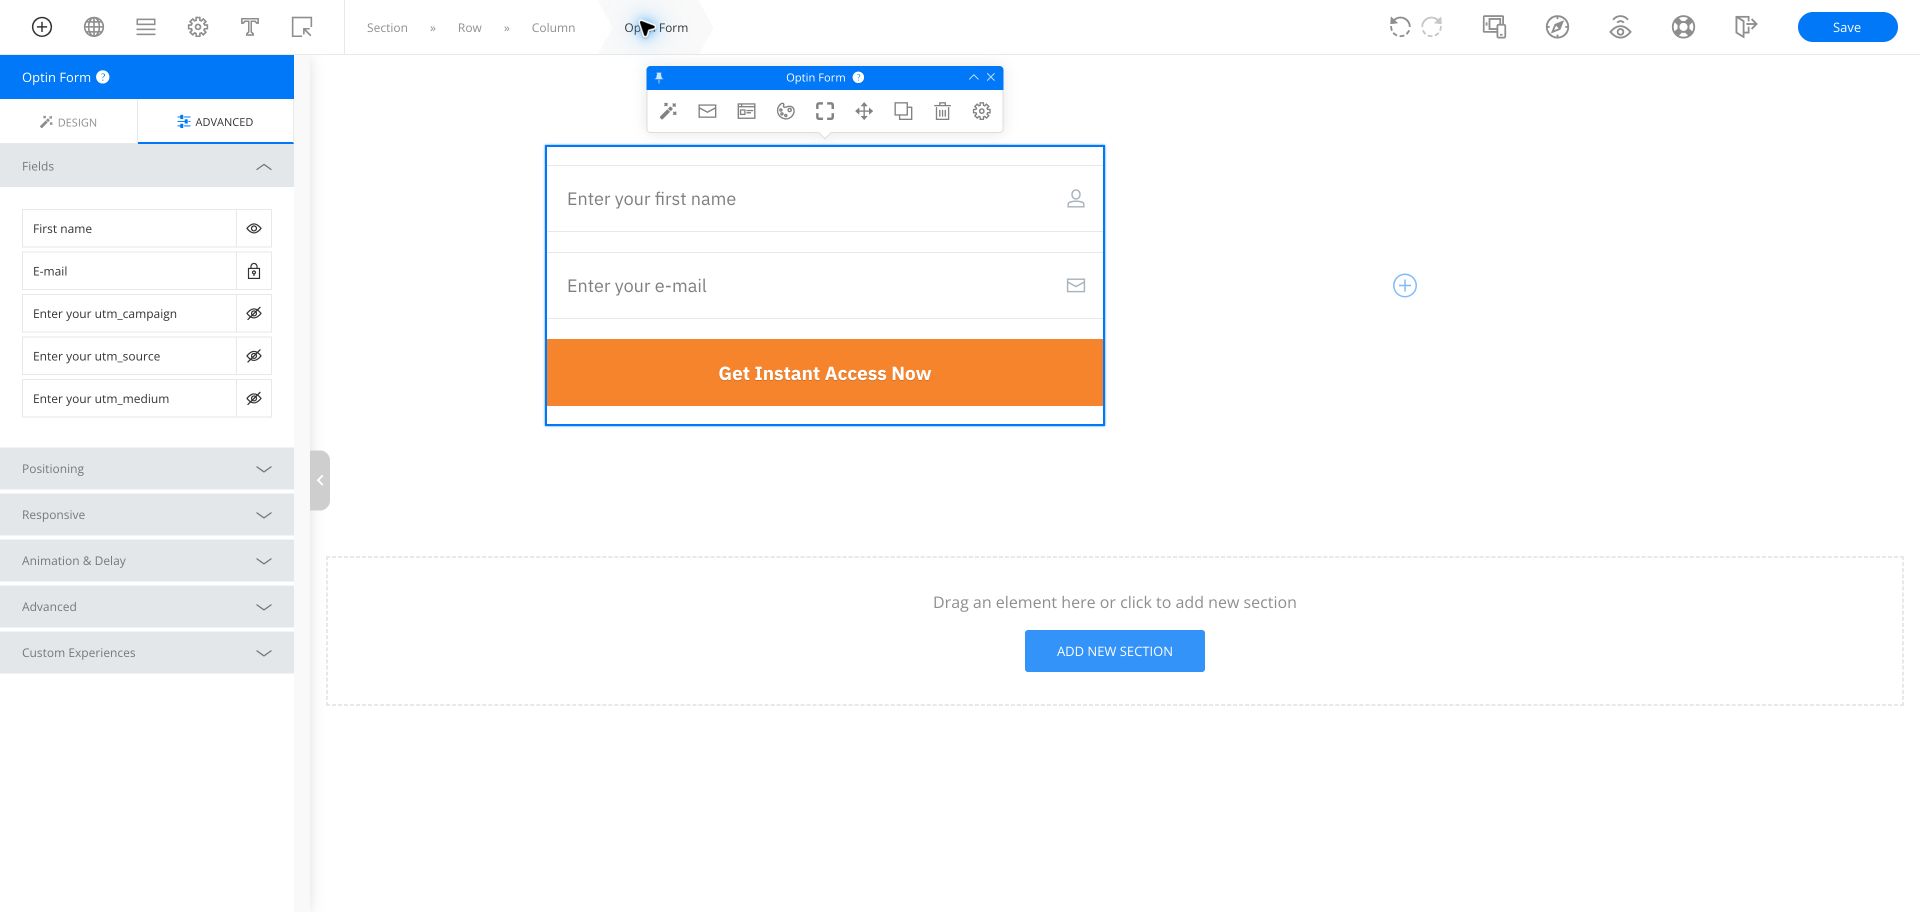
In the left sidebar, open the Advanced tab of the Optin Form. Under Fields, click the eye icon next to each tracking field. Hidden fields keep their value and are still sent to your email service.
7. Save and send a test lead
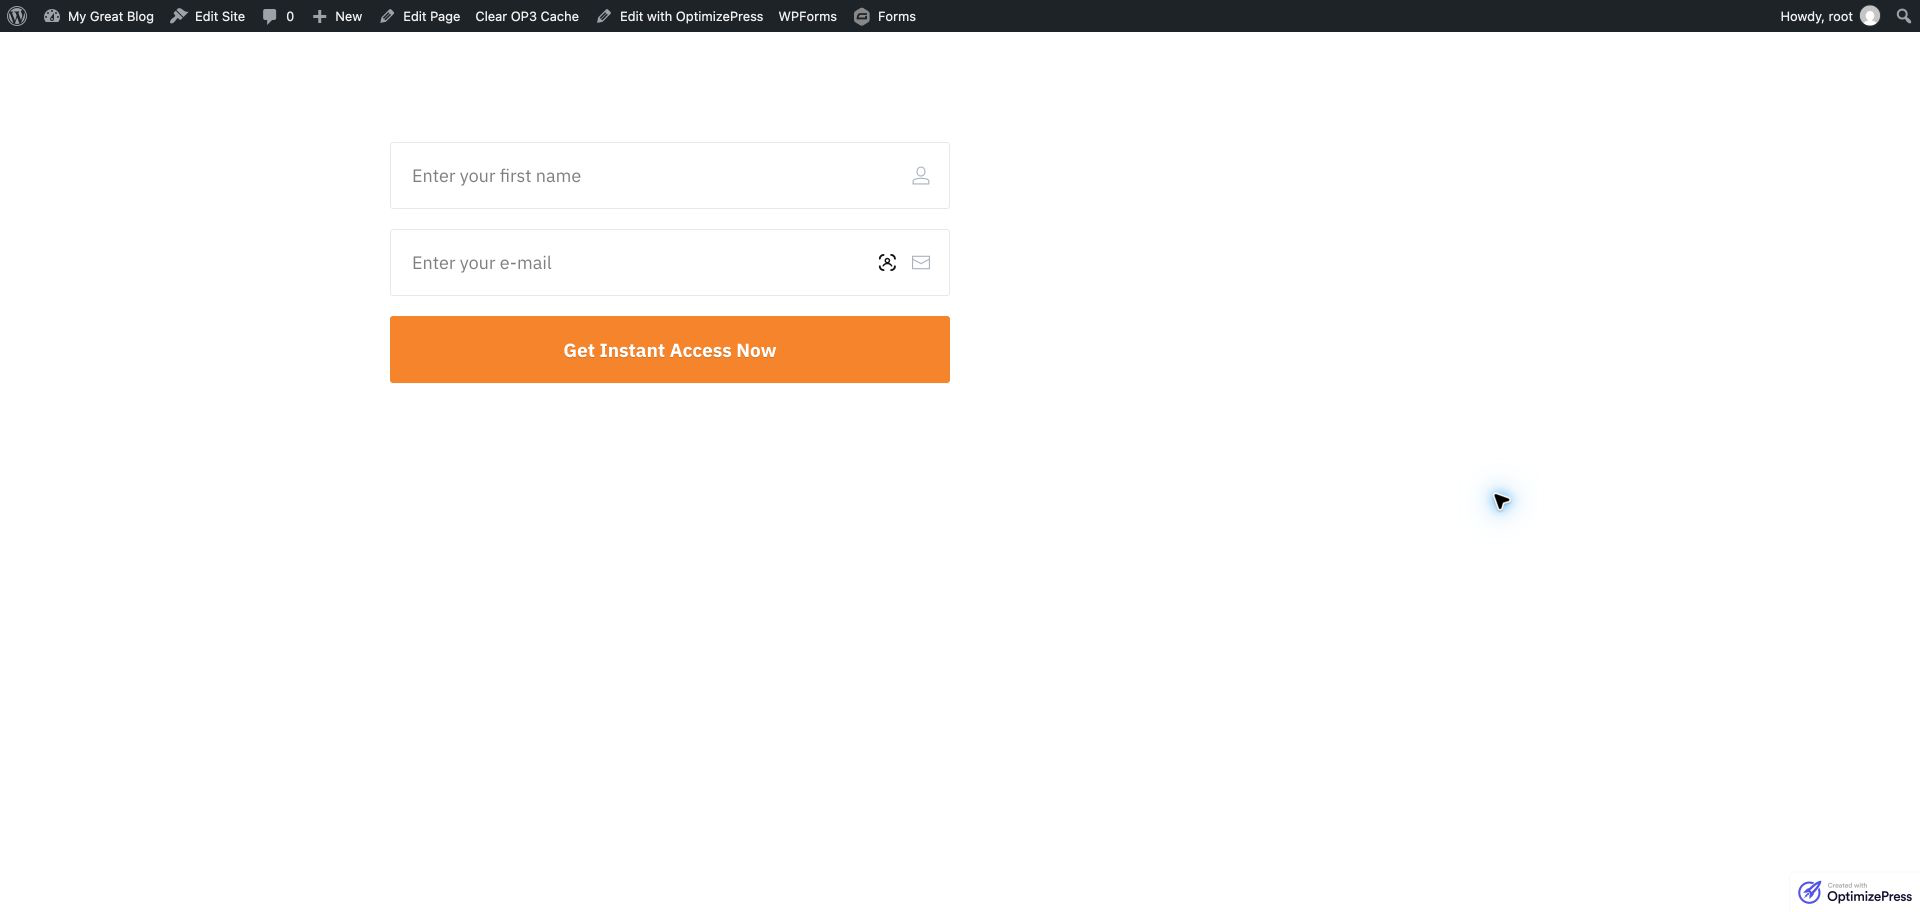
Click Save. Open the published page with UTM parameters in the URL, submit a test lead, and check the contact in your email service. The tracking fields contain the UTM values. Visitors see only the visible fields.
Here we only illustrated utm_source, utm_medium and utm_campaign. You can use all the other tracking parameters the same way. See the full list in Native WP Shortcodes.
OptimizePress and Infusionsoft UTM Tracking Integration
UTM attribution overview
This guide explains OptimizePress and Infusionsoft UTM Tracking Integration with HandL UTM Grabber. It helps you capture UTM source, medium, campaign, term, content, click IDs, referrer, and landing page data and keep the marketing context needed for accurate reporting across forms, bookings, signups, and sales.
Create custom fields in infusionsoft
Create the custom fields as explained here. You can create onefield for each UTM variables and HandL parameters matching the nameing convention (it can be any name but it is easier to follow the naming convention for mapping) here Native WP Shortcodes
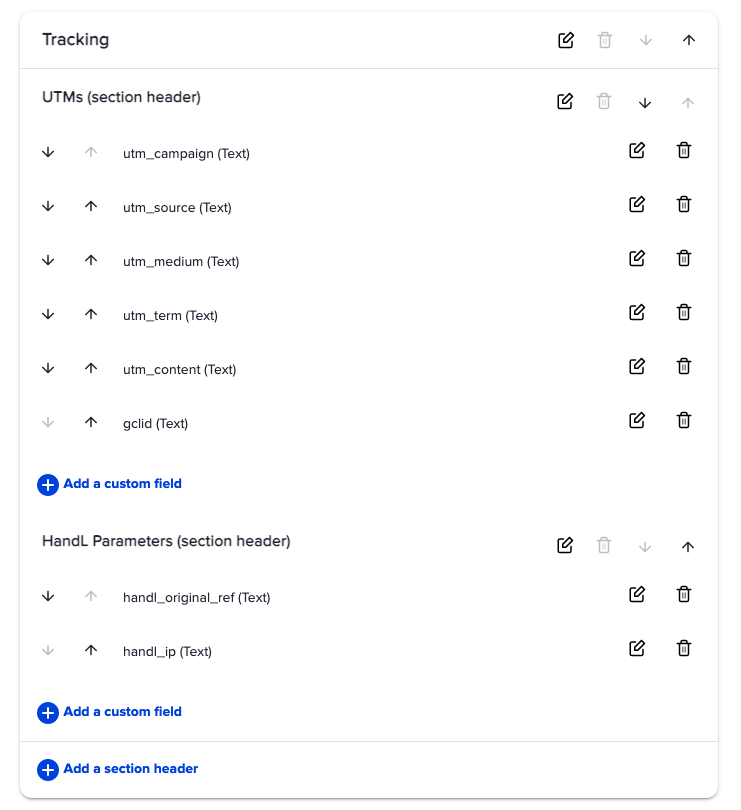
We recommend creating a seperate tab called "Tracking" and using subheader to seperate parameters for better visualization (shown in the image below)
Add the new custom fields in your form in Campaign
Create the webform as explained here https://help.infusionsoft.com/help/create-a-web-form in the Campaign.
Include custom fields as text fields (not hidden - we'll hide them in OptimizePress) using Field snippet section as shown in the image below.
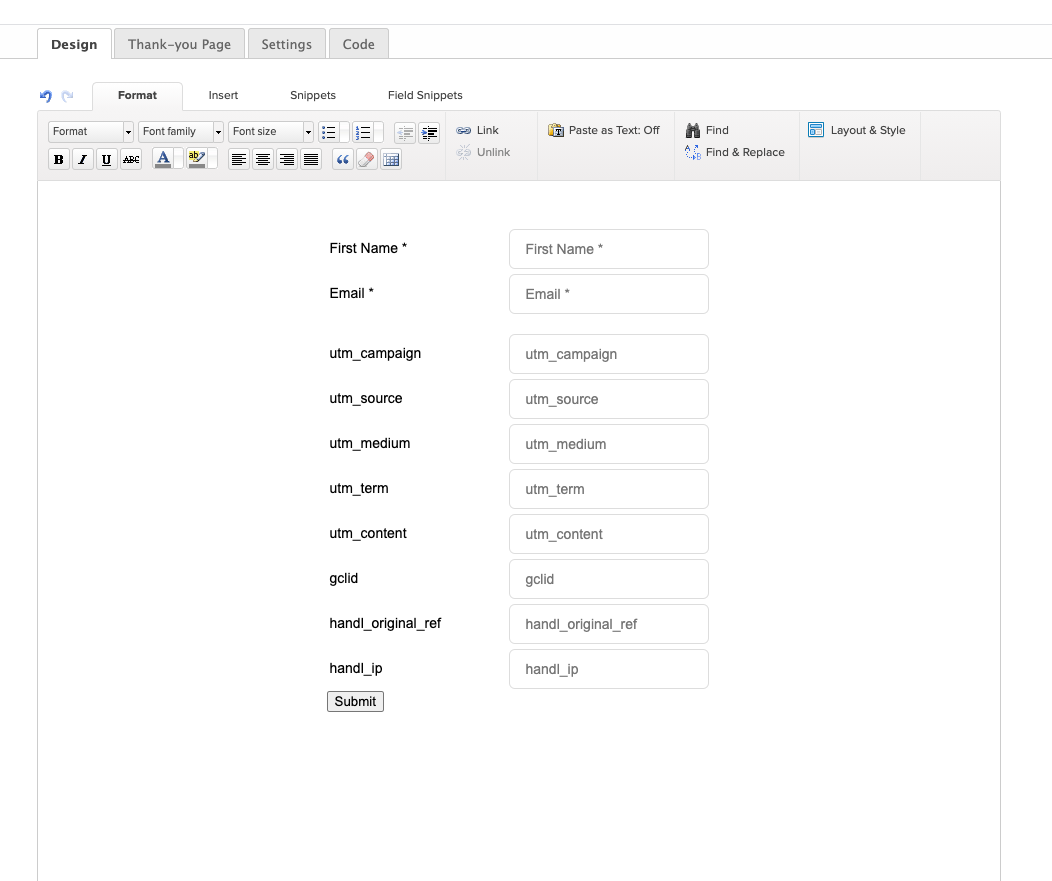
Publish the campaign
Create your automation in the campaign and publish the campaign to persist the changes.
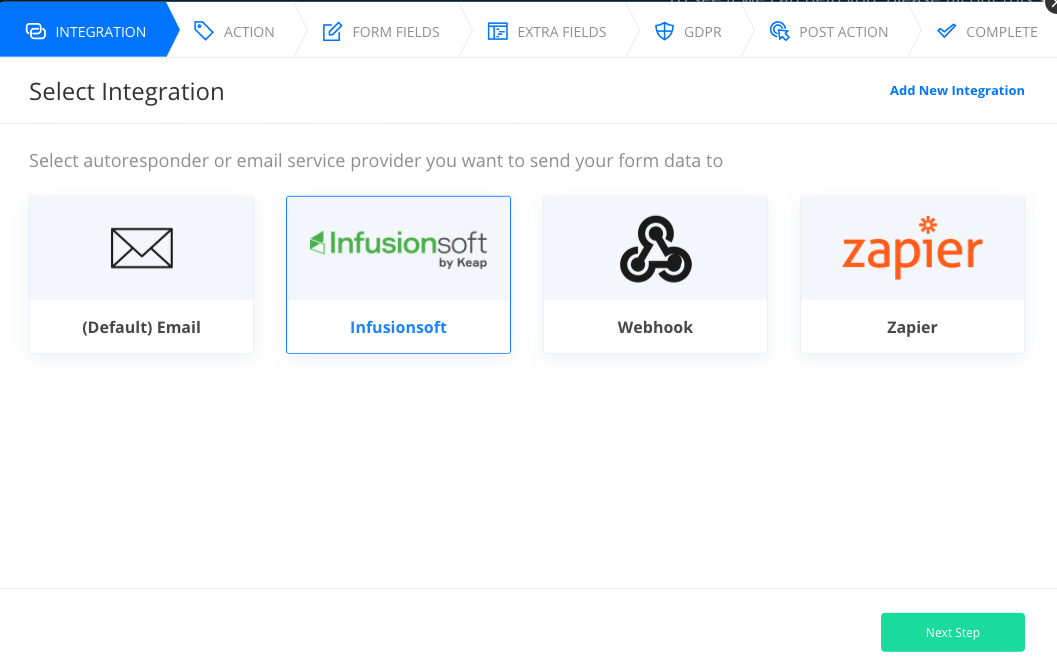
Create your optin form in OptimizePress and Select Integration as "Infusionsoft"
Shown in the image below
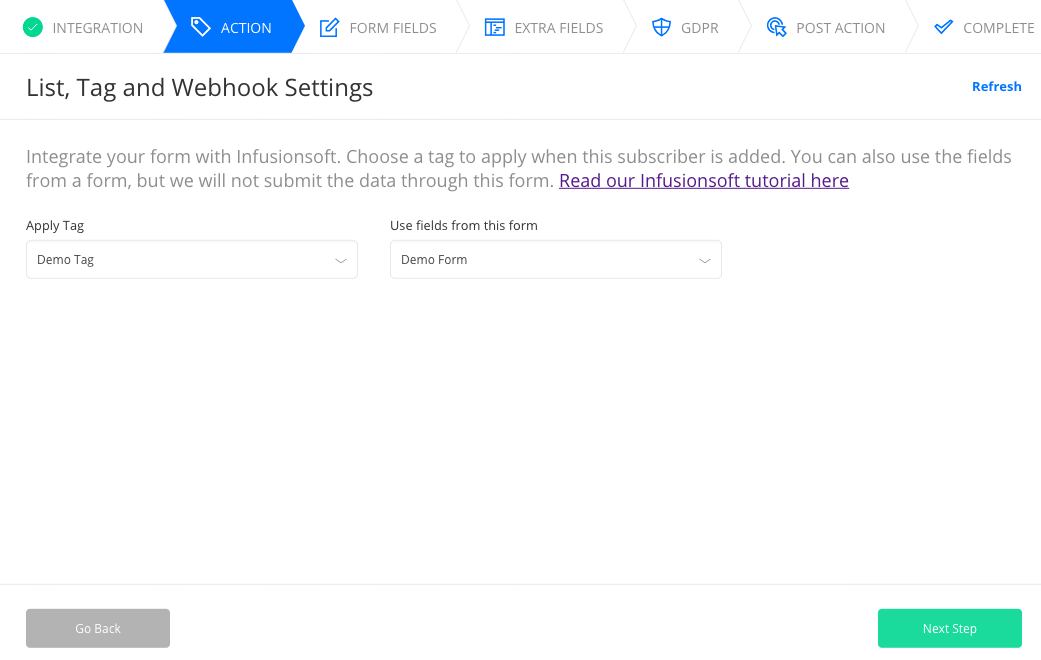
Select tag and form in Action
Select all the custom fields
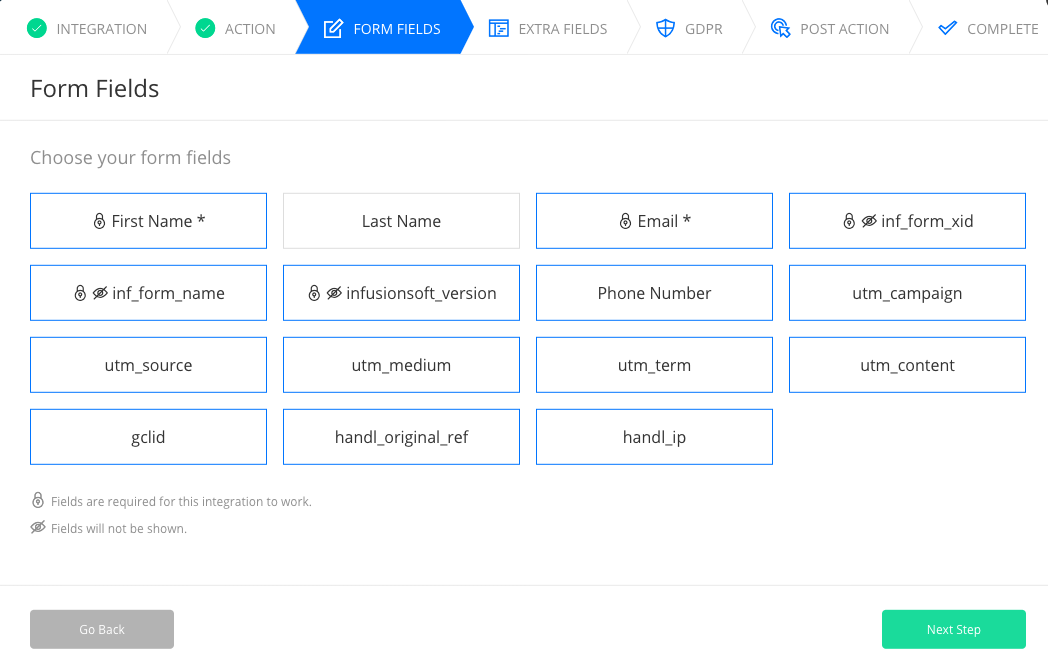
and click next until complete
Select Optin Form > Settings > Advanced Options
Mark the fields as invisible, they will disappear in the form visual
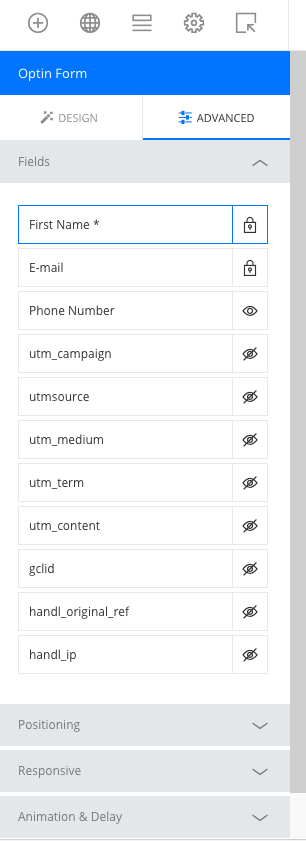
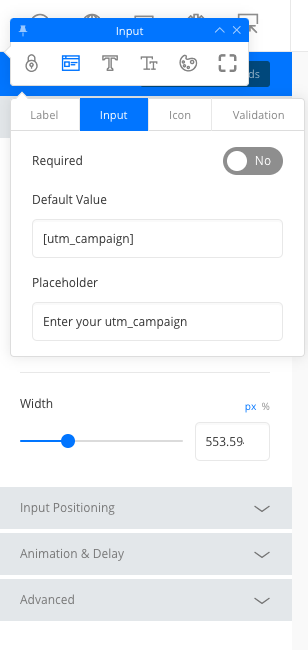
Click each input and > Input Settings > Default Value
Type the corresponding shortcode name for each individual field. You can see the list of shortcodes available here Native WP Shortcodes
Below image shows for utm_campaign, similarly you can do it for all the samples.
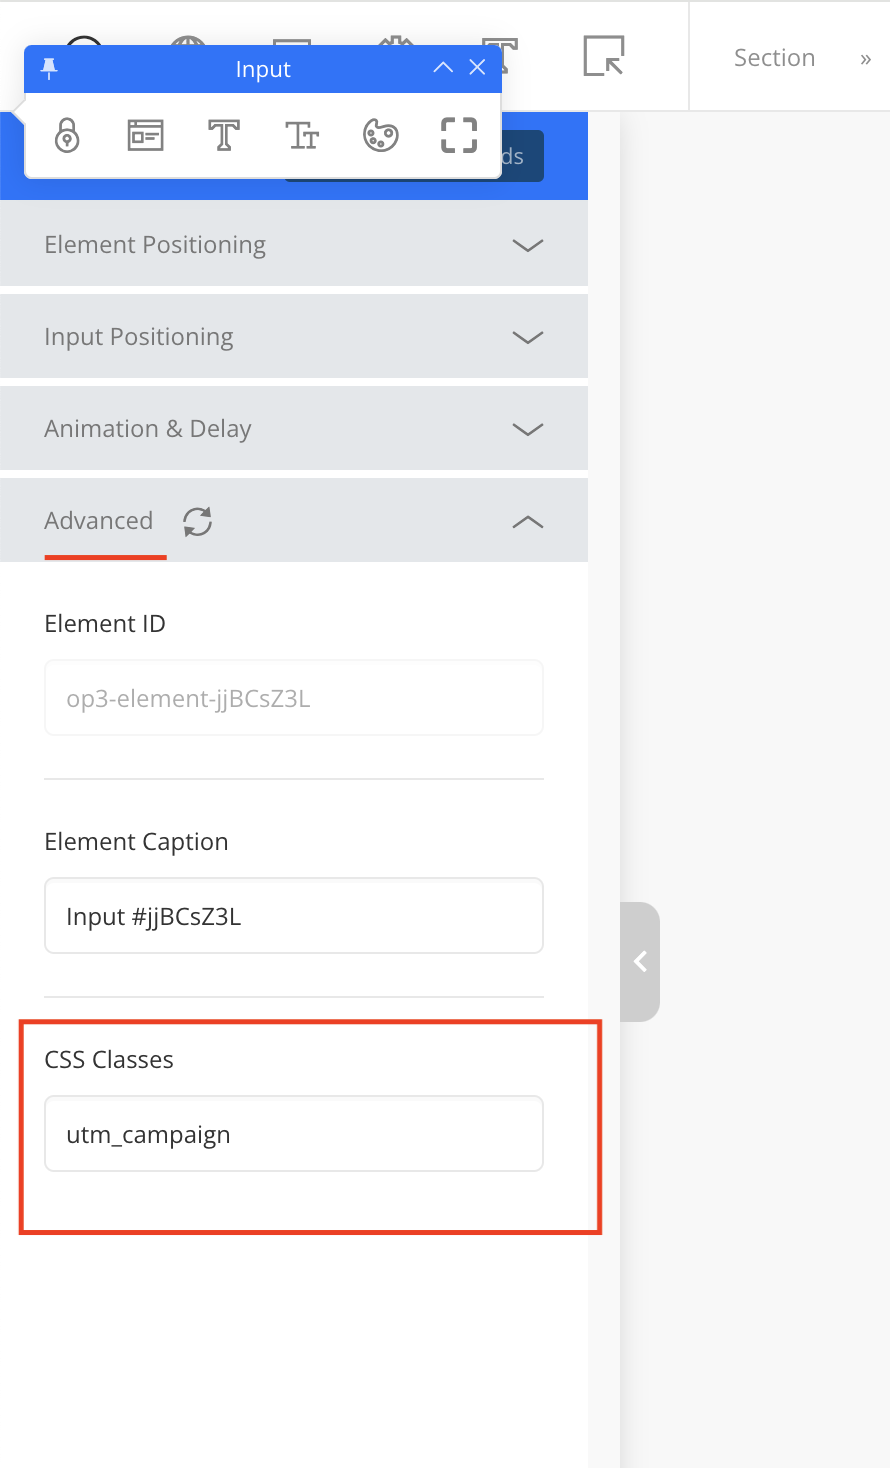
We also recommend adding CSS class for each field as shown below.
Save the page in OptimizePress, and you are done!
OptimizePress Pages (Enable Scripts & Styles) - HandL UTM Grabber Guide
UTM attribution overview
This guide explains OptimizePress Pages (Enable Scripts & Styles) - HandL UTM Grabber Guide. It helps you capture UTM source, medium, campaign, term, content, click IDs, referrer, and landing page data and keep the marketing context needed for accurate reporting across forms, bookings, signups, and sales.
If you are using OptmizePress, make sure HandL UTM Grabber is enabled for Frontend...
