HandL GCLID Reporter in HandL UTM Grabber
UTM attribution overview
This guide explains HandL GCLID Reporter in HandL UTM Grabber. It helps you capture UTM source, medium, campaign, term, content, click IDs, referrer, and landing page data and keep the marketing context needed for accurate reporting across forms, bookings, signups, and sales.
GCLID Reporter
GCLID, short for Google Click Identifier, is a unique and highly encrypted tracking parameter that Google uses internally to transfer information between your Google Ads account and your Google Analytics account. As you know, GCLID is not directly available in Google Ads, so it isn't possible to associate GCLID data with the users/campaign/location in Google Ads.
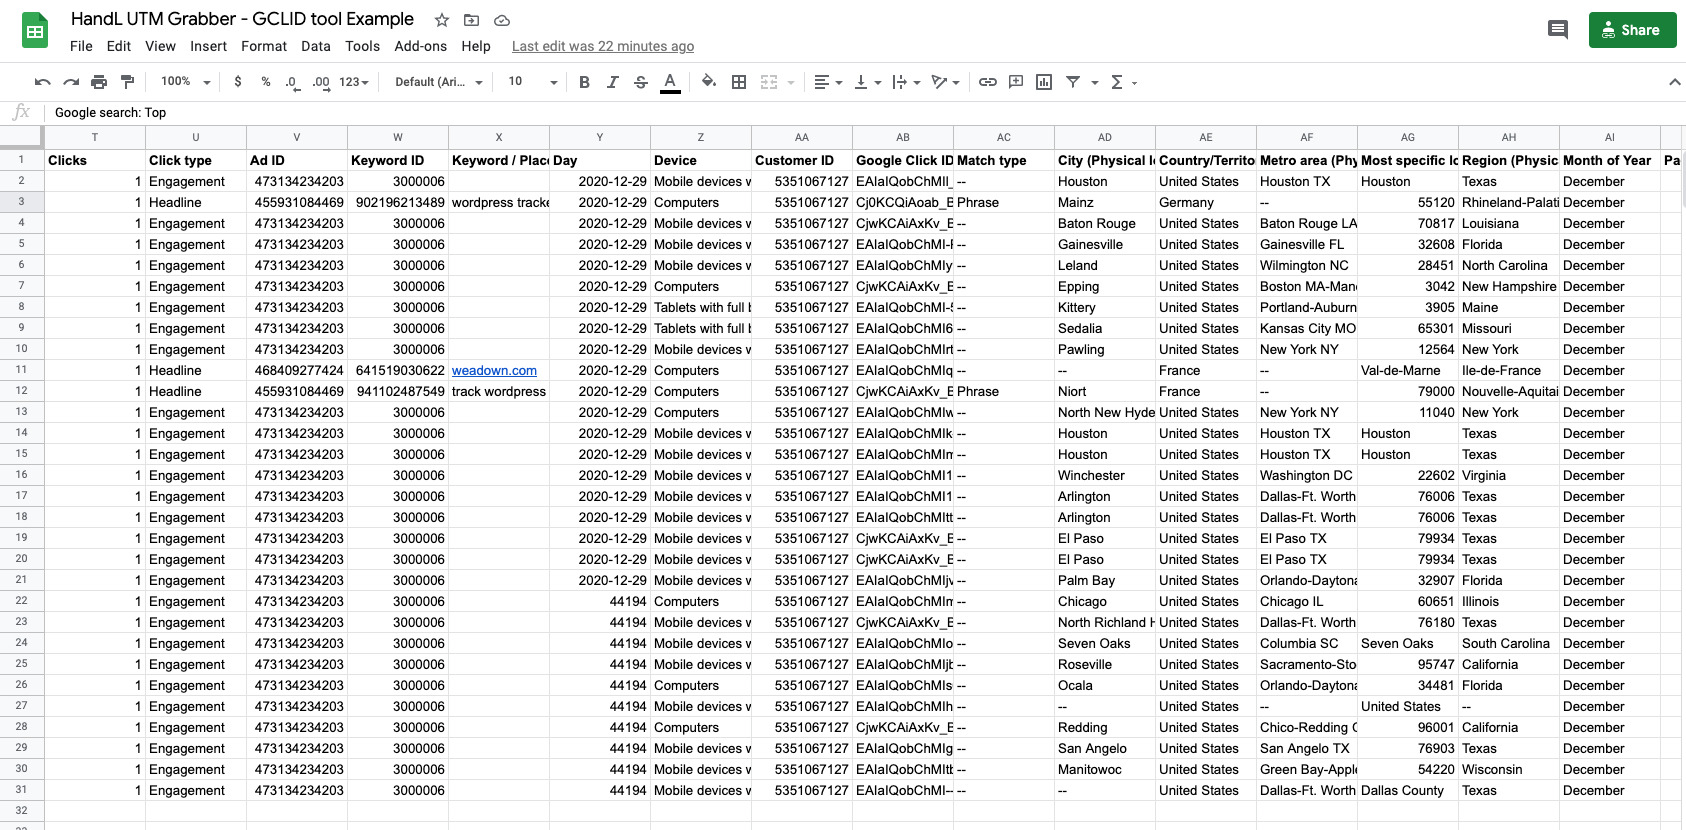
HandL UTM Grabber allows tracking GCLID throughout the conversion. With the GCLID collected and GCLID Reporter, now you can create reports associating every single GCLID to your campaign, ad groups and even to the level of ad creatives. You can also see which location each GCLID is associated with, and if it's a search ad, you can see the exact (or phrase) keywords used for the corresponding GCLID value. In addition to that, you'll see the placement, click type (engagement or headline), device, ad network and more.
See a Sample Report
Click below to view a sample report (opens in Google Spreadsheet):
How to Use GCLID Reporter
Step 1: Go to the GCLID Reporter Page
Login to utmgrabber.com and navigate to the (GCLID Reporter page).
You'll see your license information with the number of available slots for connecting Google Ads accounts.
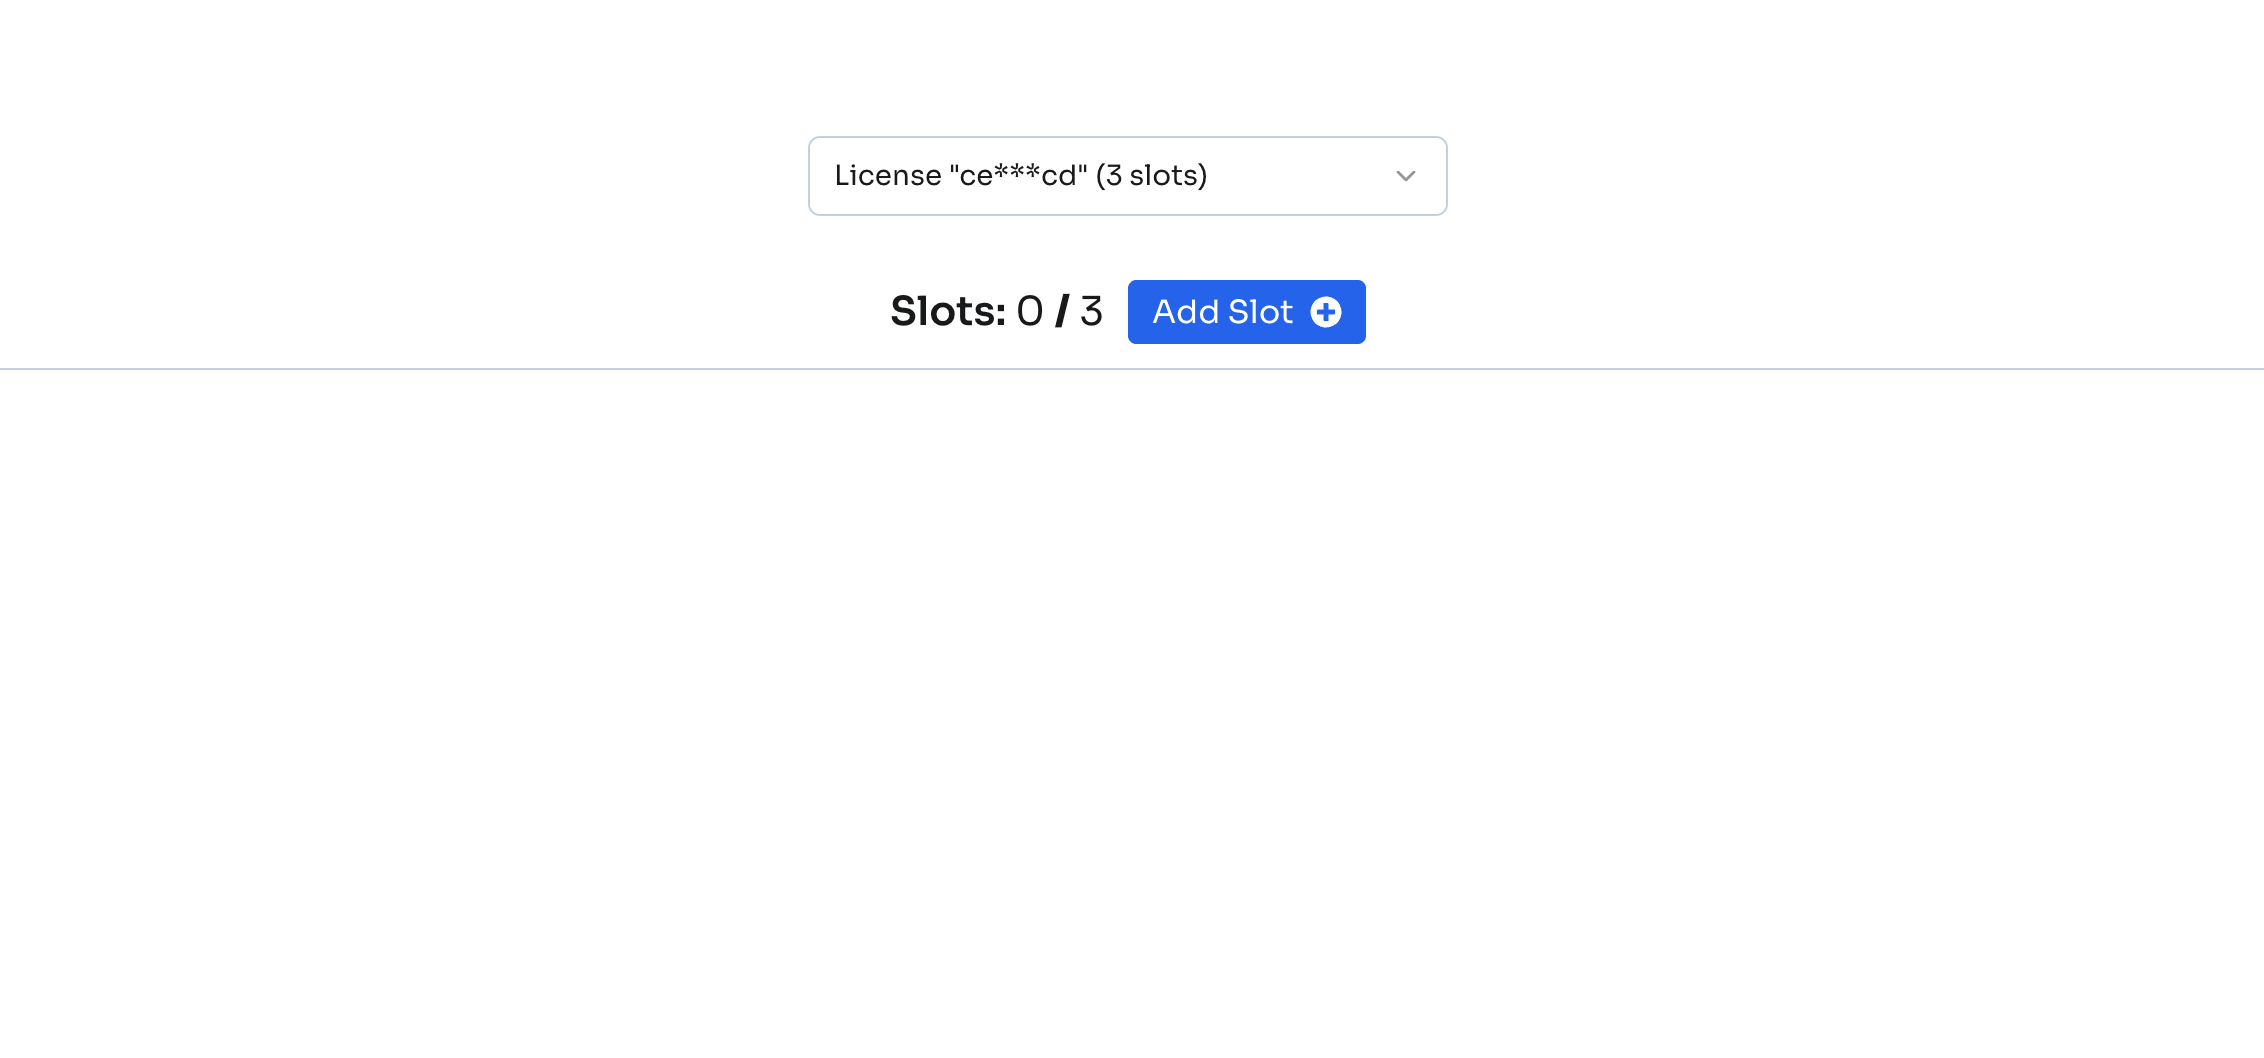
Step 2: Add a Slot and Authorize with Google
Click the Add Slot button to connect a Google Ads account. You'll see the "Authorize with Google" button appear.
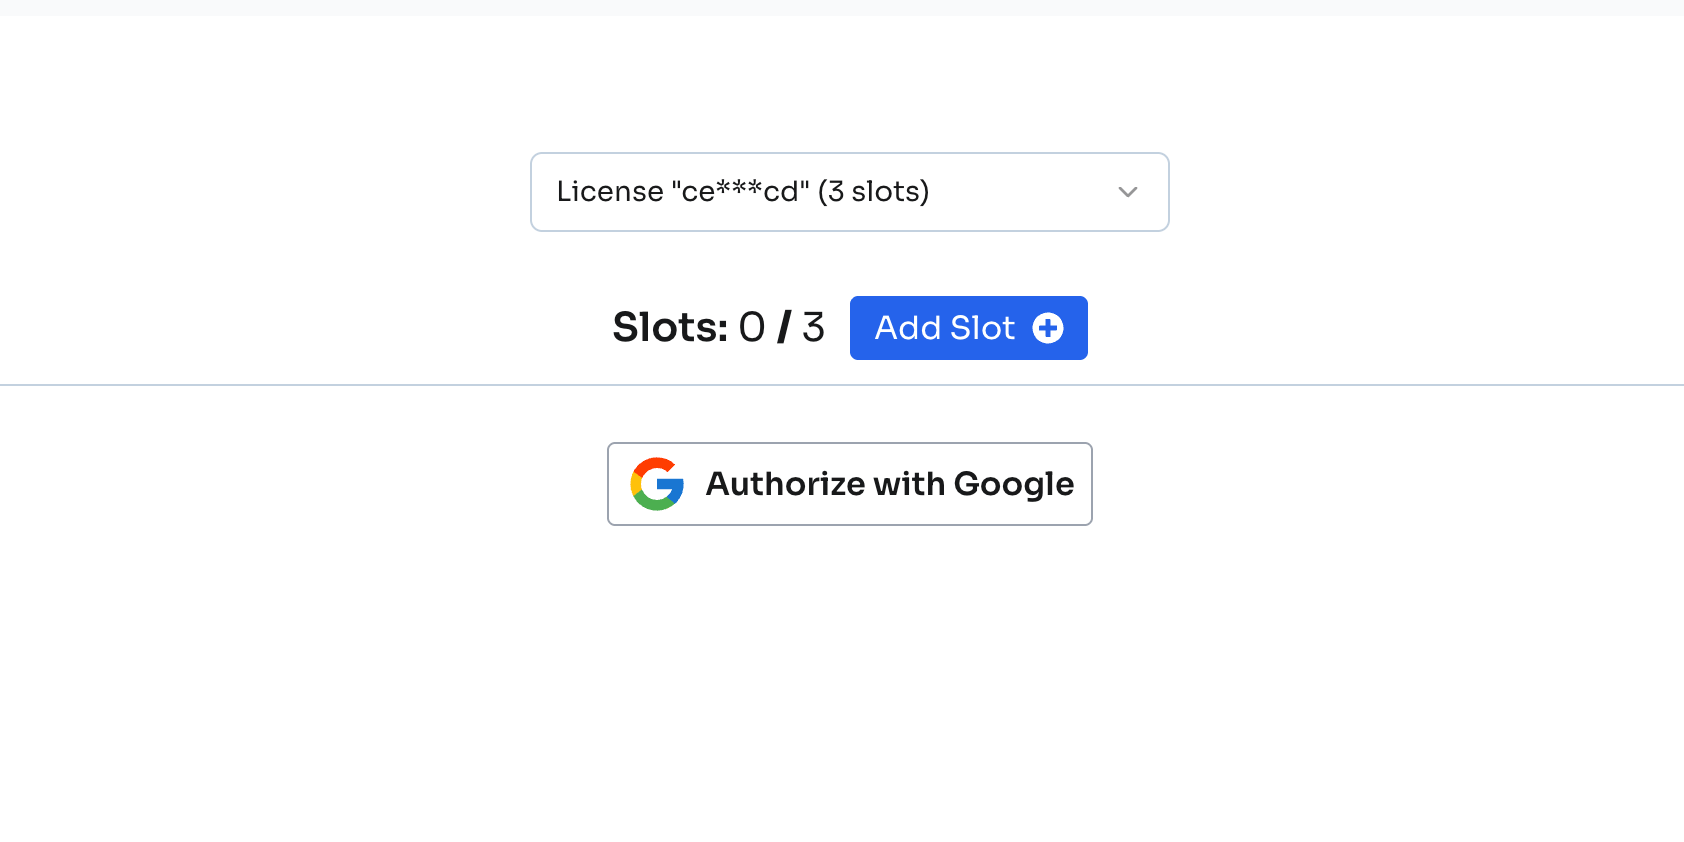 Click on "Authorize with Google" to proceed. You will be taken to Google's login page.
Step 3: Complete Google Authorization
Login using the Gmail account that is associated with your Google Ads. Review the permissions and click Continue to authorize HandL UTM Grabber.
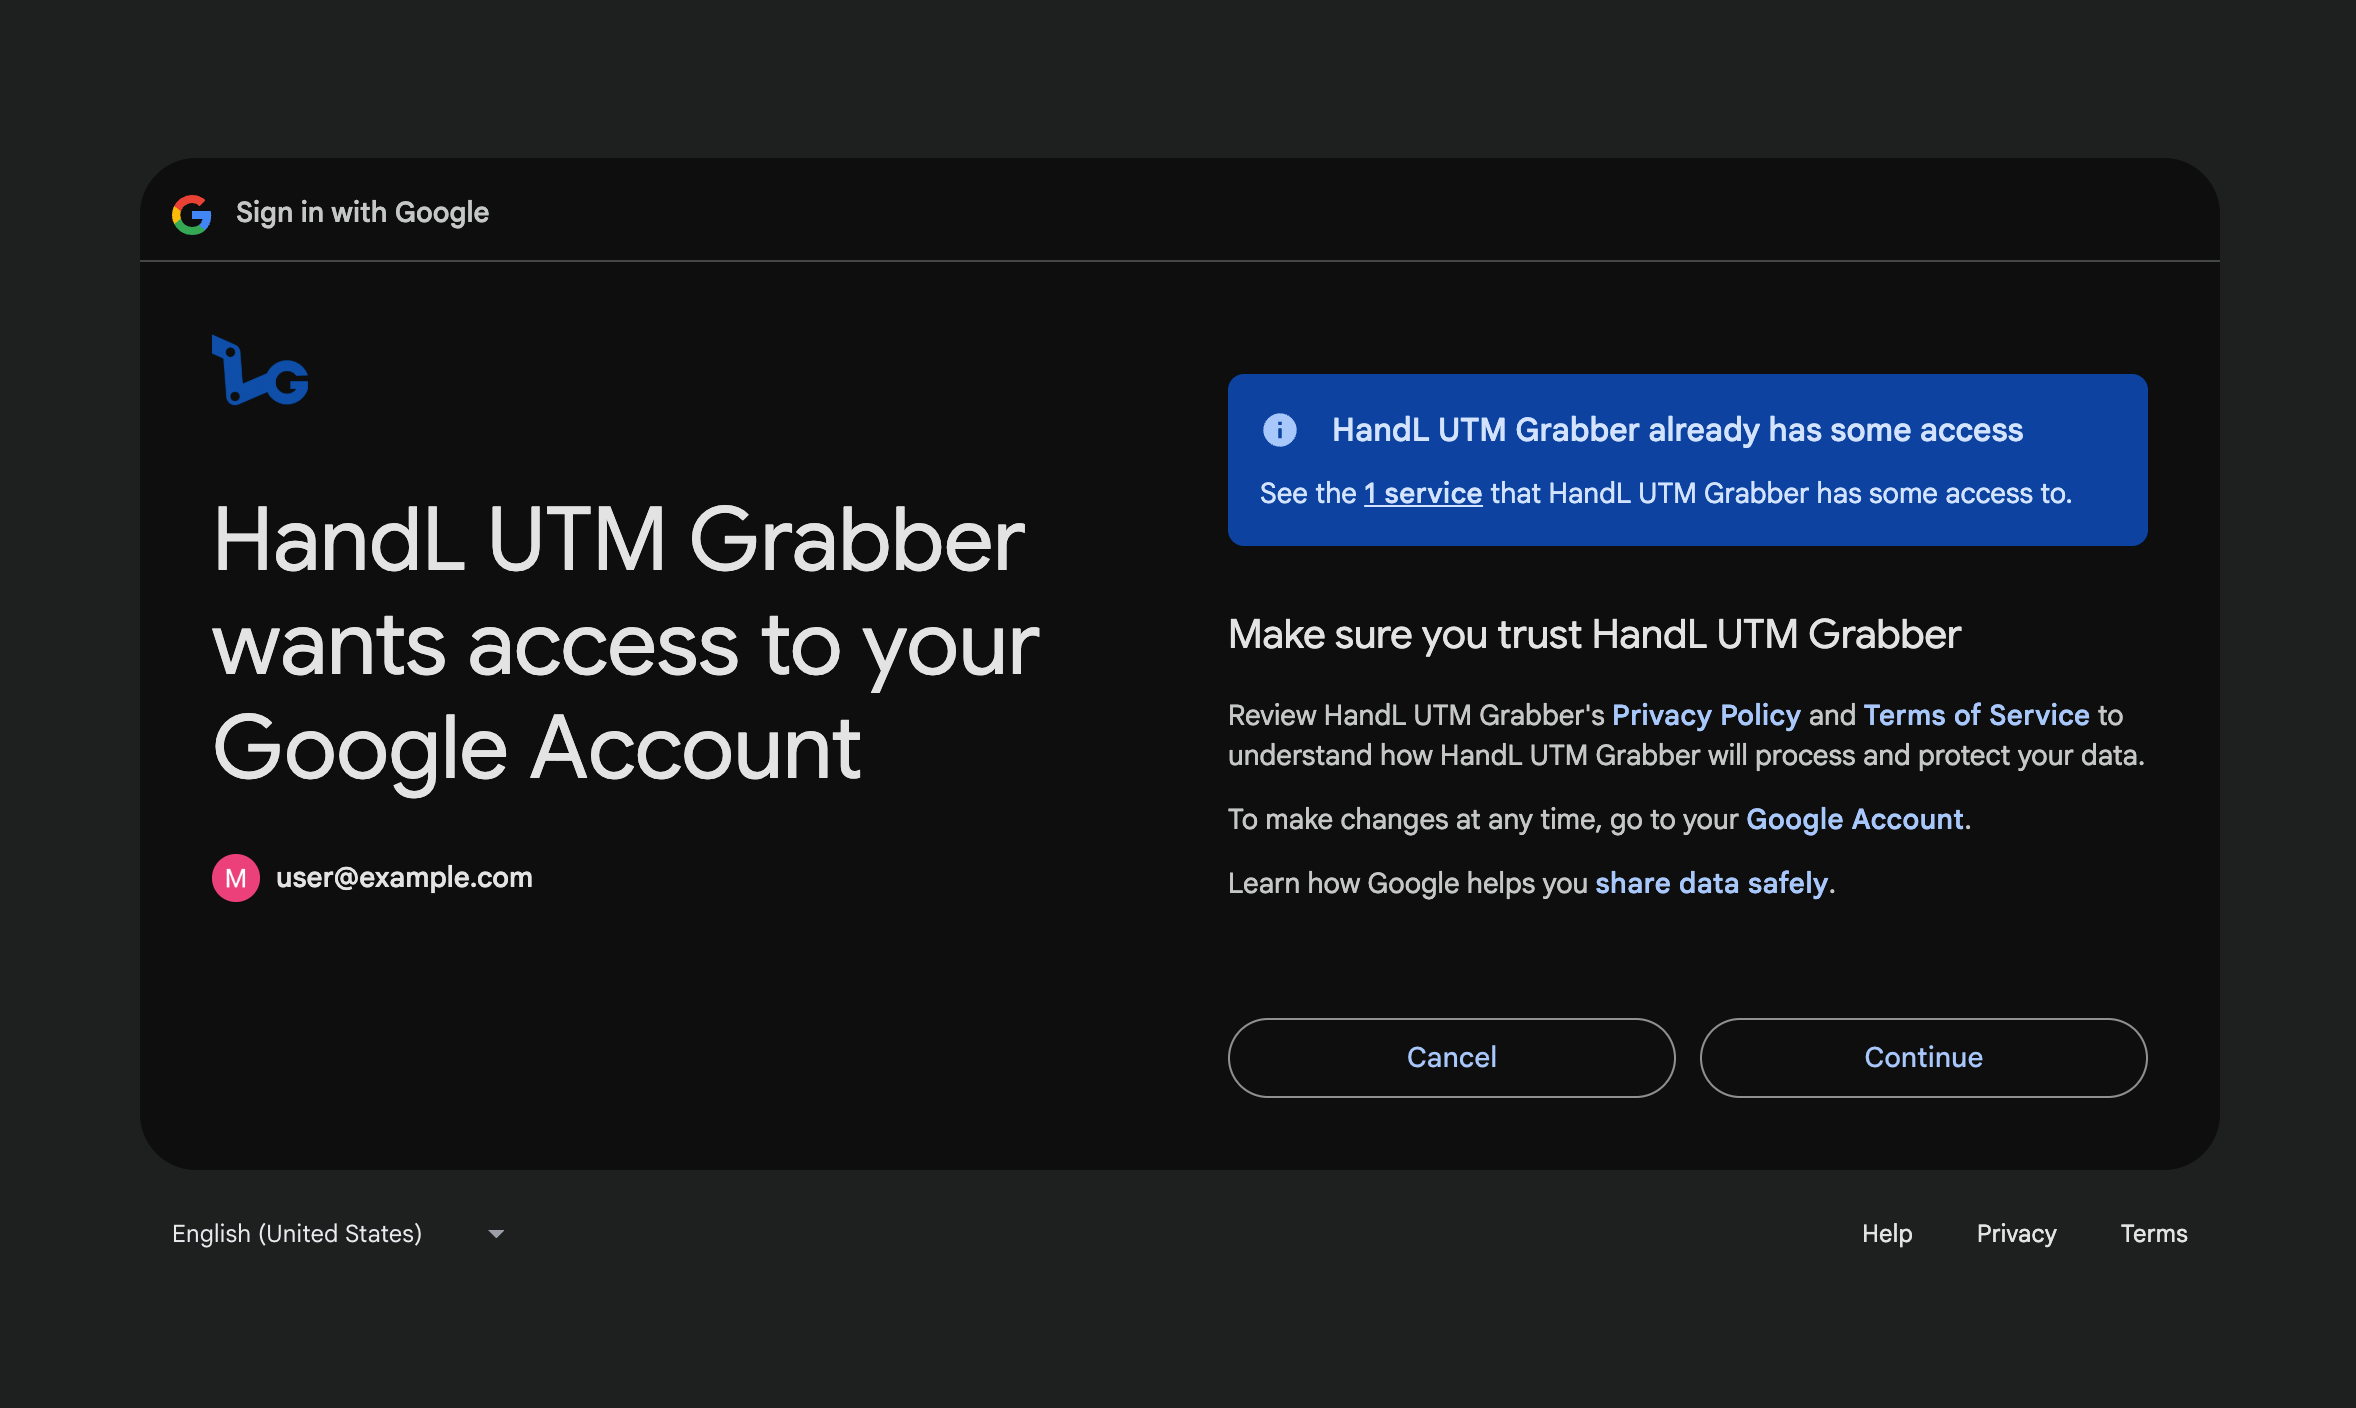
Privacy Note: We never access any sensitive information in your account. We only save the refresh token and your advertising account ID to generate the report, nothing else. See our privacy page for more details.
Step 4: Select Your Google Ads Account
After authorization, you'll be redirected back to the GCLID Reporter page. A dropdown will appear allowing you to Select Customer Client.
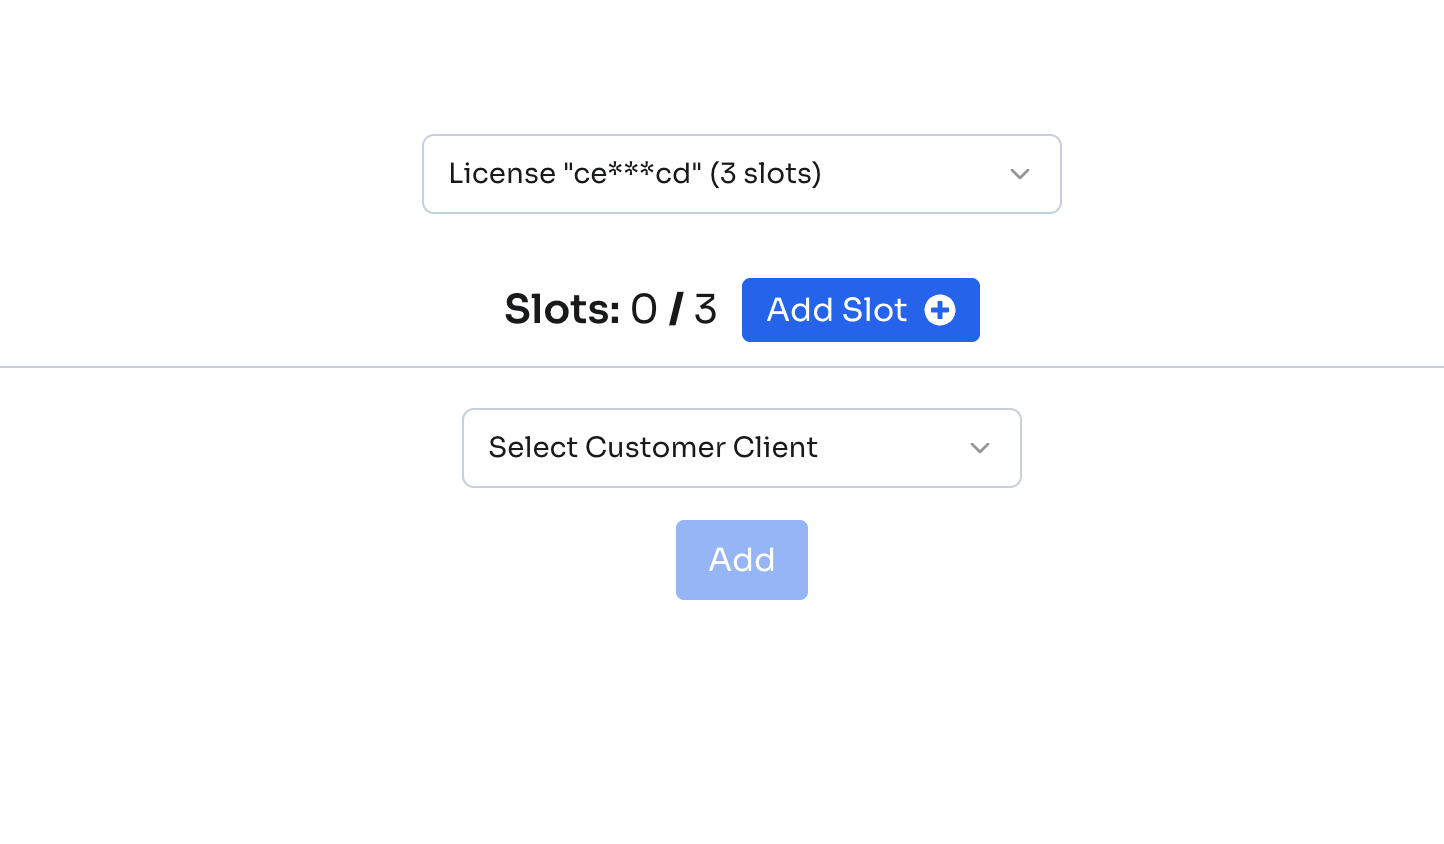 Important: Even if you have multiple Google Ads accounts under the same email (including accounts under different Manager accounts), we list all of them here. Simply choose the account you want to connect and click Add.
Step 5: Generate Reports
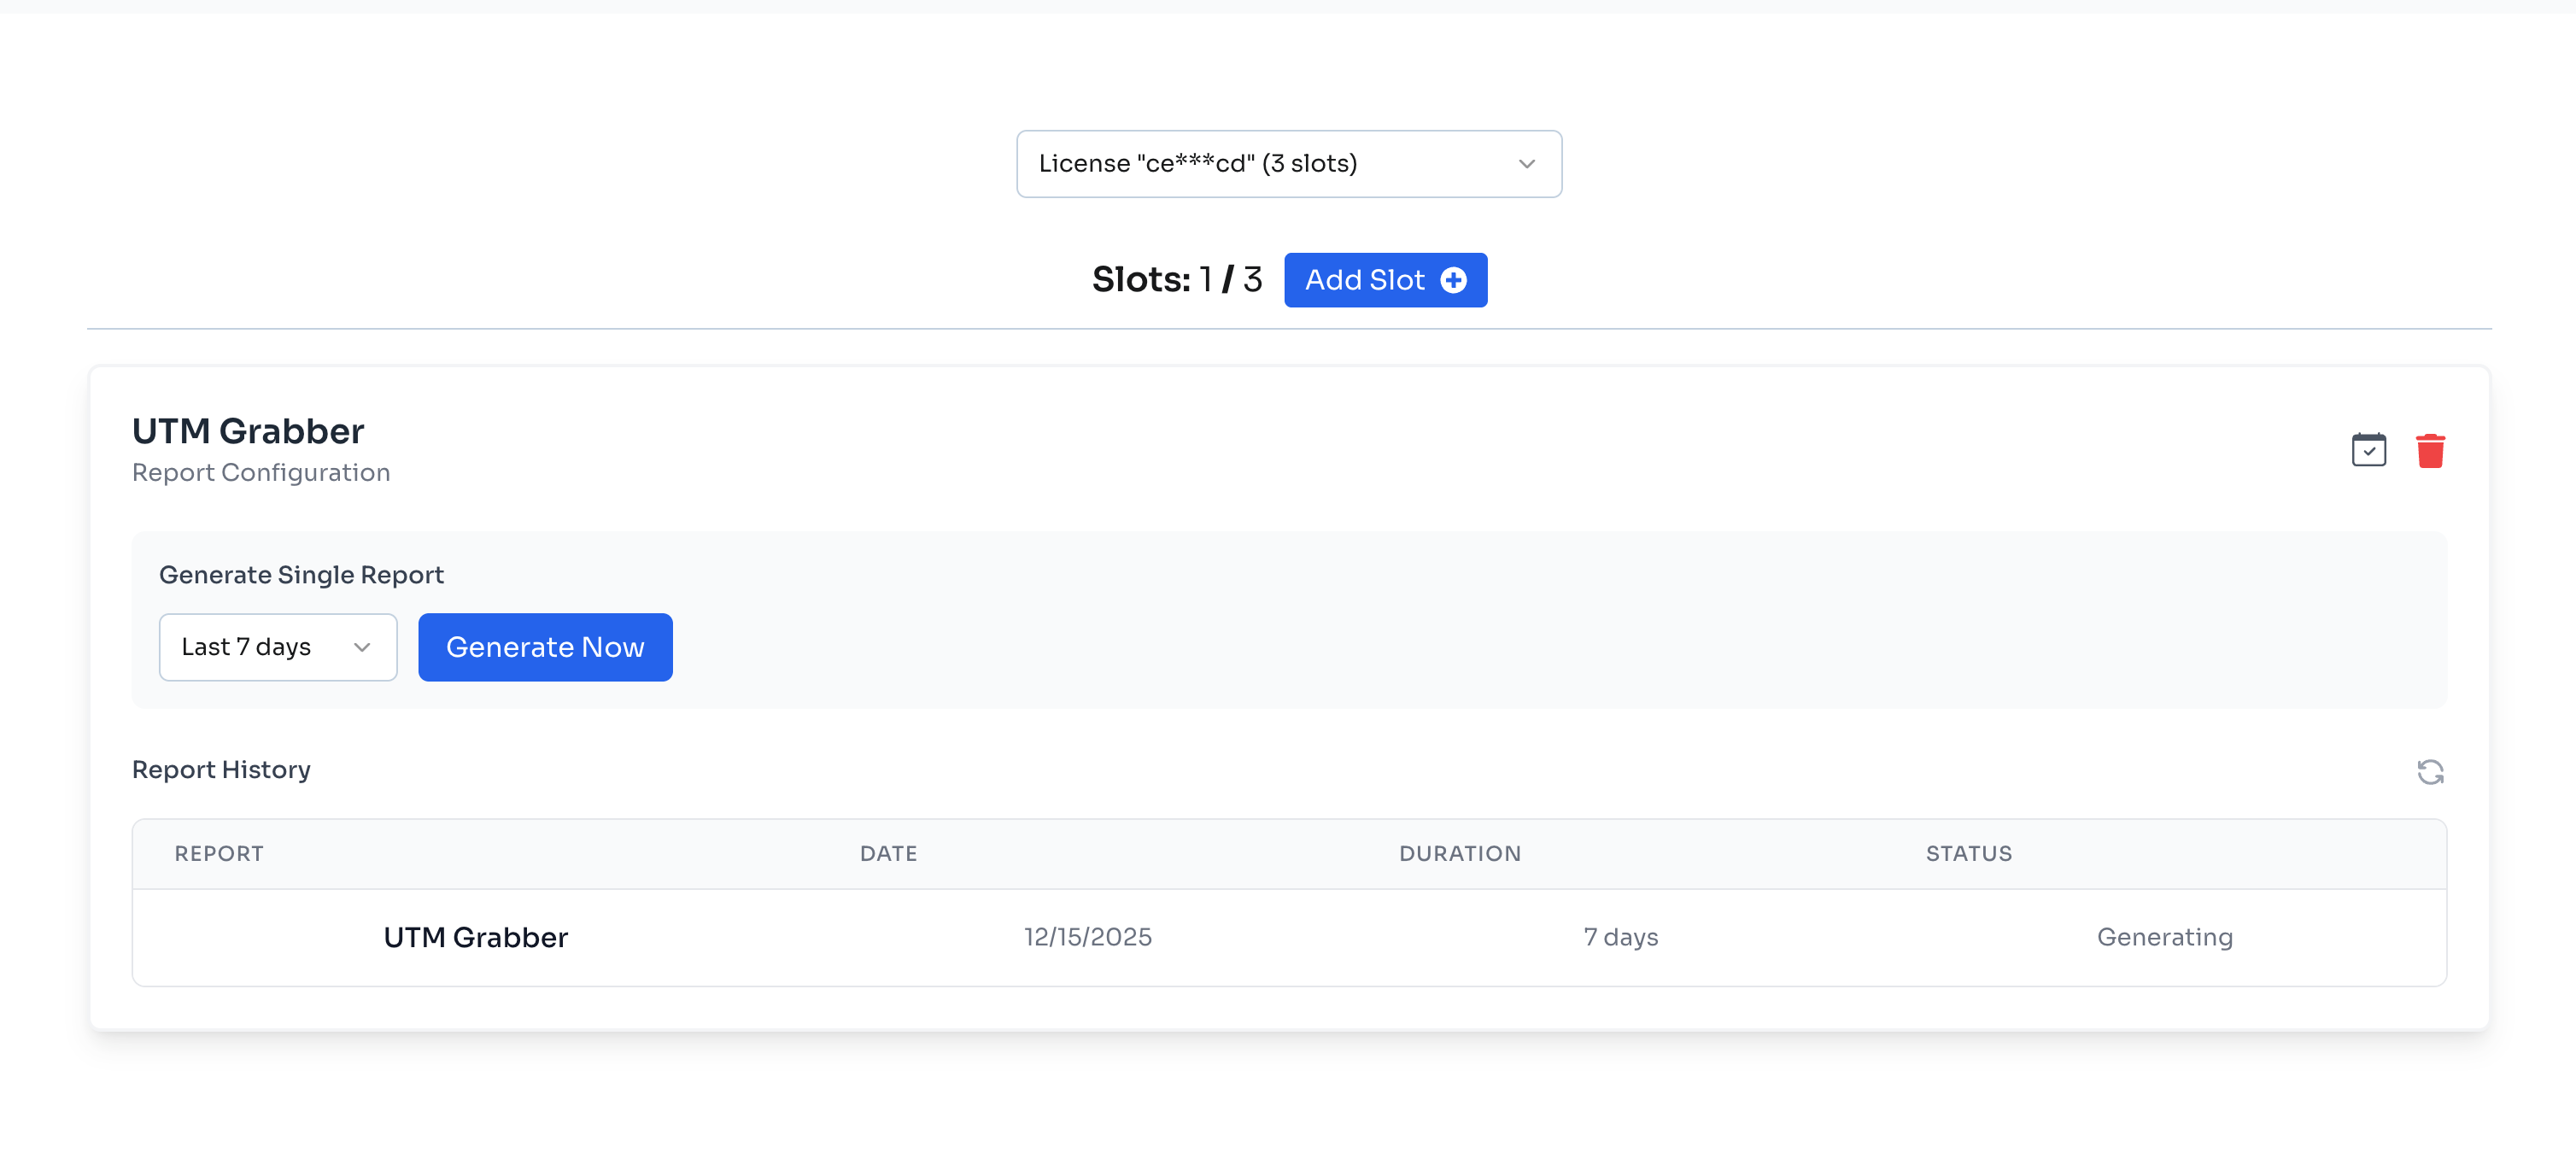
Once your account is connected, you'll see the Report Configuration panel for that account.
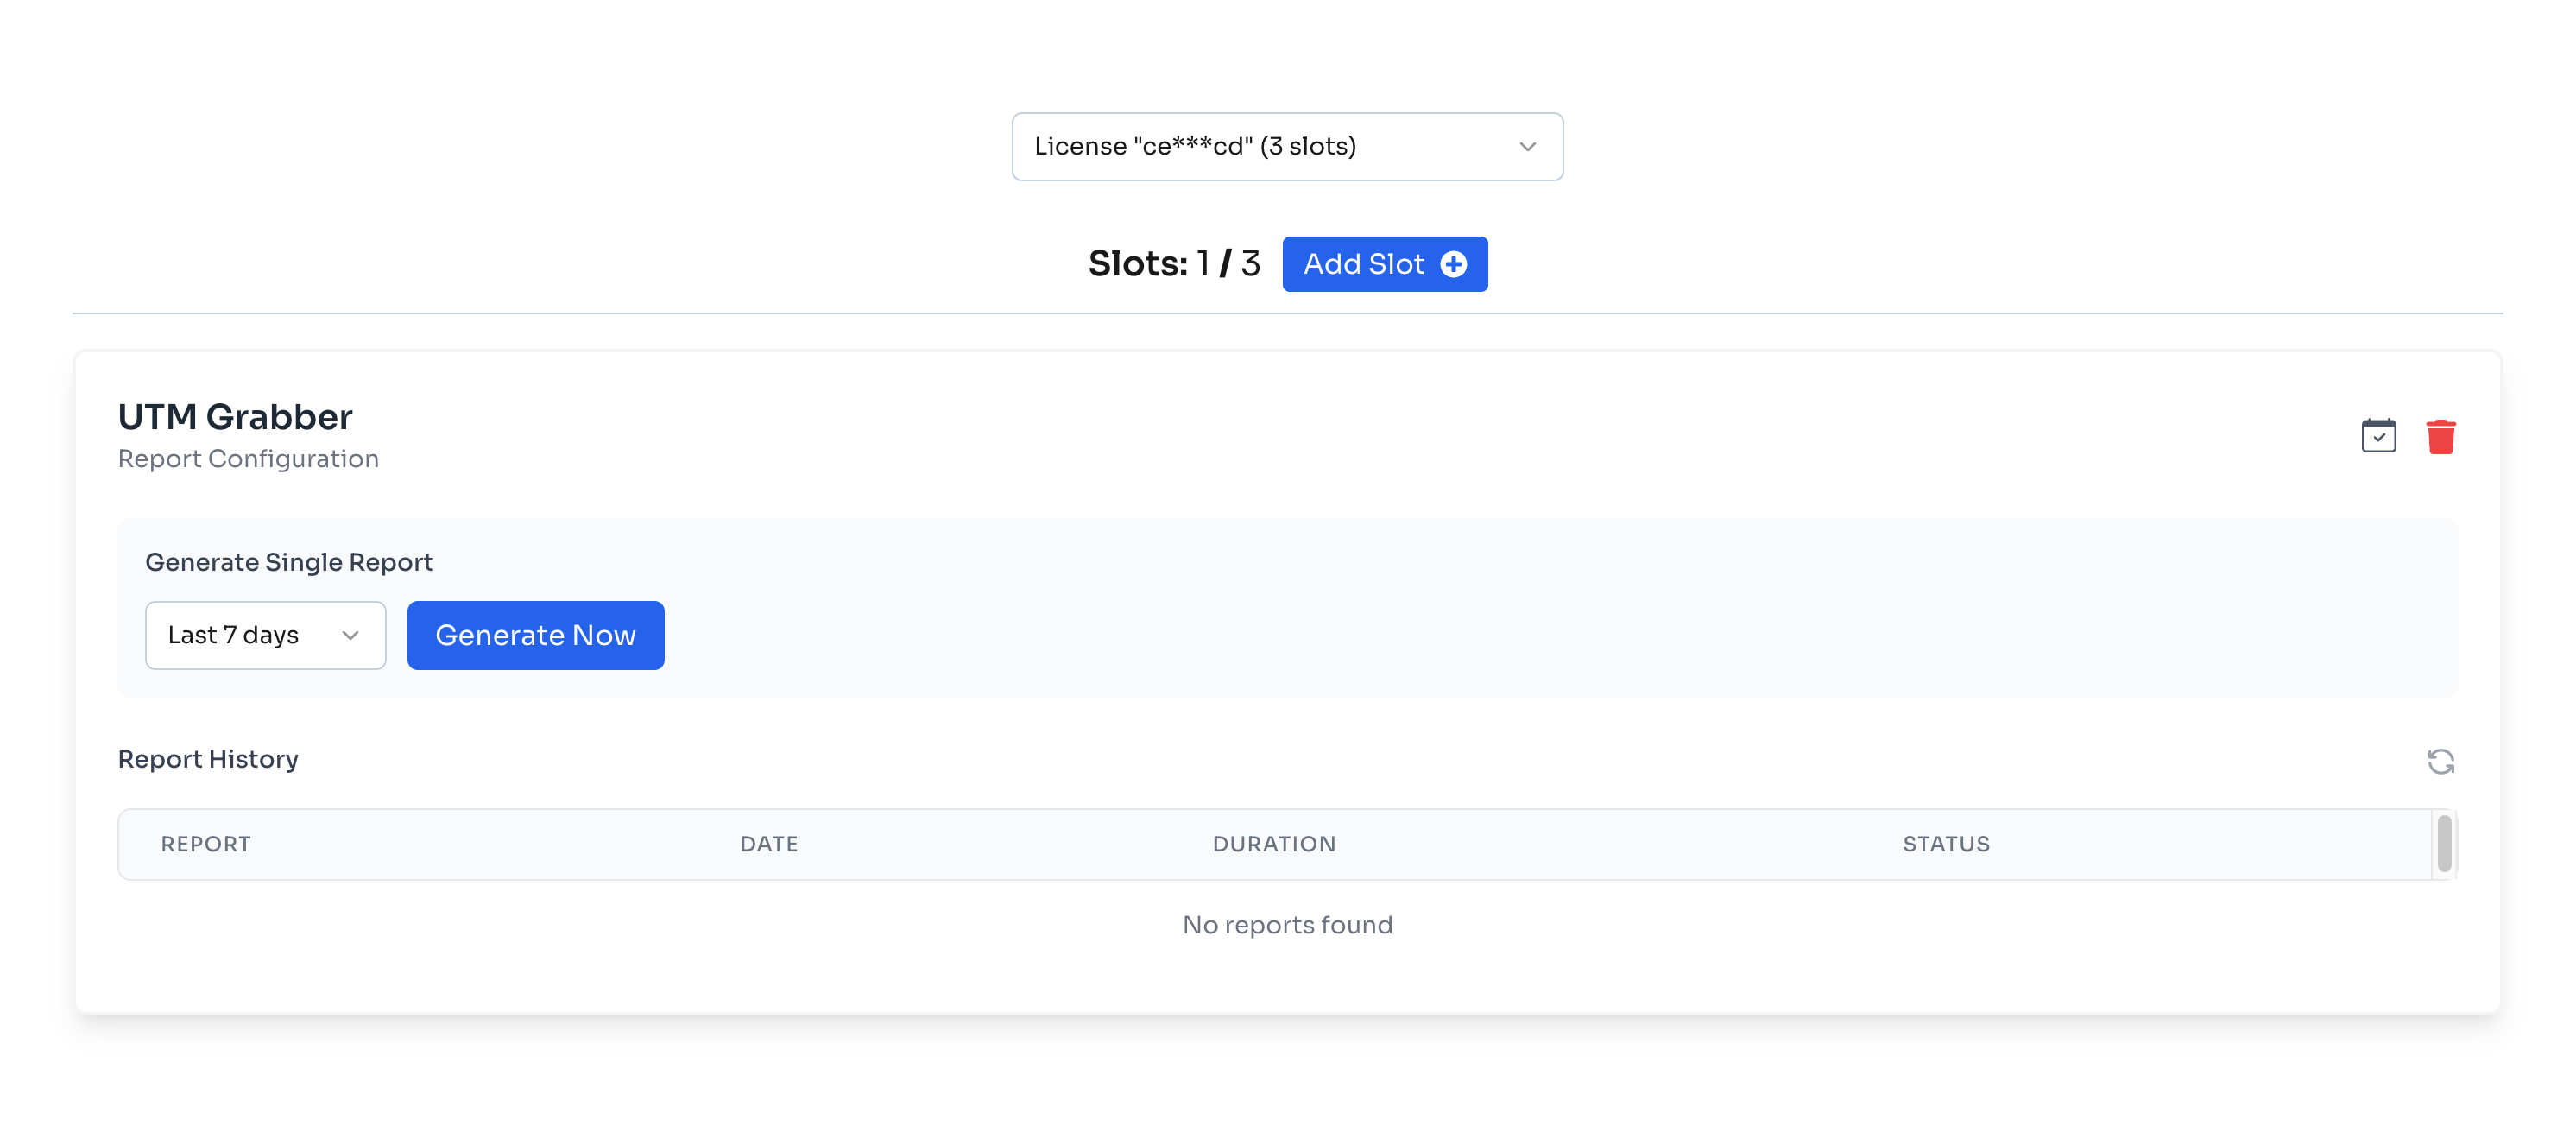
Generate a Single Report
-
Select the time period from the dropdown:
- Last 24 hours
- Last 7 days
- Last 30 days
- Last 90 days
-
Click Generate Now
Note: Time period options may be limited based on your subscription tier.
Report Generation Status
While your report is being generated, you'll see a "Generating" status in the Report History table.
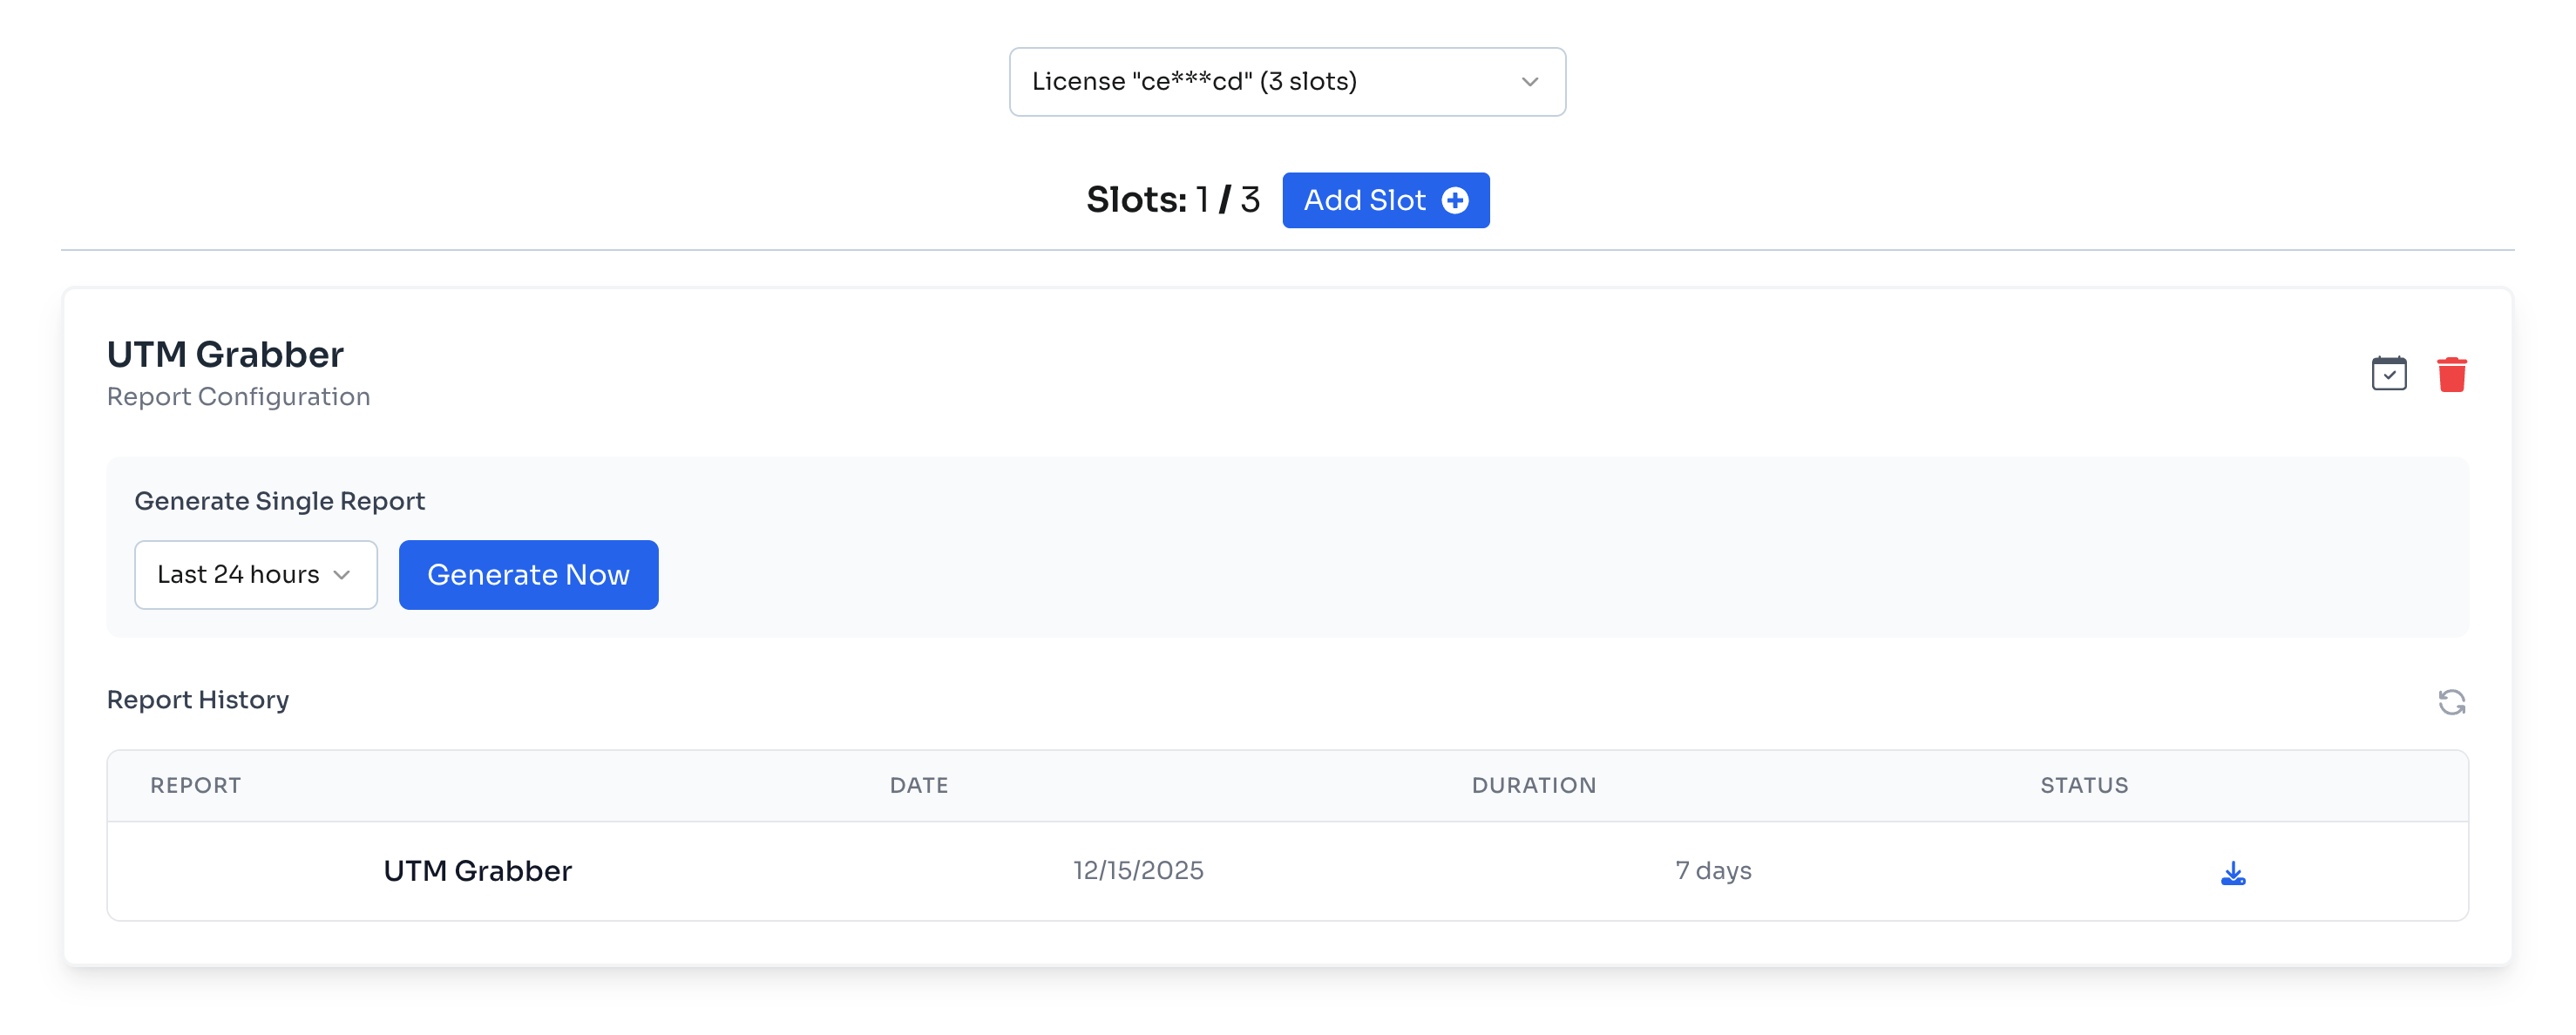
Step 6: Download Your Report
Once your report is ready, you have two ways to download it:
Option 1: Download via Email
You'll receive an email with a download link for your GCLID report. Note that the link expires in 24 hours.

Option 2: Download from GCLID Reporter Page
The report will also be available for download directly from the GCLID Reporter page. Click the download icon in the Status column.
Schedule Automated Reports
You can set up automated reports to be generated and sent to you on a regular schedule.
Click the schedule icon (calendar icon) next to the delete button on your connected account card.

In the Schedule Automated Reports modal, configure the following:
- Frequency: Choose from Weekly, Biweekly, or Monthly
- Day of week: Select which day you want to receive the report
- CC Email (Optional): Add additional email addresses to receive the report
Click Set Schedule to save your automated report configuration.
Managing Your Slots
Add Multiple Accounts
You can connect multiple Google Ads accounts to your available slots. Each account gets its own Report Configuration panel.

To add another account:
- Click Add Slot
- Click Authorize with Google (you can use the same Google account to add a different customer client, or use a different Google account entirely)
- Select the customer client from the dropdown
- Click Add
Delete a Slot
If you need to free up a slot, click the delete icon (trash icon) on the account card you want to remove.
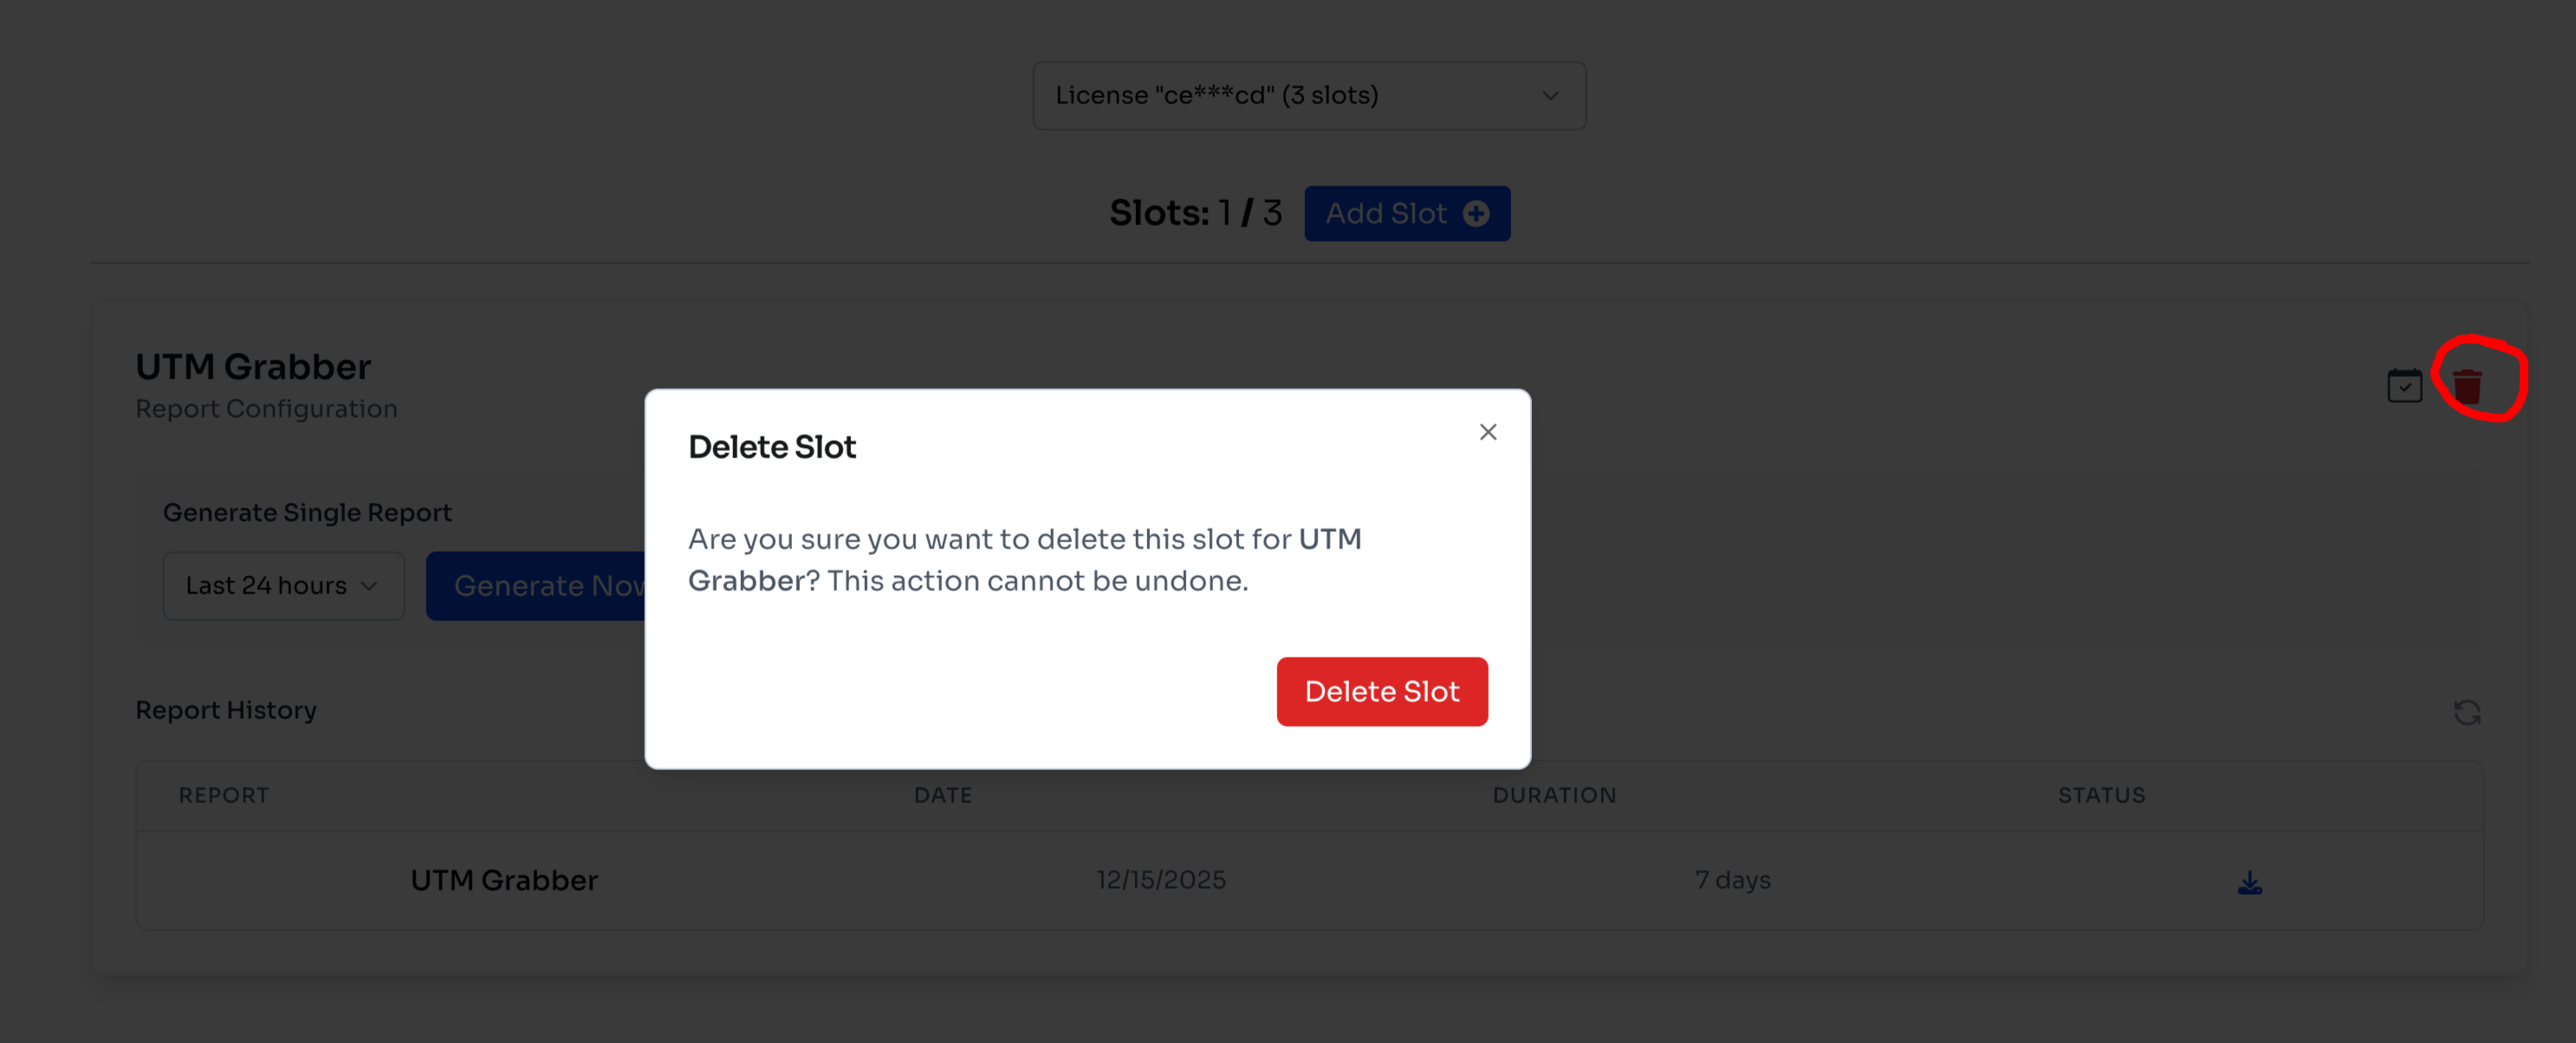
Warning: Deleting a slot will also remove all reports generated with that slot. This action cannot be undone.
Need Help?
Any questions or need assistance? Don't hesitate to click the chat bubble at the bottom of the page or contact us at support@utmgrabber.com.