Contact Form 7 UTM Tracking with HandL UTM Grabber
UTM attribution overview
This guide explains Contact Form 7 UTM Tracking with HandL UTM Grabber. It helps you capture UTM source, medium, campaign, term, content, click IDs, referrer, and landing page data and keep the marketing context needed for accurate reporting across forms, bookings, signups, and sales.
Overview
HandL UTM Grabber provides seamless integration with Contact Form 7 to capture UTM parameters and other tracking data from your form submissions. This integration allows you to automatically capture UTM parameters, GCLID, and other tracking data when users submit your forms.
Features
-
Automatically capture UTM parameters (utm_source, utm_medium, utm_term, utm_content, utm_campaign)
-
Capture Google Ads GCLID
-
Easy one-click insertion of tracking fields
-
Support for email notifications with UTM data
-
Zapier integration for advanced automation
Setup Instructions
1. Adding UTM Fields to Your Form
There are two ways to add UTM tracking fields to your Contact Form 7 form:
Method 1: Using the Tag Generator (Recommended)
-
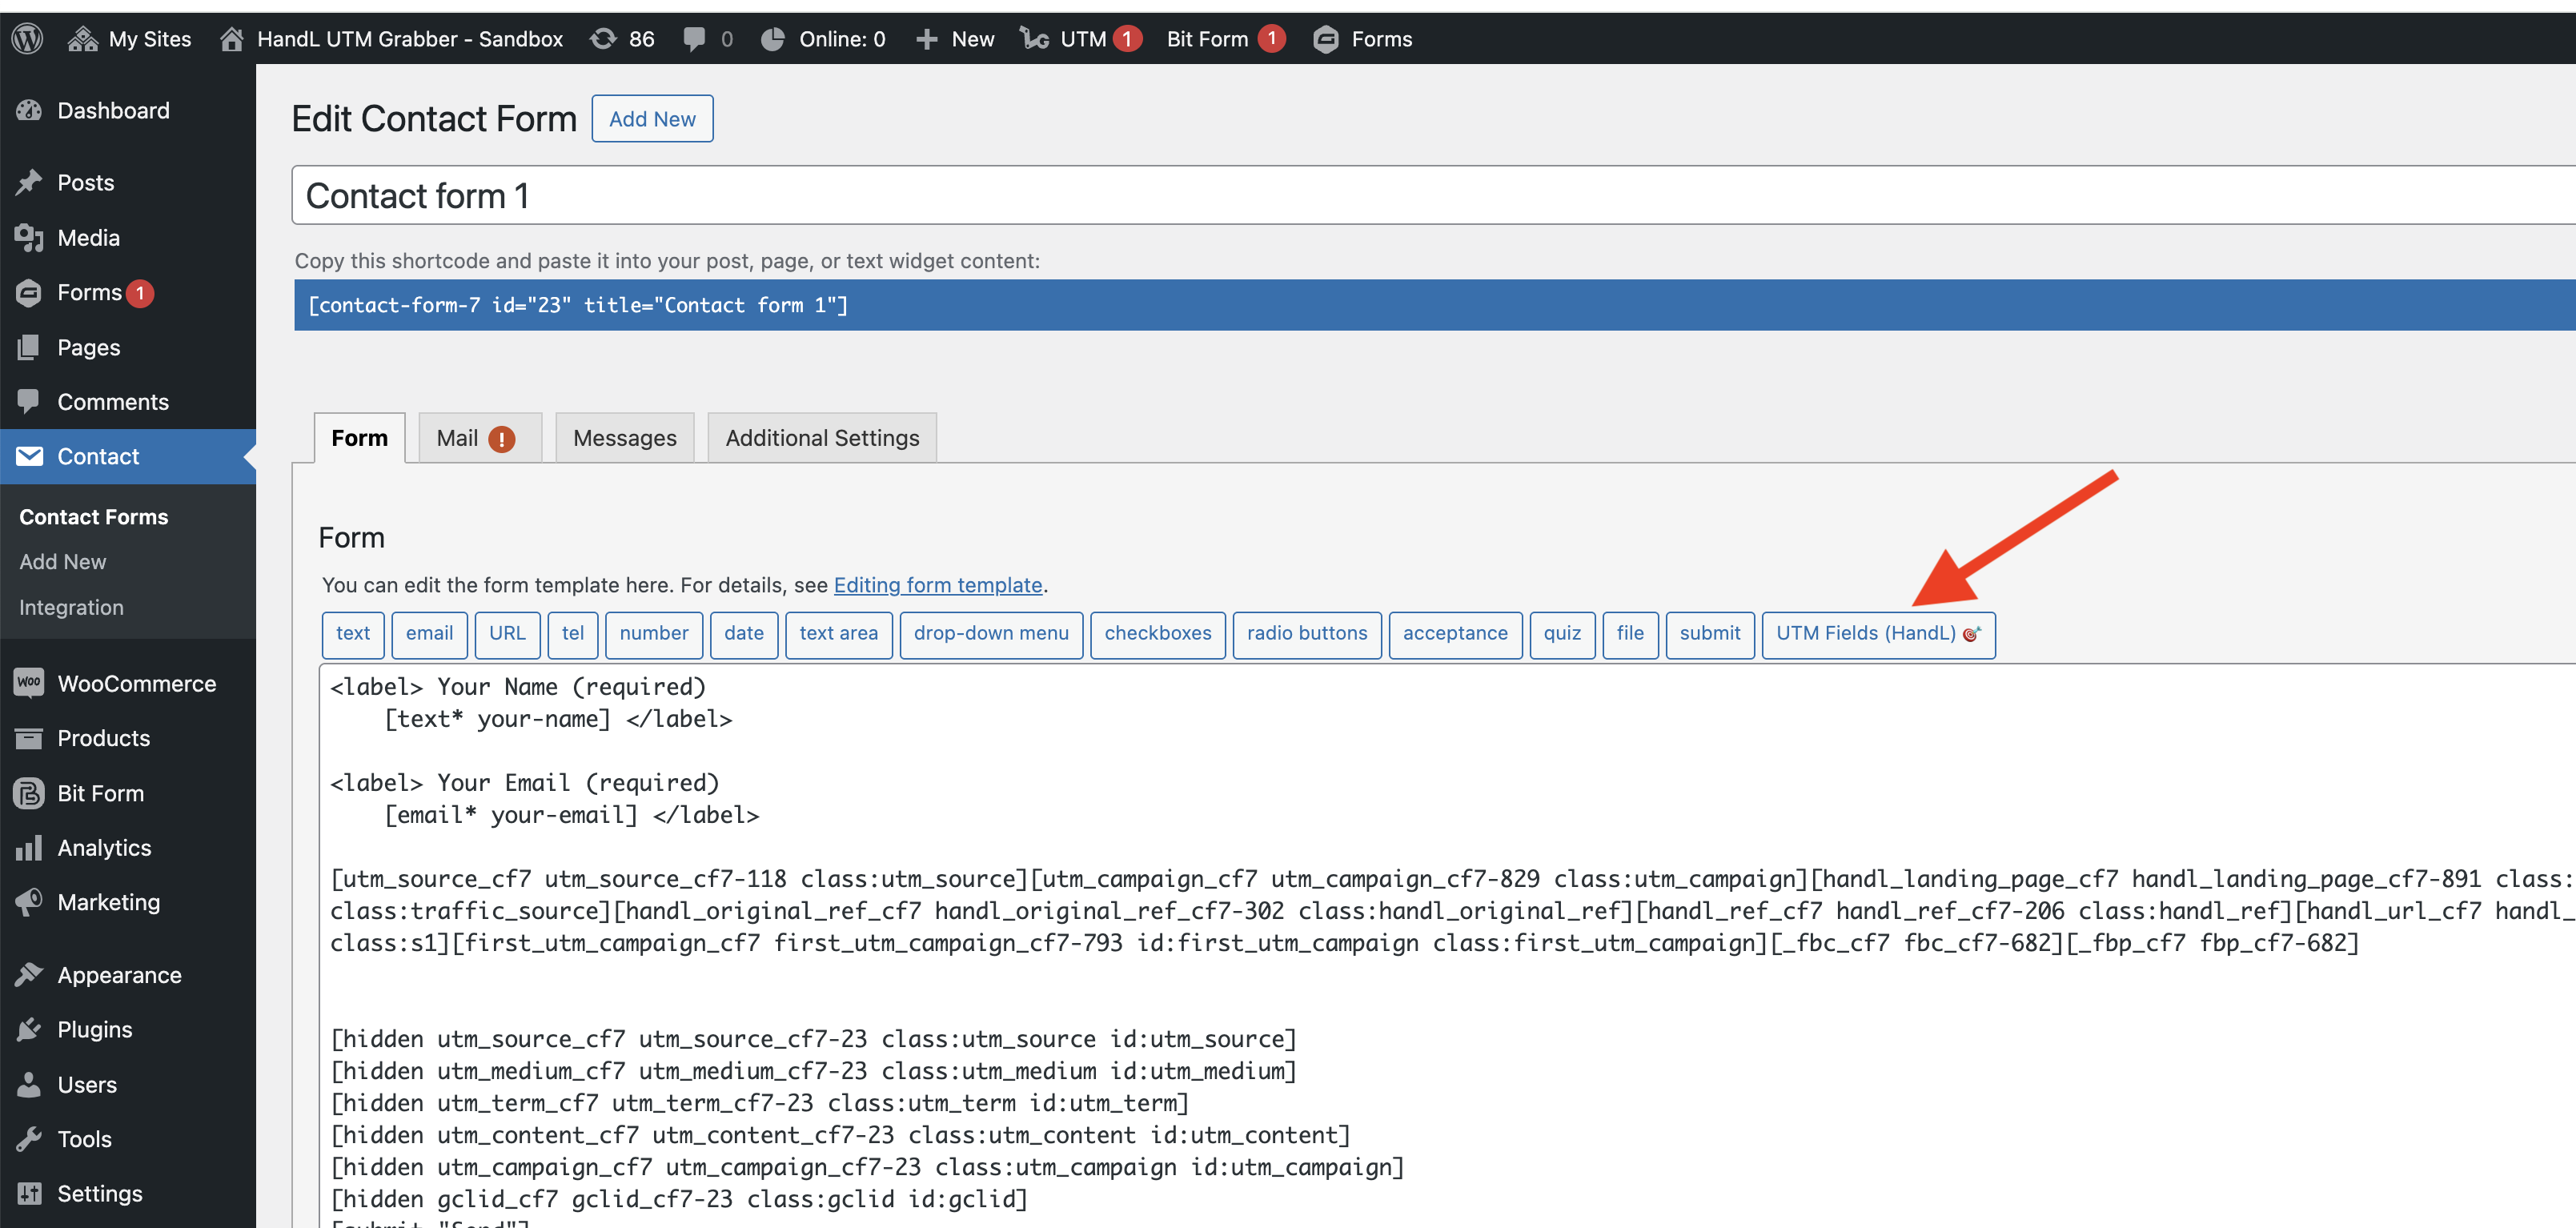
Edit your Contact Form 7 form
-
Click the "UTM Fields (HandL) 🎯" button in the form editor

-
Click "Insert UTM Fields" to automatically add all tracking fields
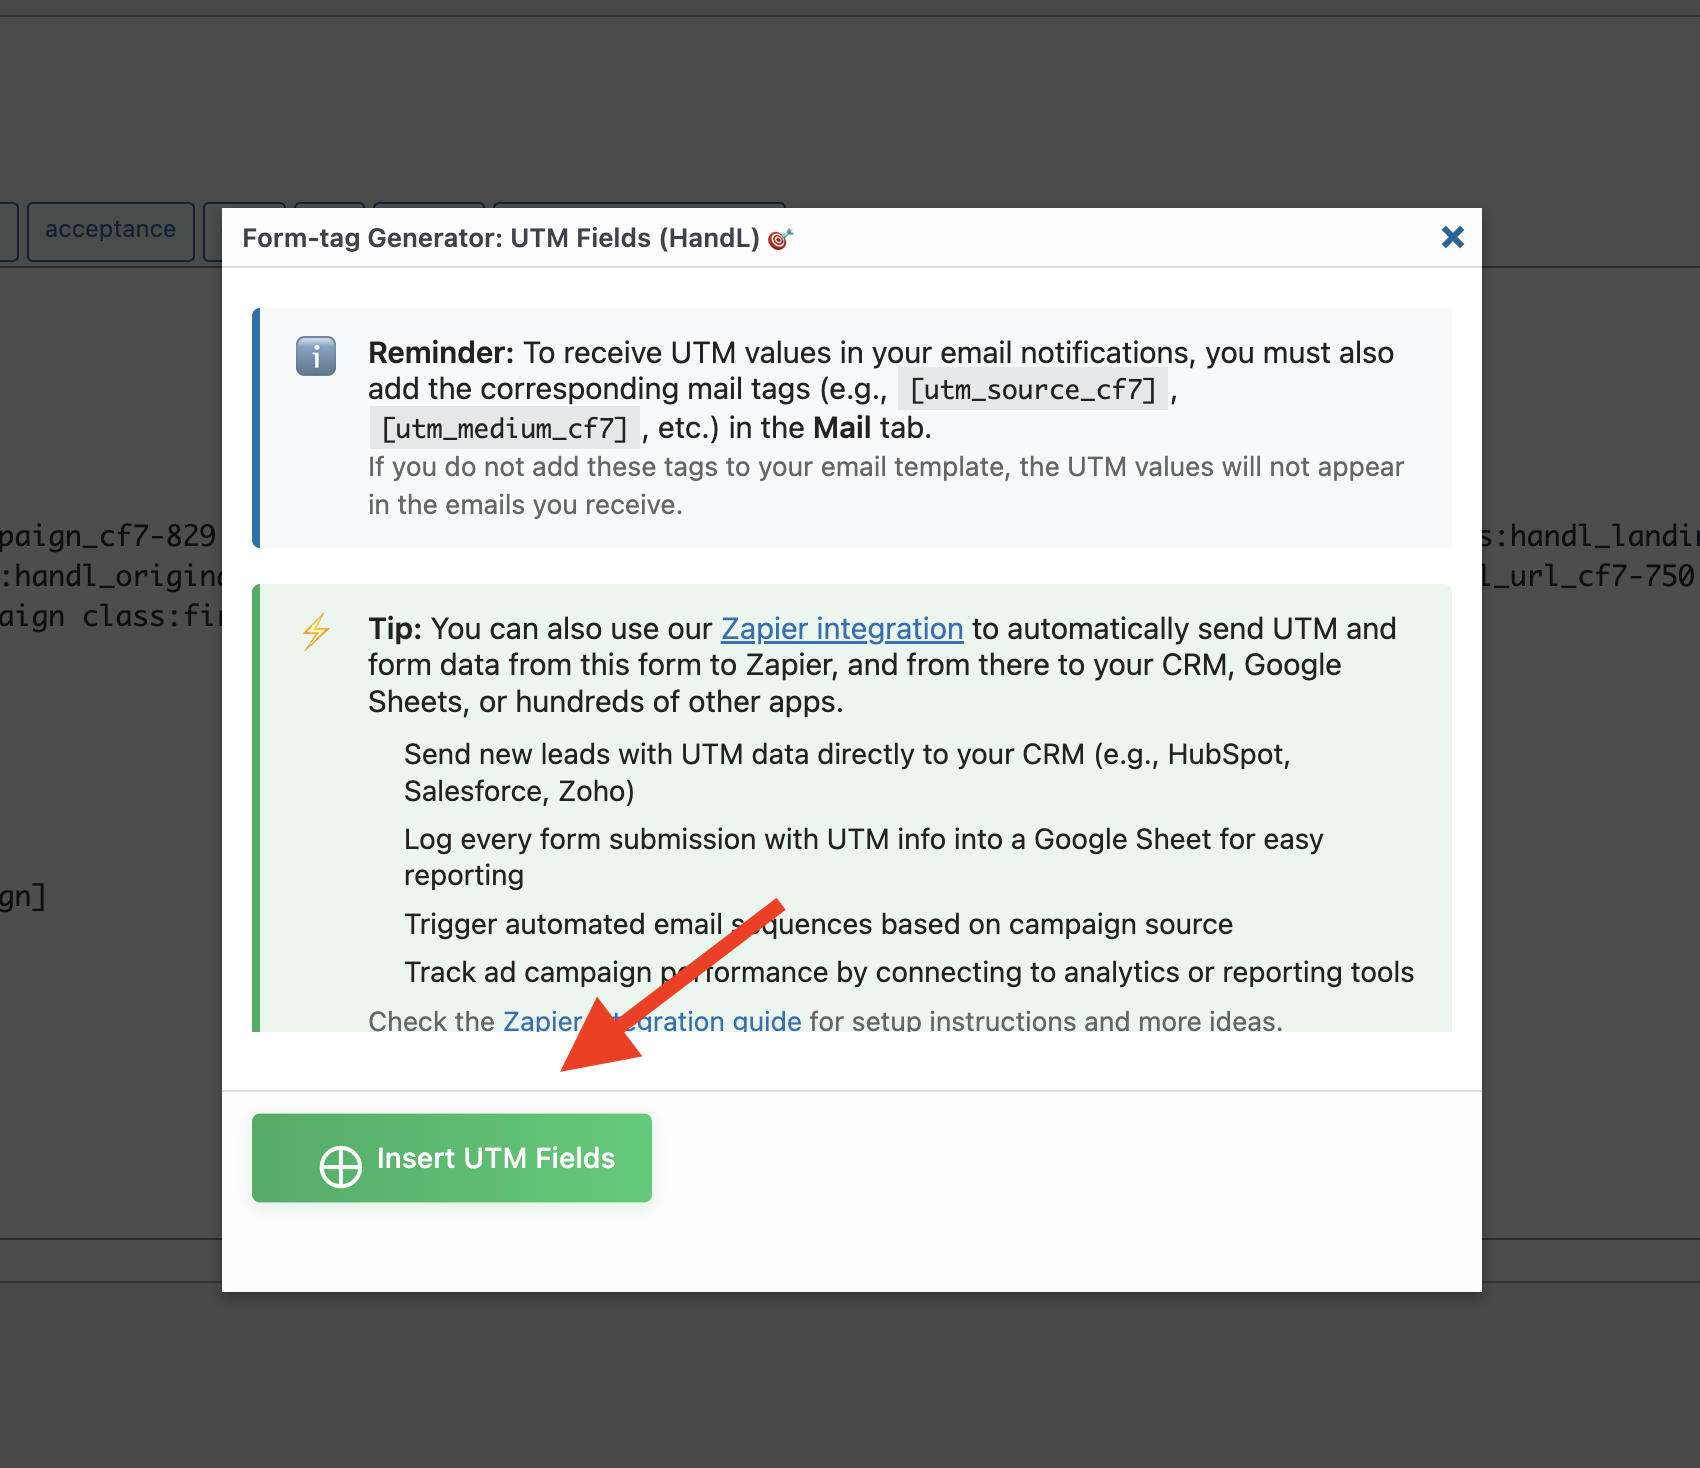
-
The following hidden fields will be added to your form:
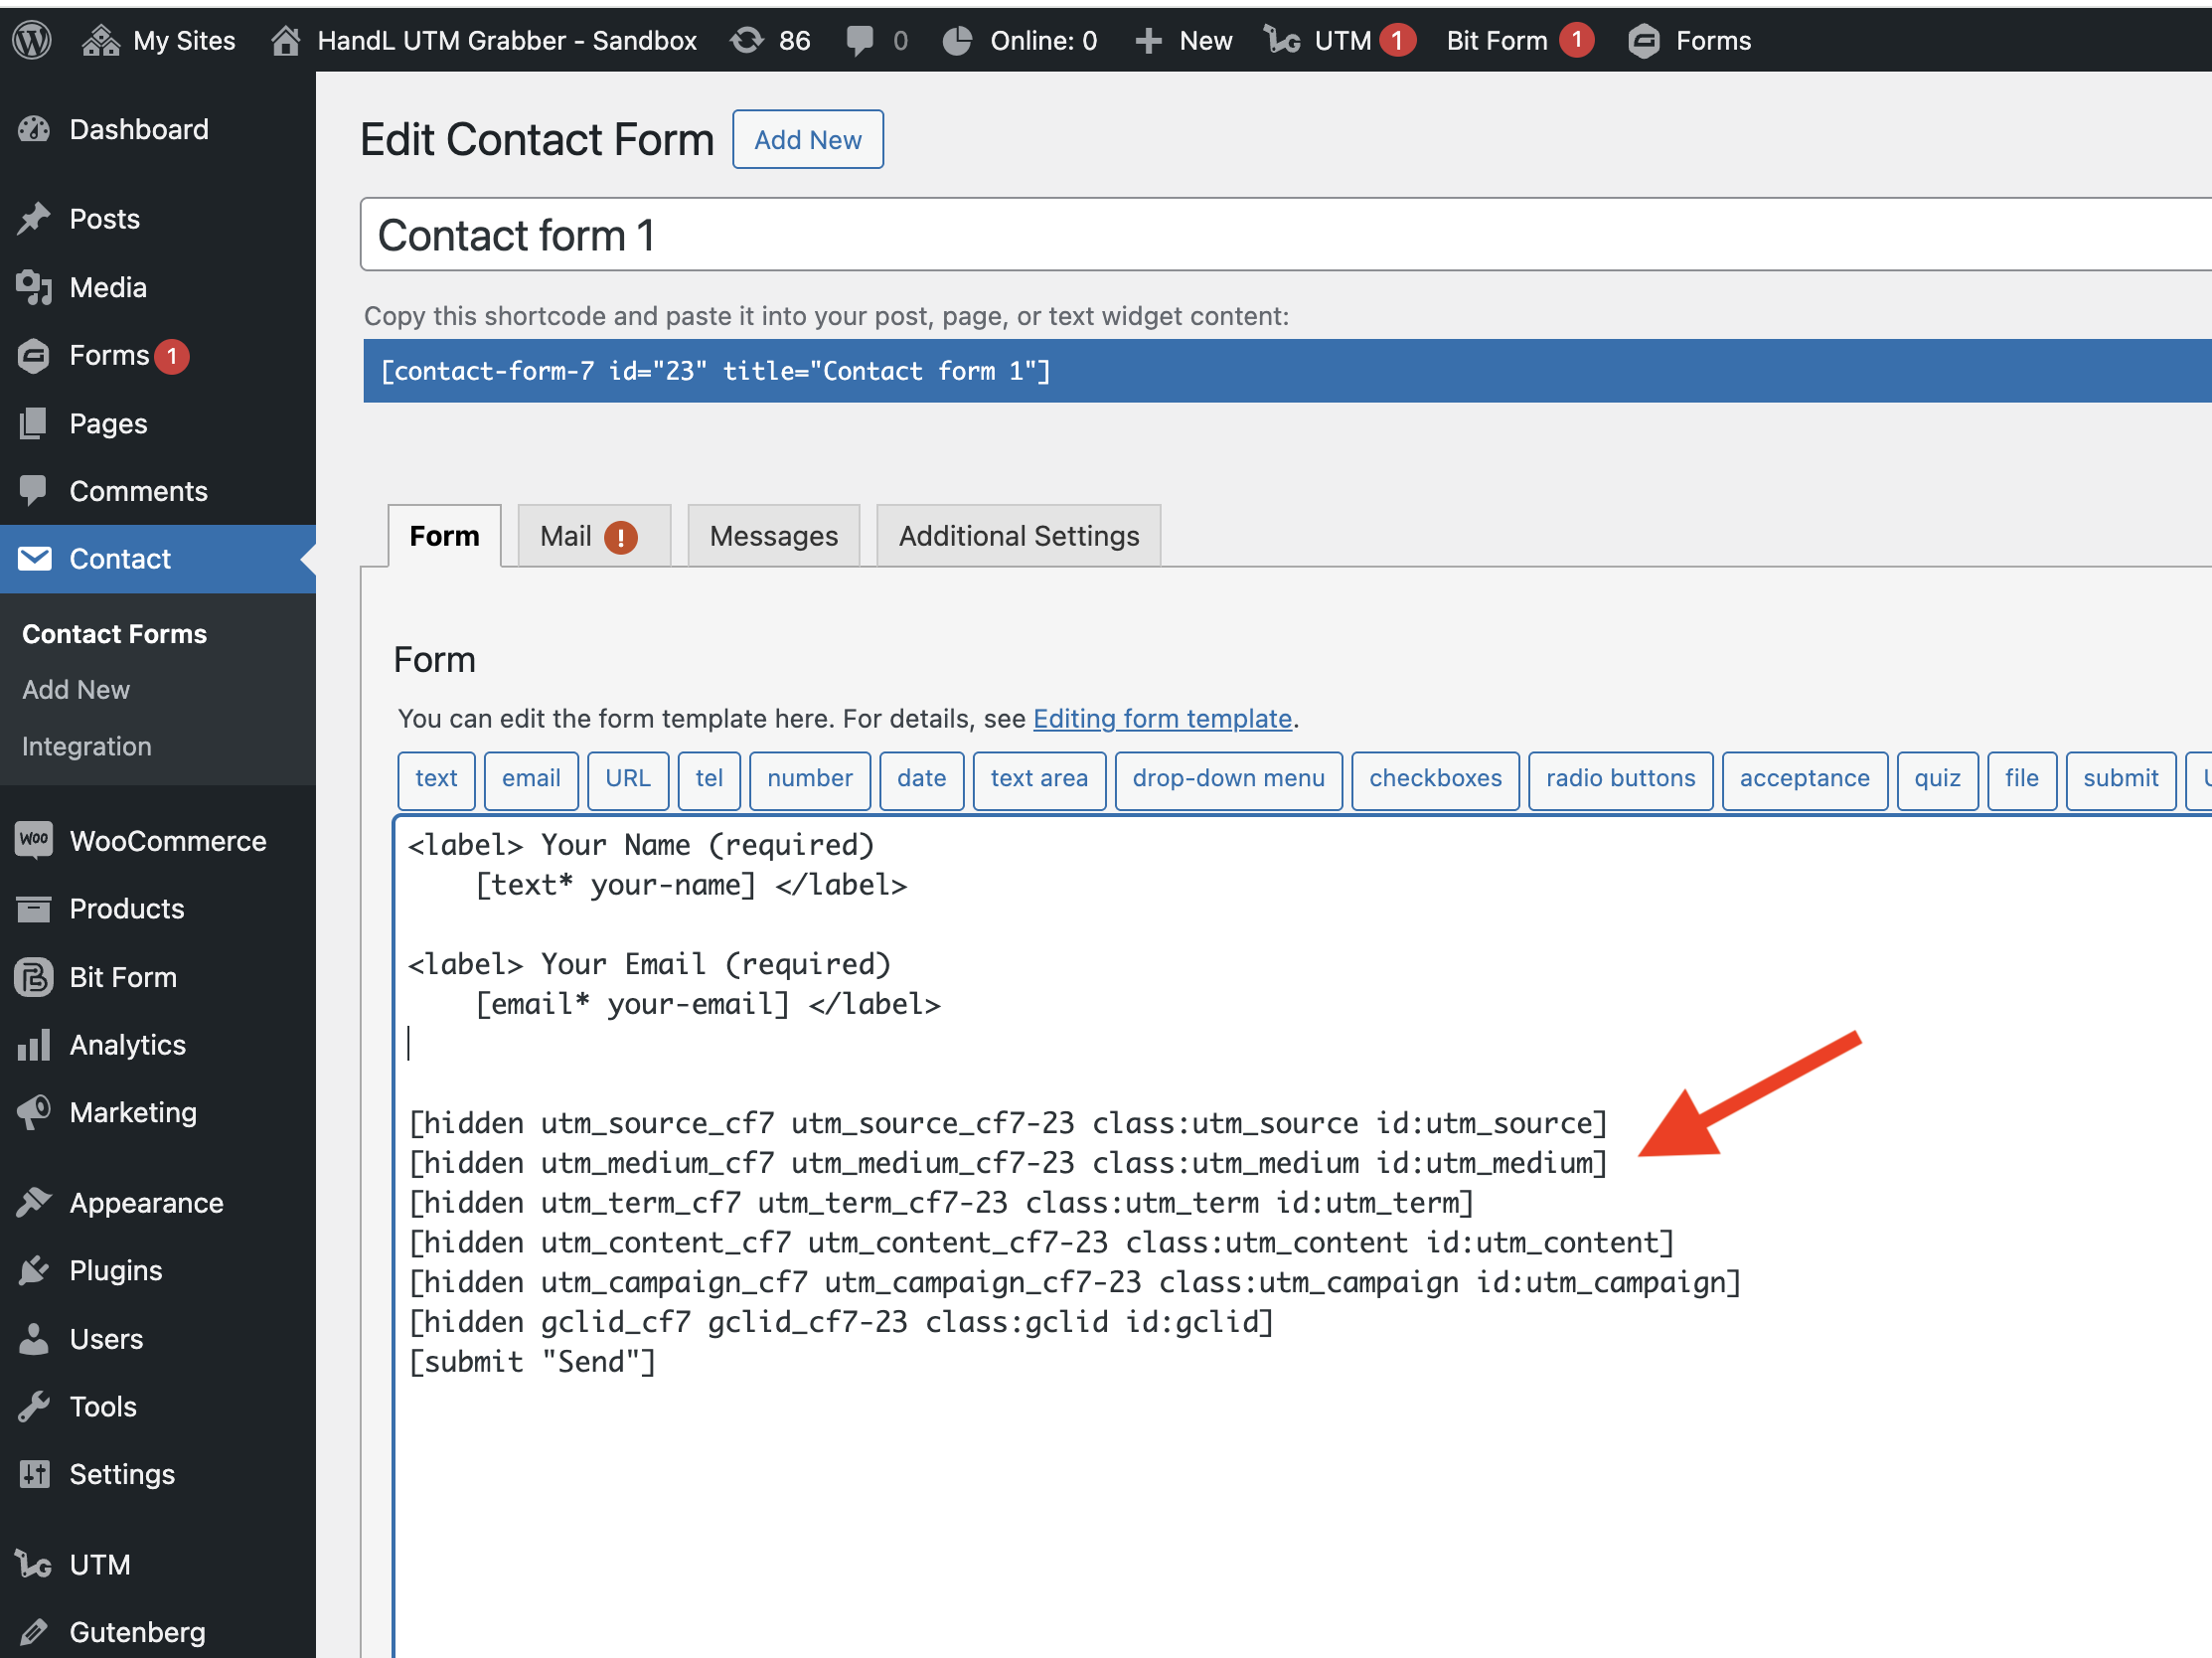


Method 2: Manual Addition
You can manually add the tracking fields to your form by copying and pasting the field tags shown above. Replace {form_id} with your actual form ID.
2. Configuring Email Notifications
To receive UTM data in your email notifications:
-
Go to the "Mail" tab in your Contact Form 7 form settings

-
Add the following mail tags to your email template:
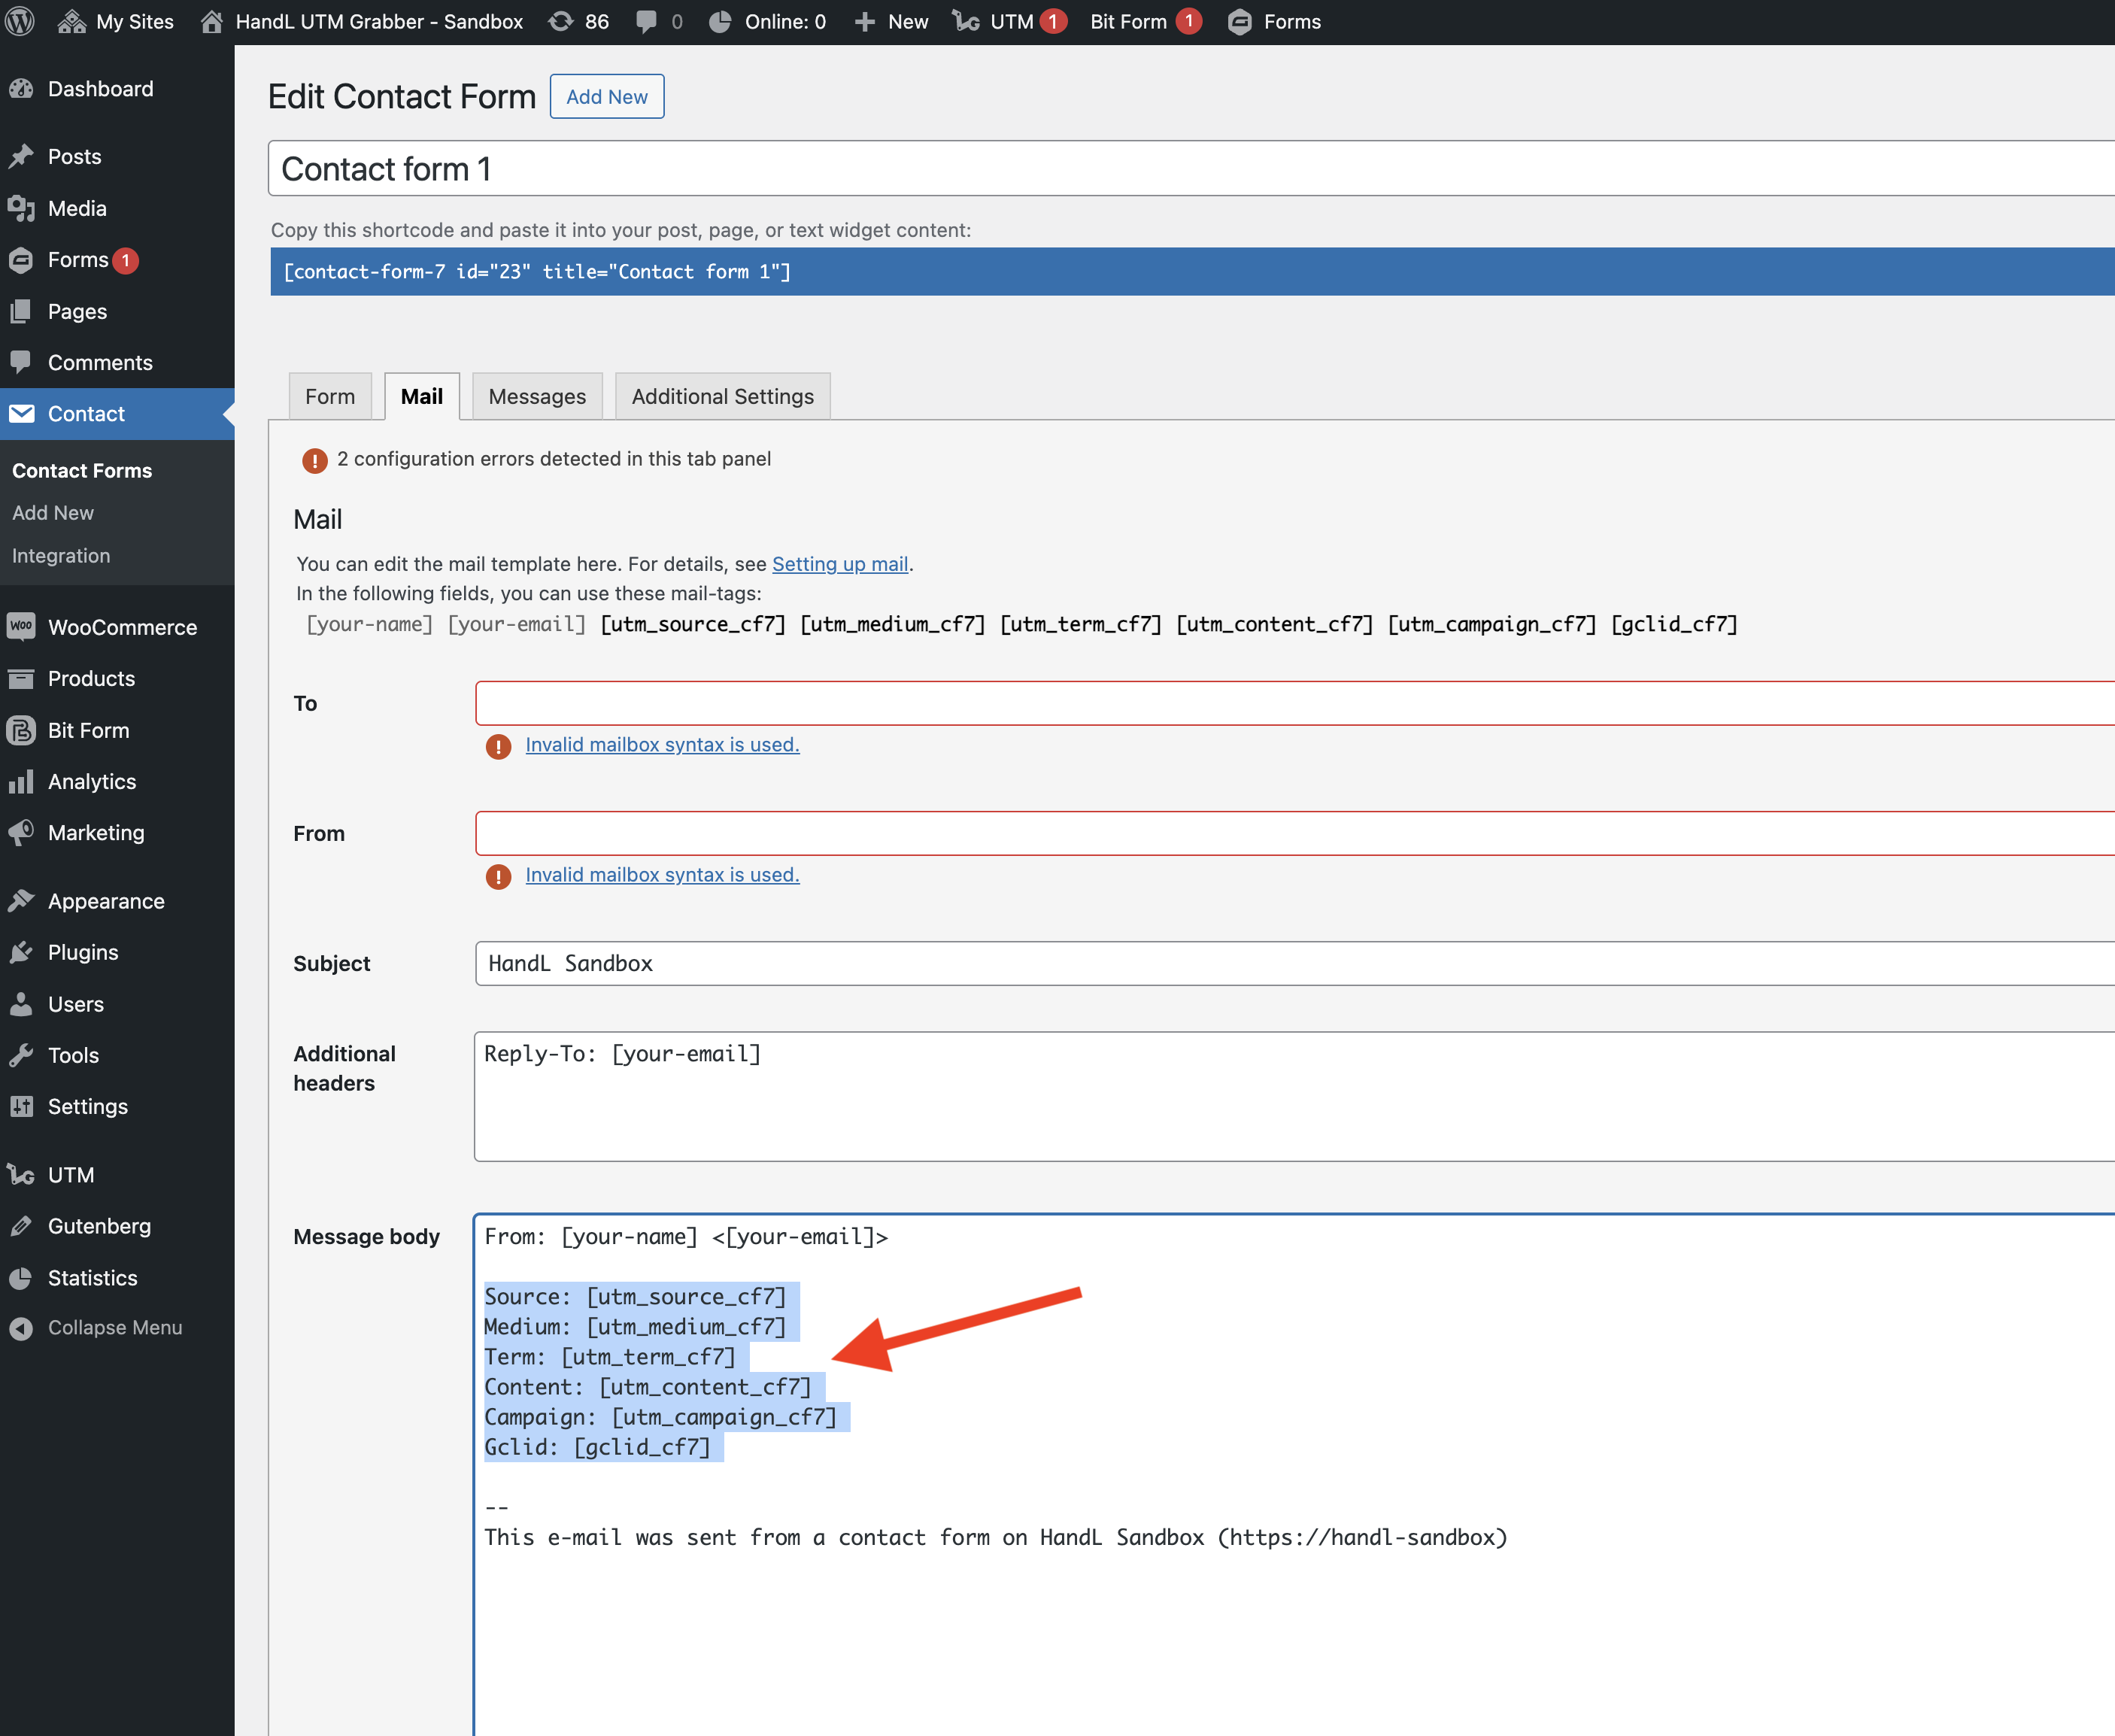
Source: [utm_source_cf7]
Medium: [utm_medium_cf7]
Term: [utm_term_cf7]
Content: [utm_content_cf7]
Campaign: [utm_campaign_cf7]
Gclid: [gclid_cf7]
3. Advanced Integration with Zapier
For advanced automation and CRM integration:
-
Set up a Zapier account if you haven't already
-
Create a new Zap using Contact Form 7 as the trigger
-
Configure the Zap to send form submissions (including UTM data) to:
-
Your CRM (HubSpot, Salesforce, Zoho, etc.)
-
Google Sheets for reporting
-
Email marketing platforms
-
Analytics tools
-
Other apps in the Zapier ecosystem
Best Practices
-
Always include UTM fields in email notifications: Make sure to add the UTM mail tags to your email template to receive tracking data.
-
Test your form: After setting up, test your form by:
-
Submitting the form with UTM parameters in the URL
-
Checking if the UTM data appears in your email notifications
-
Verifying the data in your CRM or other integration platforms
- Use Zapier for advanced tracking: Consider using the Zapier integration for:
-
Automated lead scoring based on UTM parameters
-
Campaign performance tracking
-
Custom reporting in Google Sheets
-
Multi-step automation workflows
Troubleshooting
If UTM data is not being captured:
-
Verify that the UTM fields are properly added to your form
-
Check if the mail tags are correctly added to your email template
-
Ensure that UTM parameters are present in the URL when testing
-
Check your site's caching settings, as some caching plugins might strip UTM parameters
Support
For additional help:
-
Visit our documentation site
-
Check the Zapier integration guide
-
Contact our support team for personalized assistance
Premium Features
Upgrade to HandL UTM Grabber V3 to access additional features:
-
Organic traffic tracking
-
Google Ads ValueTrack parameters
-
Facebook Ads tracking
-
First/Last touch attribution
-
Custom cookie duration
-
GDPR compliance
-
And more!